Description of a bicycle working stand made “do-it-yourself” way. With dimensions – in case it helps anyone make one by themselves.
1. Introduction and bicycle repair stand market
Long time ago I concluded that electric bicycles are the future. Batteries and electric motors make electric bicycles quite heavy, so I was looking for a stand that can hold some 50 kilograms of weight.
Bicycle repair stands that can be found on the market are quite expensive, while not looking too sturdy. But I noticed a DIY “model” that was, looking very similarly, used in several bike shops in my city (Novi Sad, Serbia).
Since I’m not good at welding, I asked around who made those stands (Aca, from Vector bikes), and asked if he could build me one. It ended up costing about 70$.
2. Aca’s bicycle repair stand – with my addition
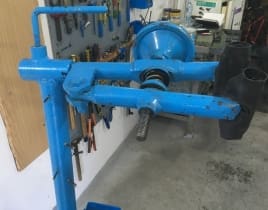
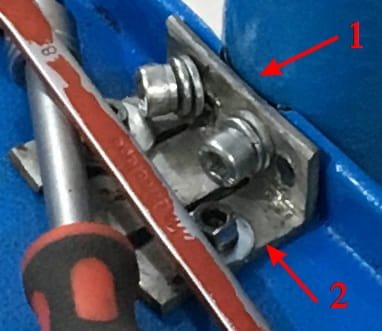
Since the floor in my shop has a slight angle (for draining any water), I asked for the bottom of the stand to be reinforced with one more pipe, at the rear part, to prevent it from tipping over. This is what it looked like when it was done (I did add some more things, but later on that):
Picture 1
3. My later additions to the repair stand
I wanted to add some hooks for keeping the tools at hand. Did it the following way:
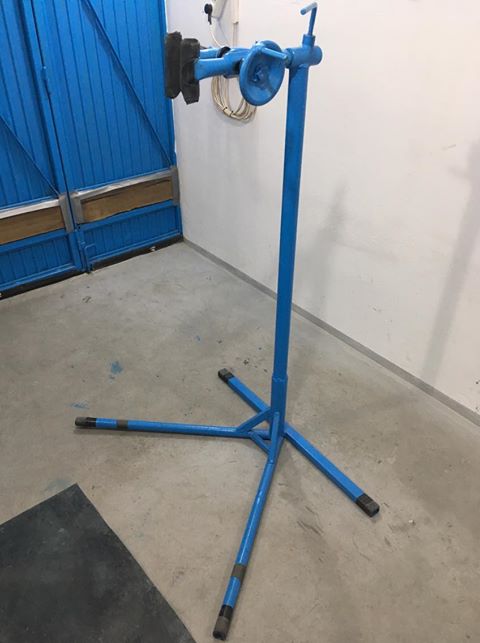
First I drilled holes in the stand, at places that I thought would be convenient for hanging tools. Drilled holes for tapping threads of 4, 5 and 6 mm wide screws. Useful list of screw thread diameters and pitches. So I drilled holes with 3.3 mm diameter (for 4 mm bolts – M4), 4.2 mm (for 5 mm bolts – M5), and 5 mm (for 6 mm bolts).
Picture 2
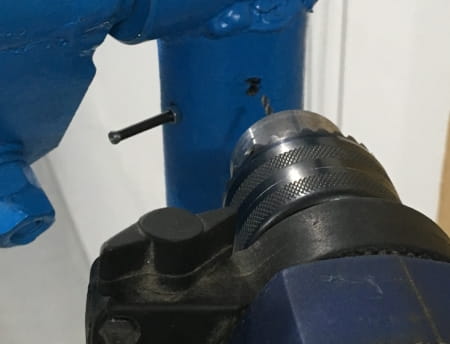
Stand’s vertical tube is steel, thick walled and of a relatively large diameter, so this hasn’t weakened it in any significant way. Next came cutting the threads in the drilled holes.

Picture 3
Park Tool tap handle for M4 to M12 sizes and a set of M4 taps (Amazon affiliate links).
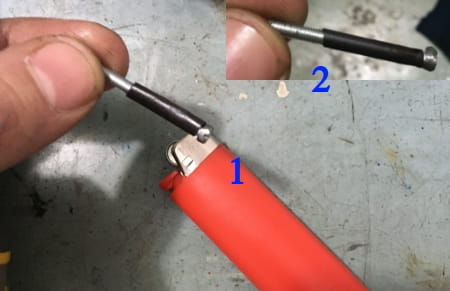
In order to hang even smaller tools more easily, I machined the heads of screws to a diameter only slightly larger than the diameter of the screw’s body (just as wide as was needed for screwdriver to engage, for tightening).
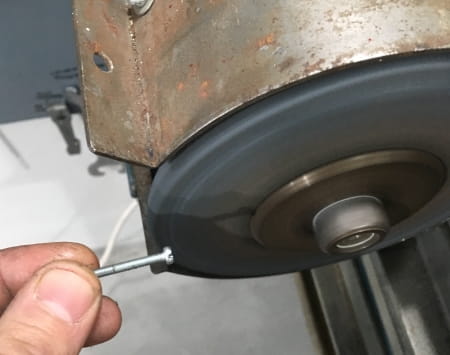
Picture 4
I covered most of the screw body with shrink tubing, and heated it with a lighter, to become snug – in order to prevent any tool scratching, or slipping.
Picture 5
I mounted a nut that would be used as a locknut, and added some thread locking glue just in case, so that the screws stay in place after mounting them.
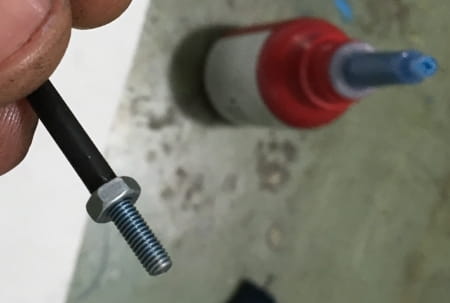
Picture 6
Amazon affiliate link for buying Loctite 242 thread locker glue.
I screwed the screws in, until locknuts reached the repair stand, then, holding the screws from turning with a screwdriver, I tightened all the locknuts. 24 hours later, after the thread locker dried, tool hooks were ready for use. 🙂
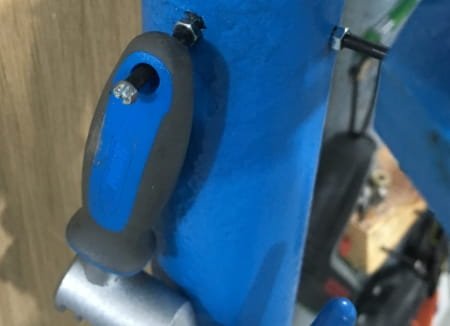
Picture 7
Of course, I also wanted a tray for small parts, for which I used a strong, steel cover of an old small Unior tool box. Adding an L shaped steel reinforcement, before screwing it all into the bicycle repair stand.
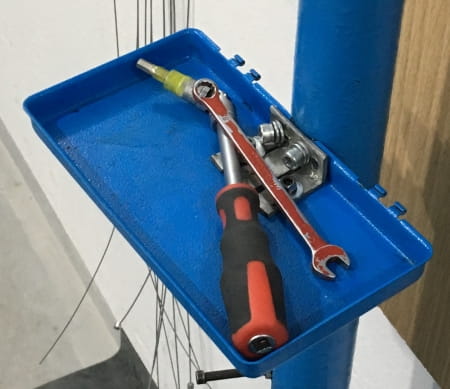
Picture 8
Close-up photo of how it was made:
Picture 9
I showed the finished stand and its functionality on BikeGremlin Cycles YouTube channel:

It’s good, I’m using it. 🙂
4. Dimensions for DIY making the bicycle repair stand
I had sent the dimensions already to some people, but figured it’s best to publish it in a post, so anyone interested in this can make one for themselves. Use the comment section below for any questions (how to post a question).
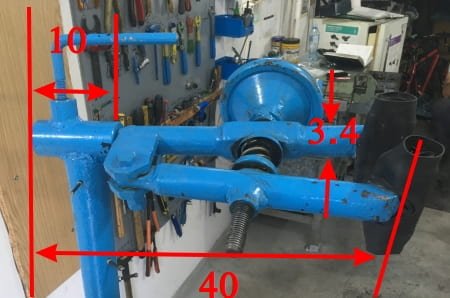
All the dimensions are noted in centimetres (cm) – unless stated otherwise. Divide by 2.54 to get the size in inches.
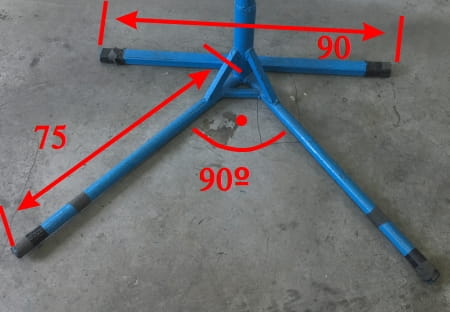
Picture 10
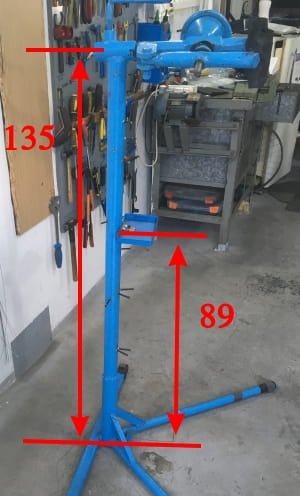
Picture 11
5. My impression – review
I’ve been using this bicycle repair stand for years. It is made to my liking and has served me very well. Strong, sturdy, practical for use.
Downsides?
- It’s heavy, so not very convenient to carry, even though the clamping mechanism can be detached (though it is quite stable even on uneven ground).
- Doesn’t have height adjustment. I very rarely need this option, and implementing it would make tool hangers and the small parts tray more difficult to implement.
Last updated:
Originally published:
Great video, now evertything I read on this site is with your accent.
OK, but I can’t offer any compensation for the grievance caused by that. 🙂