Here I’ve explained the basic things about setting up a comfortable riding position.
For a more detailed explanation (and for the more experienced riders), take a look at this post: Setting up riding position.
If you have any questions (or additions and corrections), please use the BikeGremlin forum:
www.bikegremlin.net
Table Of Contents (T.O.C.):
TL/DR
You can set the riding position of your bike to suit your needs and “size.” The trick is to start with the saddle (adjusting its tilt and height), and only then go on to set your handlebars. This article explains how exactly to do that.
Note that If your frame is by far too large, or too small, there is a point past which a you can’t make it fit, and the bicycle (or the frame at least) should be replaced for a better fitting one (how to chose a correct frame size).
0. Contact points
Comfort on a bicycle primarily depends on placement and distance of contact points of rider and bicycle: saddle, pedals and handlebars.
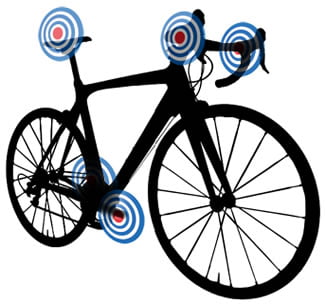
Picture 1
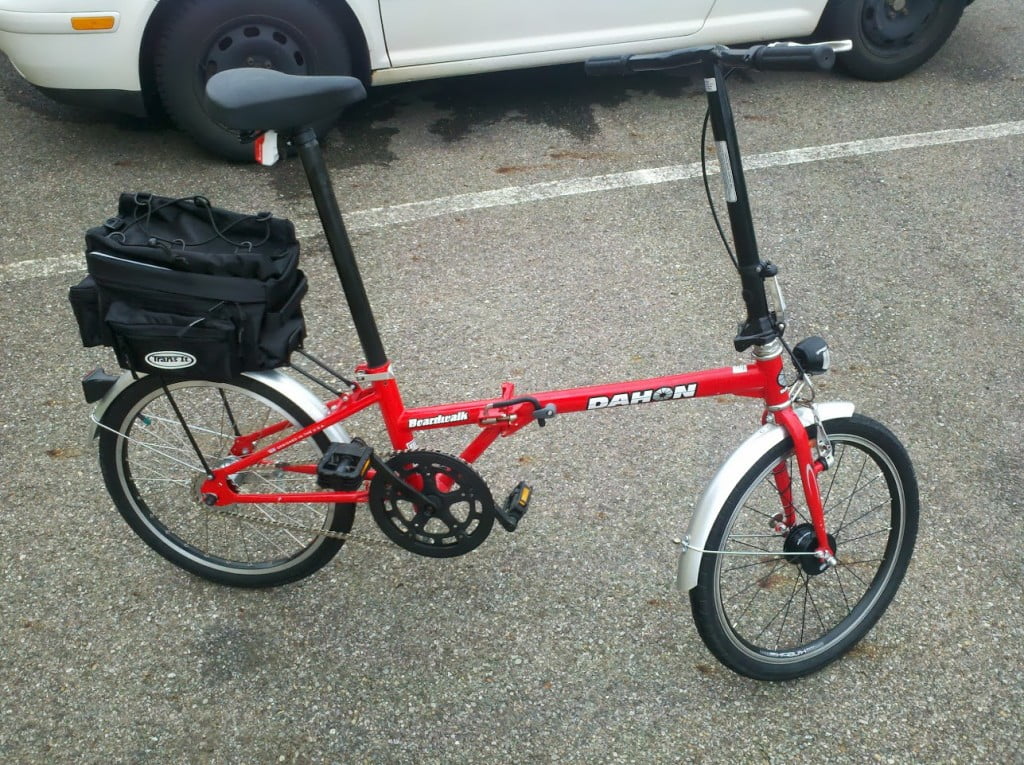
Picture 2
The following chapters explain how to set the contact points to suit the rider.
1. Saddle angle (tilt)
Saddle should be level when the bike is on level ground.
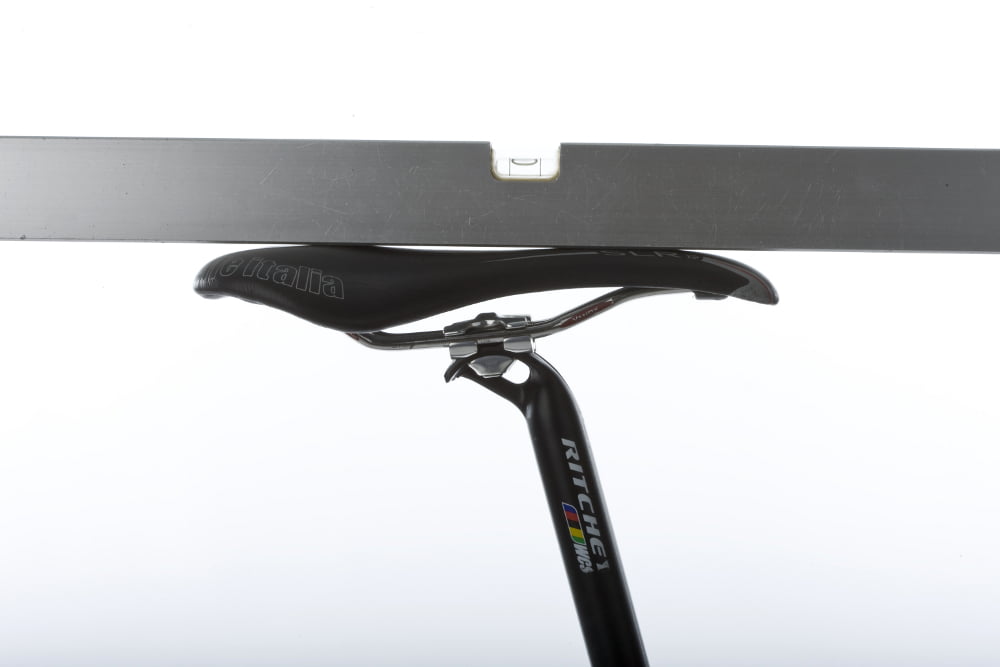
Picture 3
2. Saddle height
Saddle too low will put more stress to the knees. Saddle too high results in lower back and buttocks/groin pain.
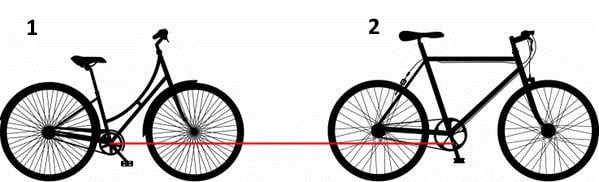
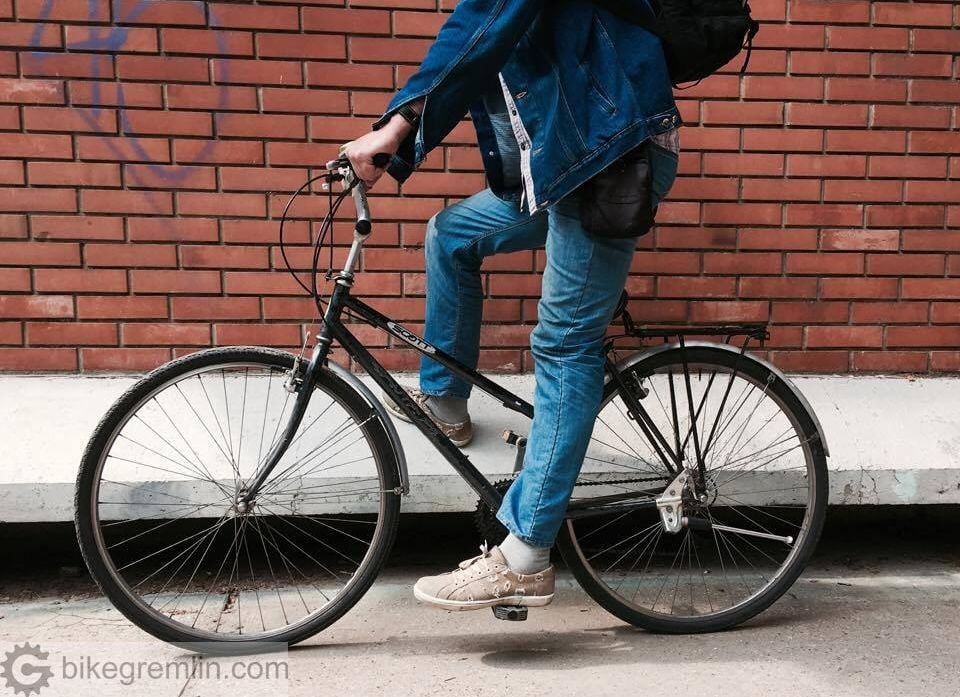
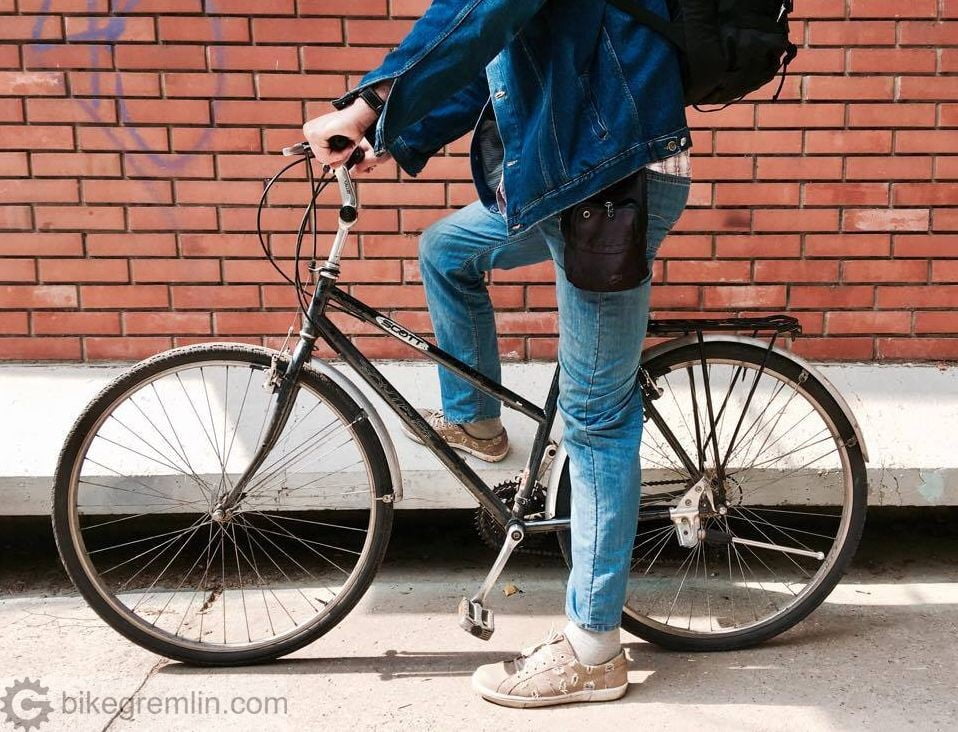
Bicycle 1 – vintage design
Bicycle 2 – most modern bicycles
Picture 4
Vintage bikes had pedals placed lower than the bike 1 in the picture 4, so one could reach the ground while seated, without placing the saddle too close to the pedals for comfortable riding. Modern bikes have pedals placed higher up (bike 2 in the picture 4) – when saddle height is adjusted so one can reach the ground from the saddle on such a bike, during riding knees will be awkwardly bent, like riding a too small kids bike.
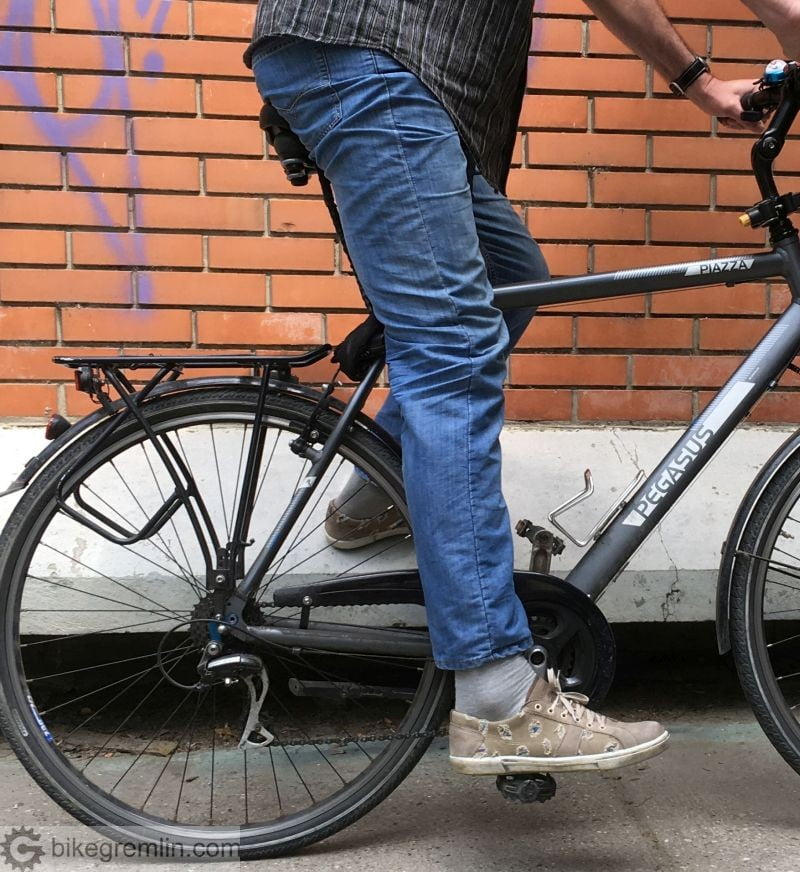
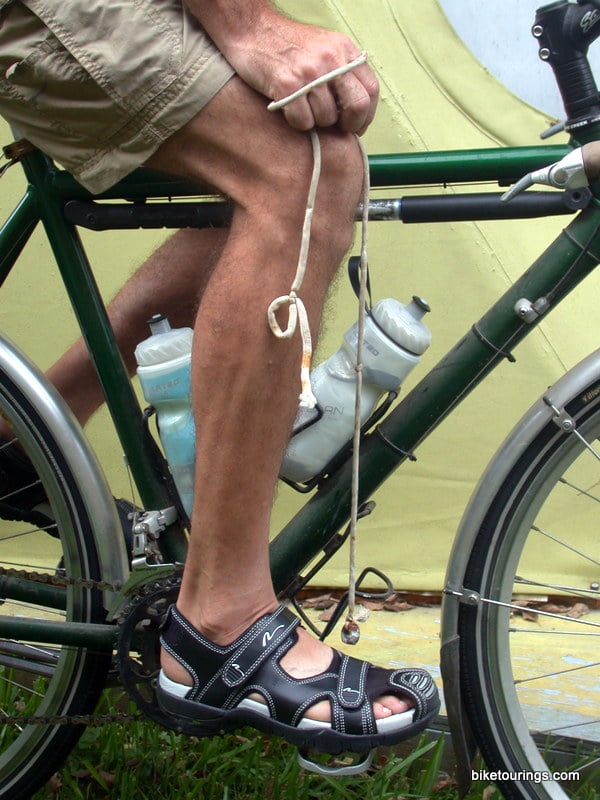
Heel is placed on the pedal, with a straight knee, so that the rider is neither pushed off the saddle, nor the pedal is too low so it can’t be reached with a heel and a fully straight leg.
Picture 5
Placing the saddle on the bike in picture 5 so that ground can easily be reached makes for a bit less comfortable riding position.
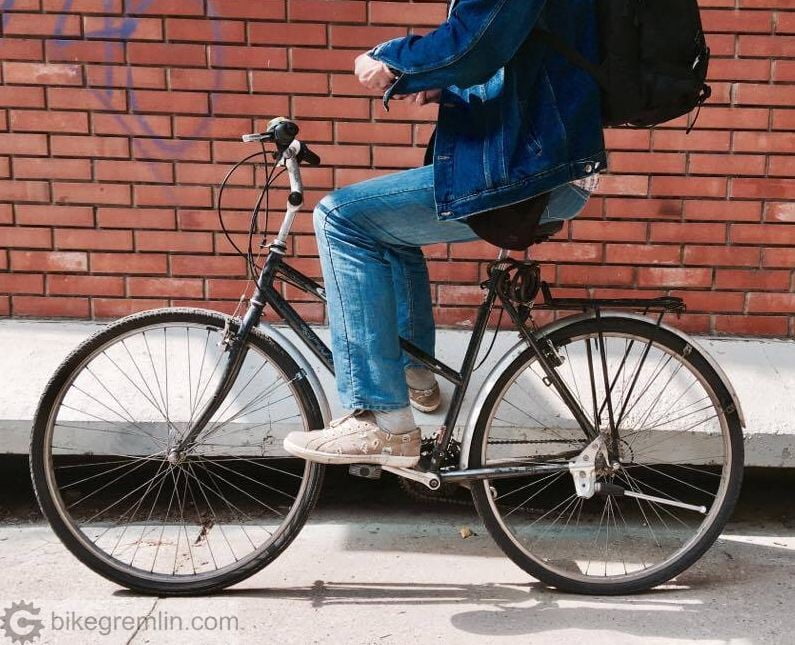
The heel doesn’t quite reach the pedal when the pedal is in a position furthest away from the saddle.
Picture 7
Placing the saddle lower, or higher than optimal position will make pedalling harder and less comfortable. Some will find this less, or more problematic.
3. Fore-aft saddle position
A common mistake is trying to adjust distance from the bars by altering saddle position – usually by moving it forward. Saddle should be positioned relative to the pedals, regardless of the bars position. Why?
Try leaning forward while standing with your back against the wall. Can you easily keep the balance, or are you tipping forward? Try the same standing a few cm from the wall. Do the buttocks move towards the wall when leaning forward? It is similar on a bicycle. Unless the backside is moved a bit to the rear, all the weight will be on the hands, causing pain in the palms, hands, and shoulders.
Moving the saddle too far back, on the other hand, causes too much bend at the lower back and poor leverage on the pedals.
Correctly placed saddle fore-aft position:
Picture 8

Picture 9
4. Handlebars
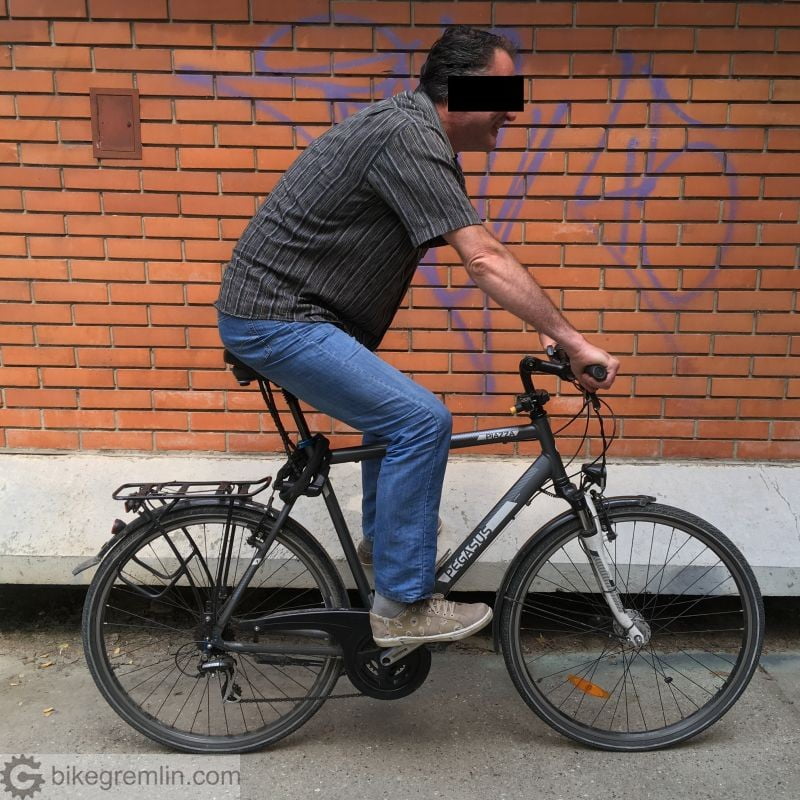
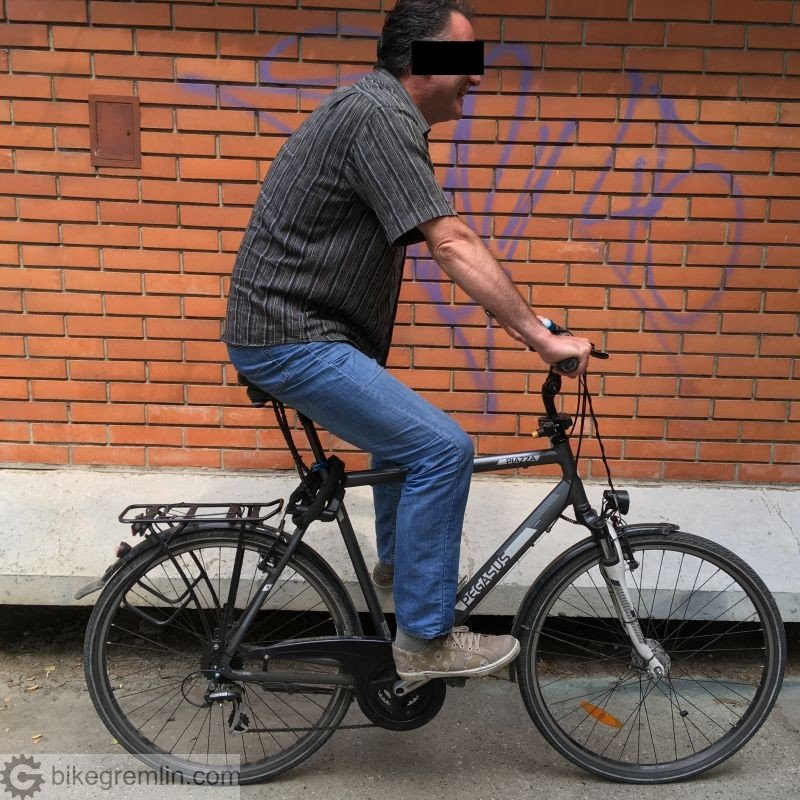
Only after the saddle is positioned correctly, the bar should be set in the desired position. Placing the bars closer and higher results in a more upright riding position and vice-versa – placing the bars further and/or lower, results in a more leaned position.
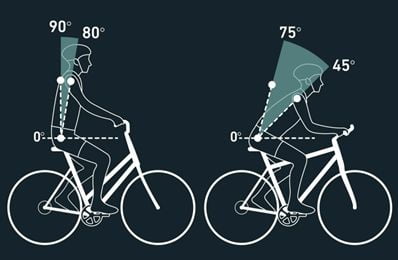
Picture 10
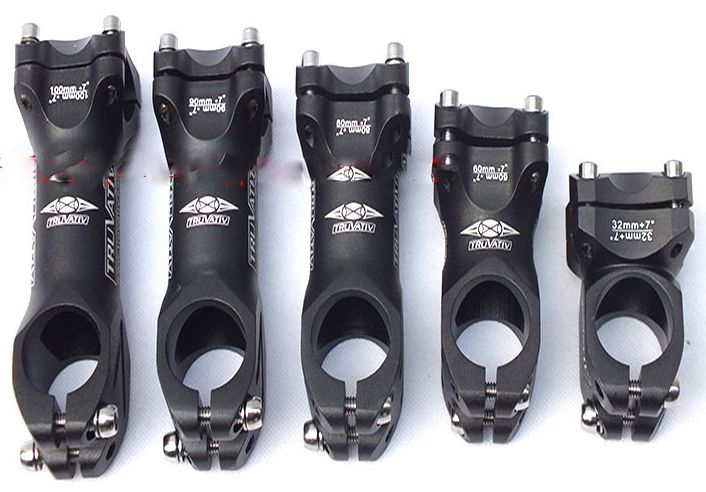
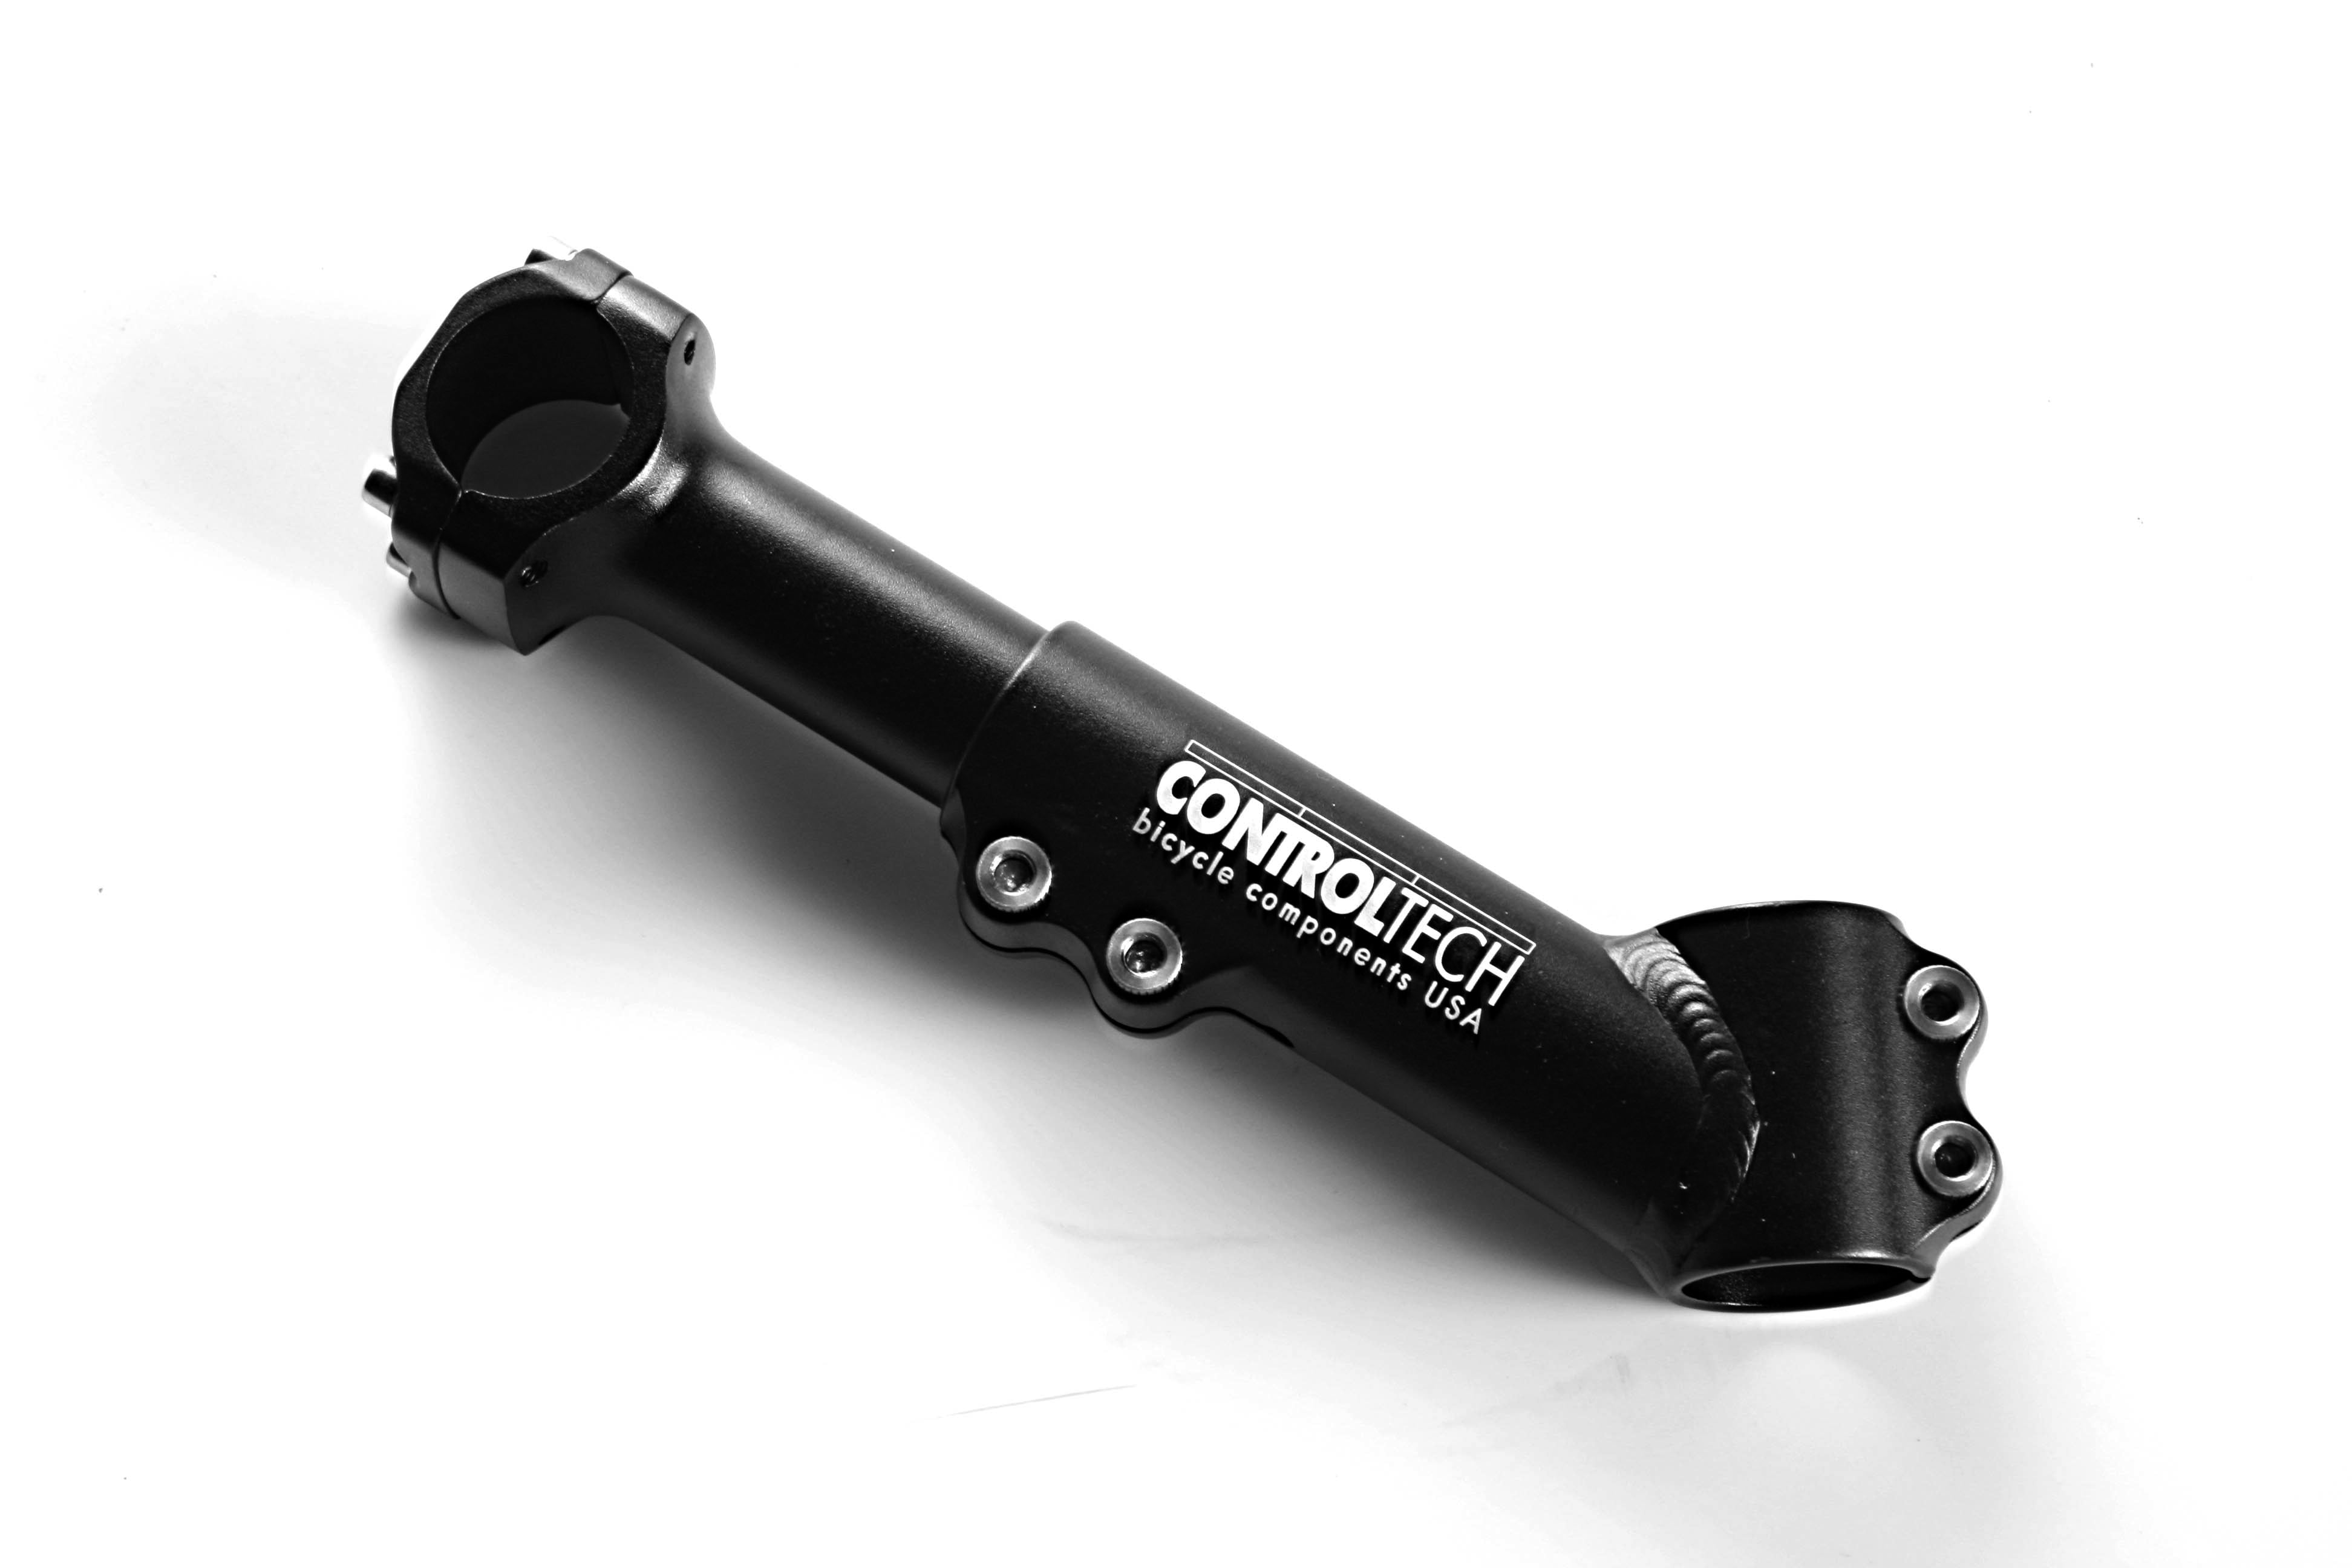
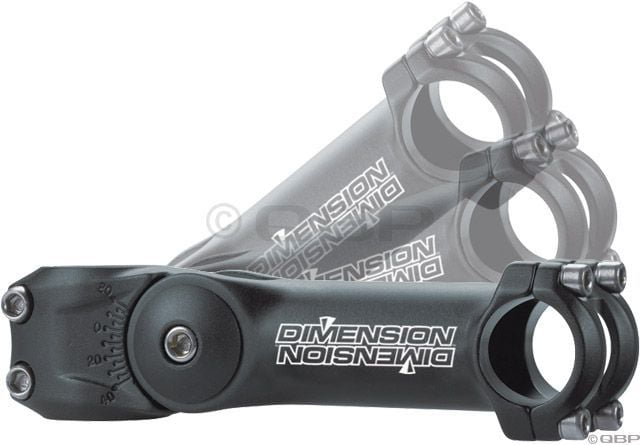
For altering bar height and distance there are stems of various angles and lengths, as well as stem height adjusters (i.e. riser stems). If a stem is longer, it will result in a more bent over and stretched over the bars position. If a stem is placed lower, it will have a similar effect. Shorter and higher placed stems create an opposite effect. That is shown in the picture 10.
Stems that are angled, depending whether the angle is upward, or downward, place the bars higher and closer, or lower and further from the rider, roughly speaking.
Effect in picture 13b could have been achieved with a shorter stem and a riser stem from picture 14.
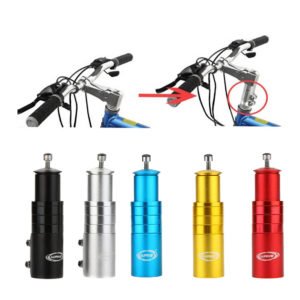
Picture 14
A decent quality adjustable stem is Ritchey 4-axis (Amazon affiliate link):
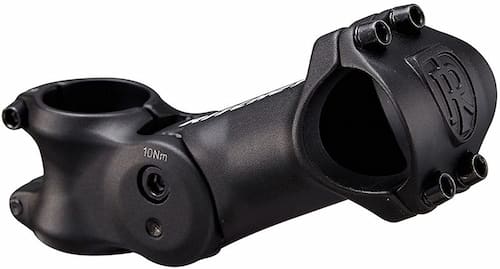
Picture 15
For a decent quality stem-riser (in case you need even more bar height), a good option is Origin8 Extra-Lift (Amazon affiliate link):
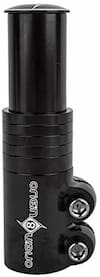
Picture 16
These are the basics. For more detailed instructions on how to set the bars themselves, along with all the levers on the bars, read the appropriate posts:
- Mechanics of bar angle and height setup
- MTB bars (flat bars) setup
- Setting up road bike bars (drop bars)
My video explanation of frame geometry and bicycle fitting (sitting position configuration) basics:
![Bicycle frame geometry and bicycle fit basics explained [1018]](https://bike.bikegremlin.com/wp-content/plugins/wp-youtube-lyte/lyteCache.php?origThumbUrl=https%3A%2F%2Fi.ytimg.com%2Fvi%2FajoLYCn7IcM%2F0.jpg)
If you have any questions (or additions and corrections), please use the BikeGremlin forum:
www.bikegremlin.net
Help BikeGremlin
stay online & independent
This website is educational, free, objective, and not commercial
(sponsors don’t enjoy paying if you mention all the product downsides that you notice 🙂 ).
How much does a WordPress website cost?
If you find this site to be good and helpful,
and if $5 per month is what you can afford to set aside,
please consider supporting my work with a Patreon donation:
Many thanks for such a clear explanation.
I am an inexperienced cyclist who recently acquired a Brompton 6 speed bicycle with ” M ” style bars.
The riding position on my M type Brompton is quite upright. I have Schwalbe Marathon Plus tyres fitted and the ride is very firm.
Are there any adjustments that might be needed to compensate or improve the ride for the geometry of the Brompton ?
Thanks again for such an informative site.
S, or P type bars should provide a bit more leaned forward position (S), or even more grip and body position options (P).
Also, tyres that are both wide and with “soft” sidewalls (no puncture protection) usually offer softer and more comfortable ride. Something like Continental contact in 47-406 dimension (47 mm wide).
Schwalbe Kojak, or Marathon Racer should also be very good, if they are available in the 406 diameter (I suppose that’s what fits Your Brompton) and in at least 1.5″ (40 mm) width.
Has anyone developed a real-time adjustable stem/handle bar assembly that enables easy adjustment of the handle bars without removing your hands from the handle bars? This type of device would allow people sit in the inclined position and move into other more upright and comfortable positions. This type of adjustment will reduce back pain, minimize seat discomfort and decrease tingling in the fingers and thumbs.
There are easily adjustable stems and seatposts used for bike fitting. Not real time – but still quick and easy.
For real time position change, road bicycle “drop bars” are close – they offer several different grip and upper body positions, depending on where the rider holds them (drop bar grip positions).
Good fit should help with tingling – it usually results from too much weight on the hands.
As for the back pain, in addition to proper bicycle fit, stretching and muscle exercising should help (yoga especially).
Though I’m sure with some electric motor and controls, real-time position changes could be implemented – with some additional weight on the bicycle.
thank you for this basic but essential article and, above all, for the brand of stem/extender useful for the safety of ours.
In section “4. Bars” you write:
“That is shown in the picture 9.”
But I think you mean picture 10.
Hi Namdar,
Yes, that’s right. Thank you for the correction – I’ve updated the article. 🙂