One of the main advantages of drop bars is that they provide various hand, arm and body positions. This enables easy transition during riding for more comfort, more control, more aero – depending on priorities at the moment. All the positions should be comfortable when the bars are set up correctly. If you can’t get comfortable, consider using a different drop bar shape (ergonomy).
TL/DR
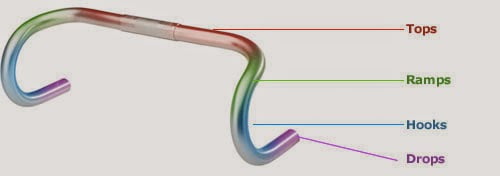
Photos with brief explanations of the five different drop bar hand positions.
Some new riders don’t know this, or at least don’t know what each hand position is called (when discussing fitting or discomfort situations). This should help clear that up.
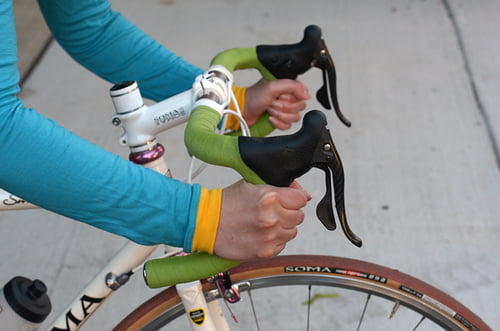
1. Tops
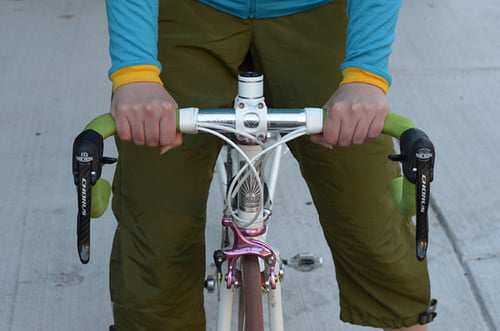
Grip on the top, flat part of the bars. Gives the most upright seating position. Good for relaxed slow pace riding on flat parts. Also good for long steady climbs (in the saddle). It is also the least stable grip. Brakes are impossible to reach from that position. That is why it’s not good for fast riding, for traffic, for bumpy roads. Experienced riders might use a variation of this grip for fast descending, but not advisory for beginners.
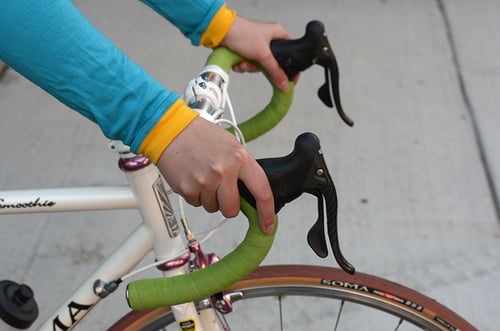
2. Hoods
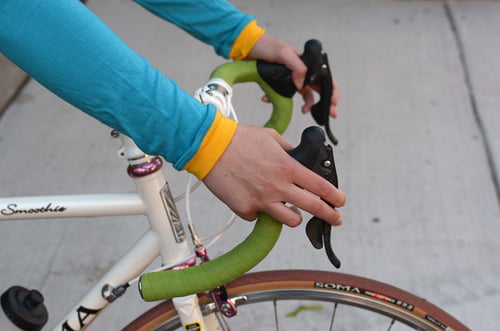
The grip is on the brake levers mostly. Modern integrated brake/shift levers have ergonomic grip shape.
This grip provides a compromise between decent control, decent aero, with relatively upright, more comfortable body position. 90% of cyclists spend 90% of the time in this position. Excellent for less aggressive riding on flats and for climbing, both in and out of the saddle.
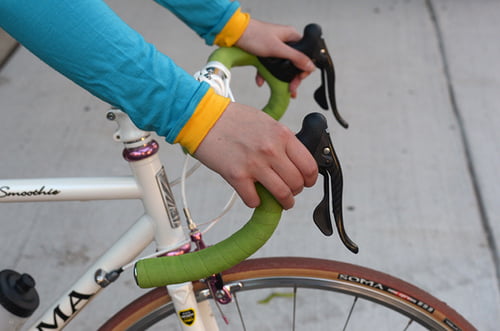
3. Ramps
Transition grip between the tops (1) and hoods (2). Decent level of control, with still a rather upright and relaxed position. Brakes can not be controlled directly from this position.
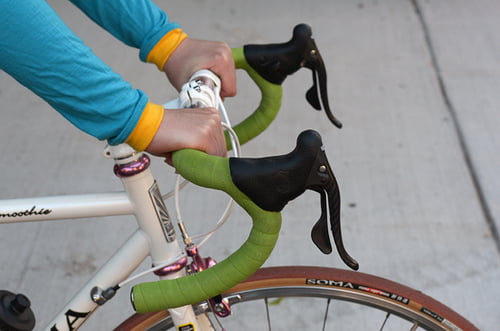
4. Drops a) – hooks
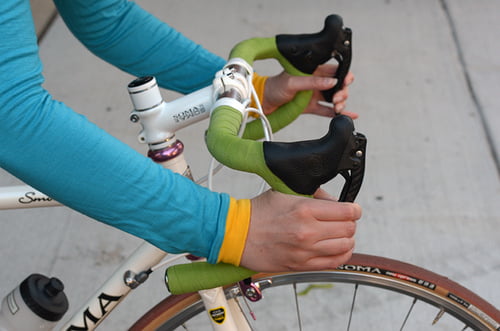
Grip on the sloped part of the bars. Often referred to as “drops”. Provides the best grip on the levers, allowing for hard braking. Enables aero position, with lower upper body. Transfers more weight to the front wheel, enabling better steering. Good for aggressive fast riding, fast downhill riding, sprinting.
5. Drops b) – lowest grip position
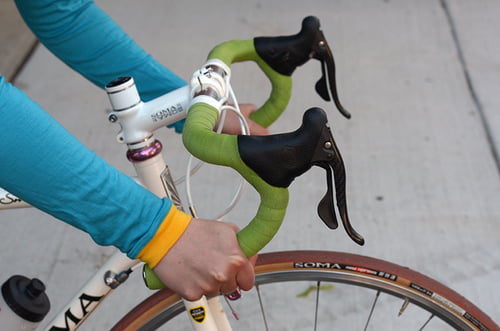
Grip on the lowest part of the bars. Quite steady and aero, but it is impossible to grab brake levers from this position. If everything is set up correctly on the bike, this is one of the more comfortable grips.
Summarizing in the picture below. The only thing missing is hoods, since the bars in the picture don’t have brake levers mounted. 1. tops, (2. hoods) 3. ramps, 4. hooks, 5. drops:
Last updated:
Originally published: