A good-quality bicycle wheel hub can last for ages if serviced regularly. This article explains how to service a hub properly (a full overhaul). The hub used in this tutorial is a front one. Rear hub overhaul is the same with only one difference: for multi-speed hubs, cassette with sprockets needs to be removed first. That procedure is explained in the article:
Removing rear sprockets.
Note: the whole procedure is explained in length and it might seem more complicated than it actually is. The detailed explanations are meant for those facing this topic for the very first time. Once it is all read and “settled”, one just follows the logical order of operations and it’s very easy. More experienced mechanics will just follow the steps, or even just look at the pictures to make sure they didn’t forget anything and use it as a reference.
I’ve also made a cup and cone hub service video.
1. Prepare the tools needed
Full list and explanation of needed tools is given in a separate post: Tools needed for a bicycle hub overhaul. Here’s a shortlist, without detailed explanations:
- Wrench needed to remove the wheel, unless the wheel has a quick-release mechanism.
- Cone wrenches.
- Wrenches for lock nuts.
- Grease gun.
- Clean rags, or kitchen roll wipes.
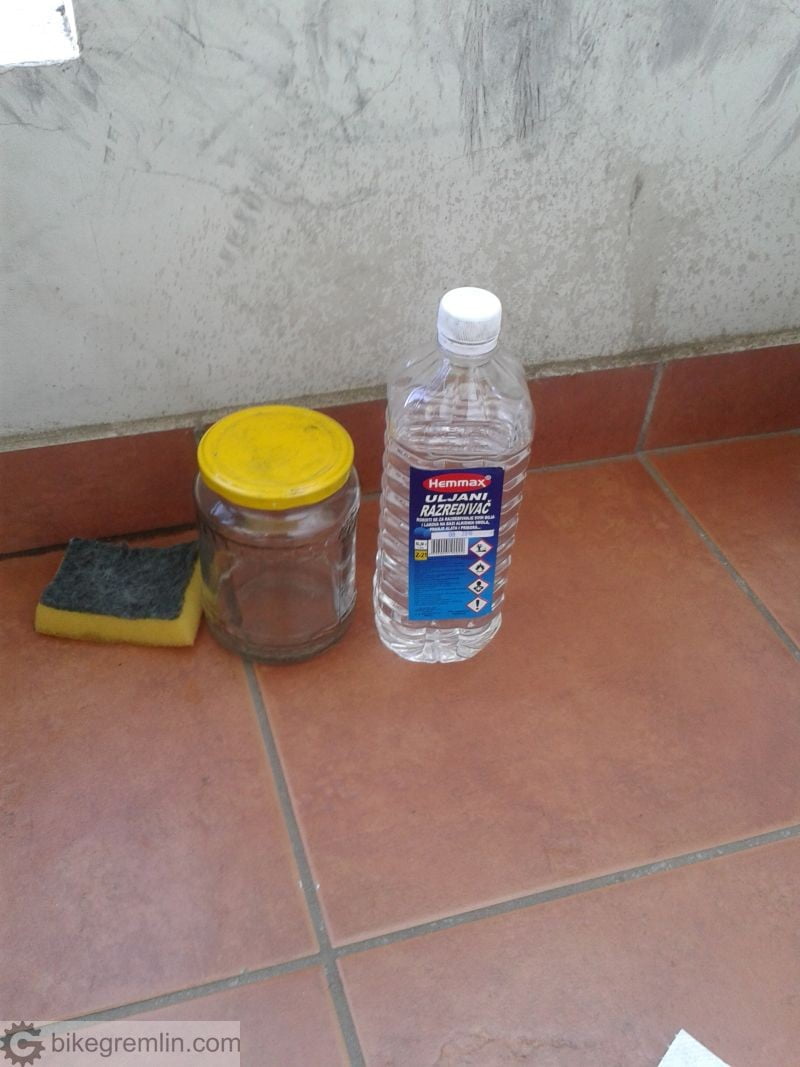
- Mineral spirits (oil based paint thinner), or some other degreaser for cleaning.
- Tweezers – best with silicone end.
- Flat end screwdriver – small and medium. In case a loose ball needs to be pried out, or a cone cap removed
- Small brush
- Small clean container for ball bearings.
- Lithium soap based grease.
- Tools required to remove rear sprockets, if servicing a rear wheel hub.
- Clean and flat surface, with lots of light.
- New ball bearings.
2. Remove the wheel
Before servicing hubs, wheel needs to be taken off the bicycle. How to remove a wheel and tools needed for the job is explained in this post:
How to remove a wheel.
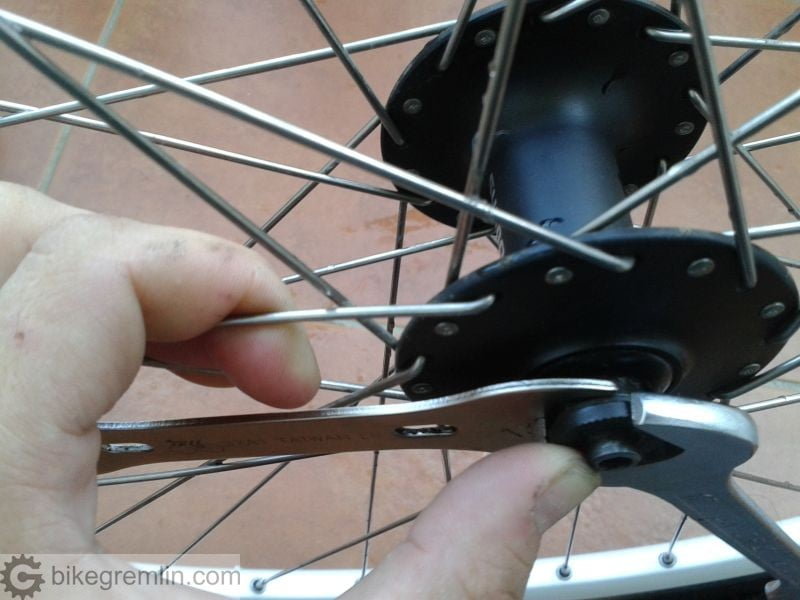
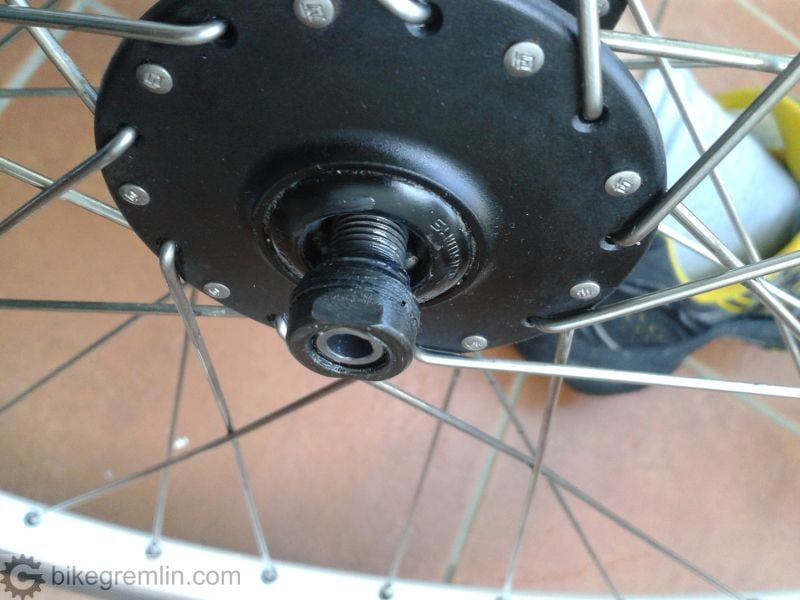
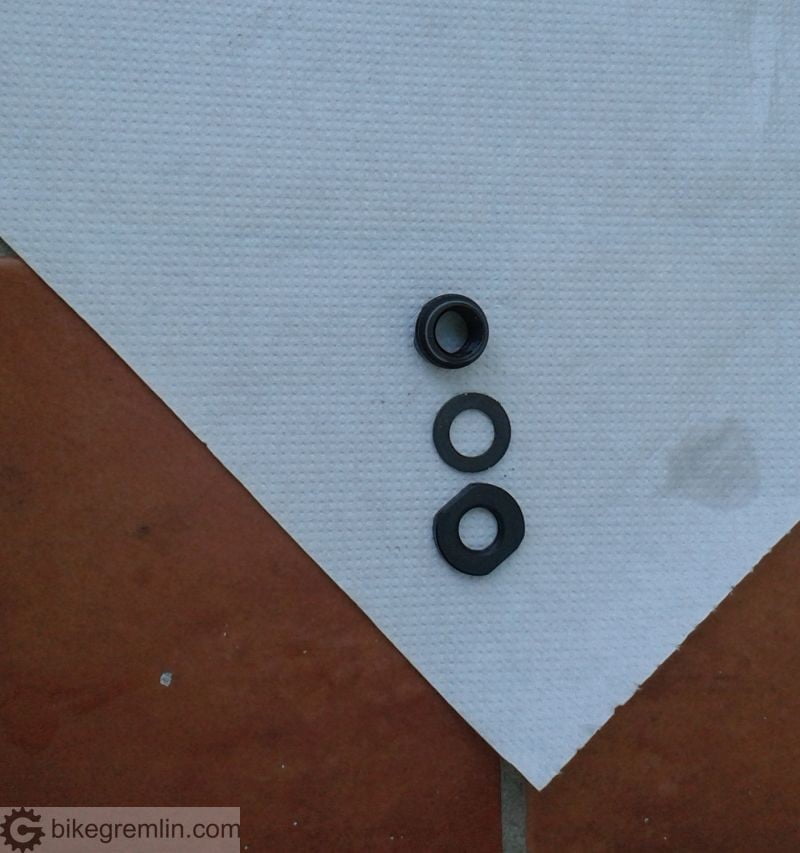
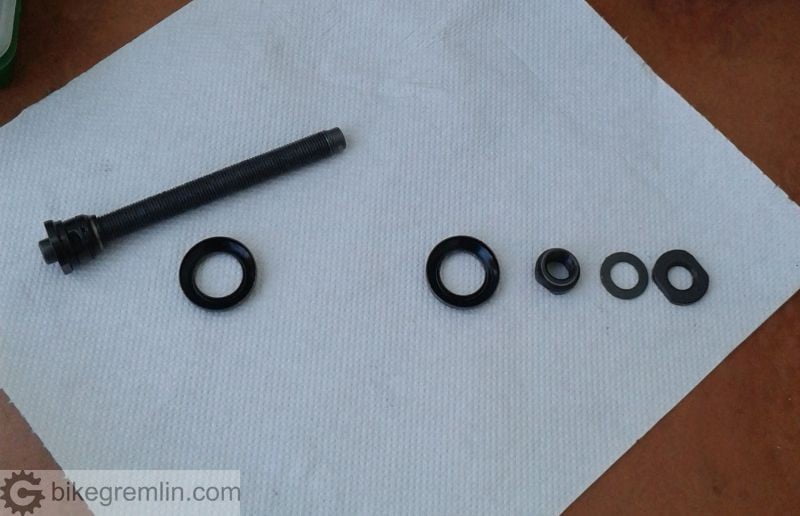
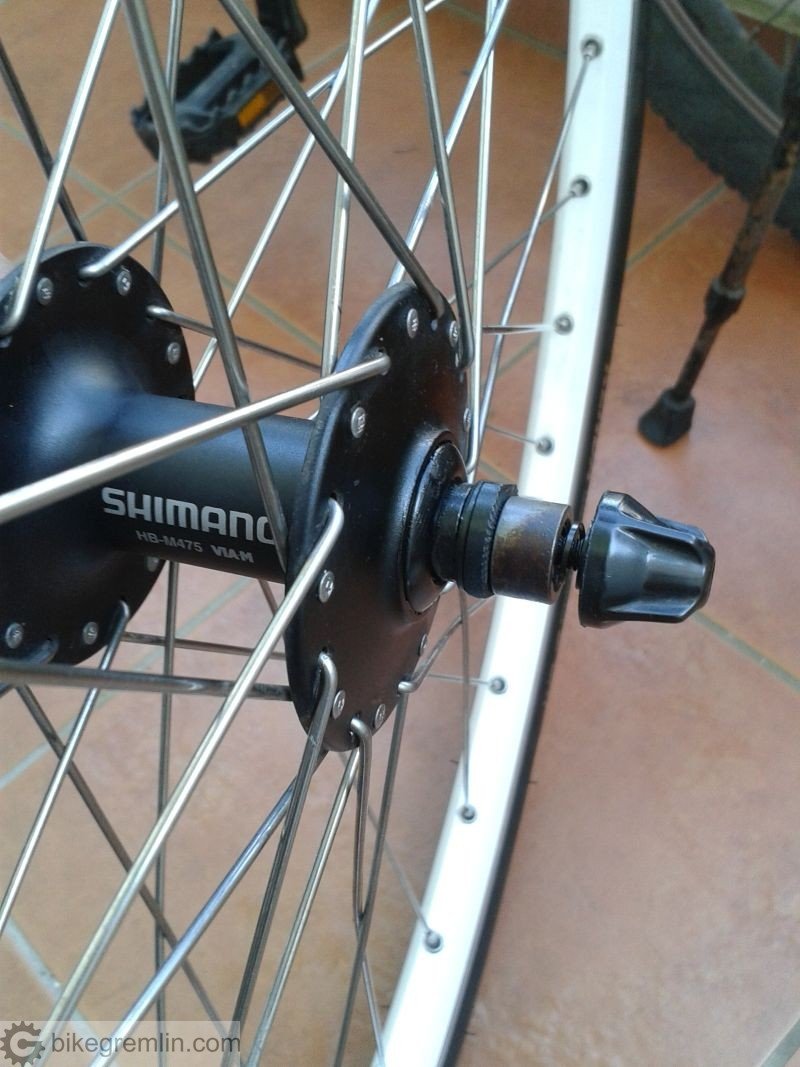
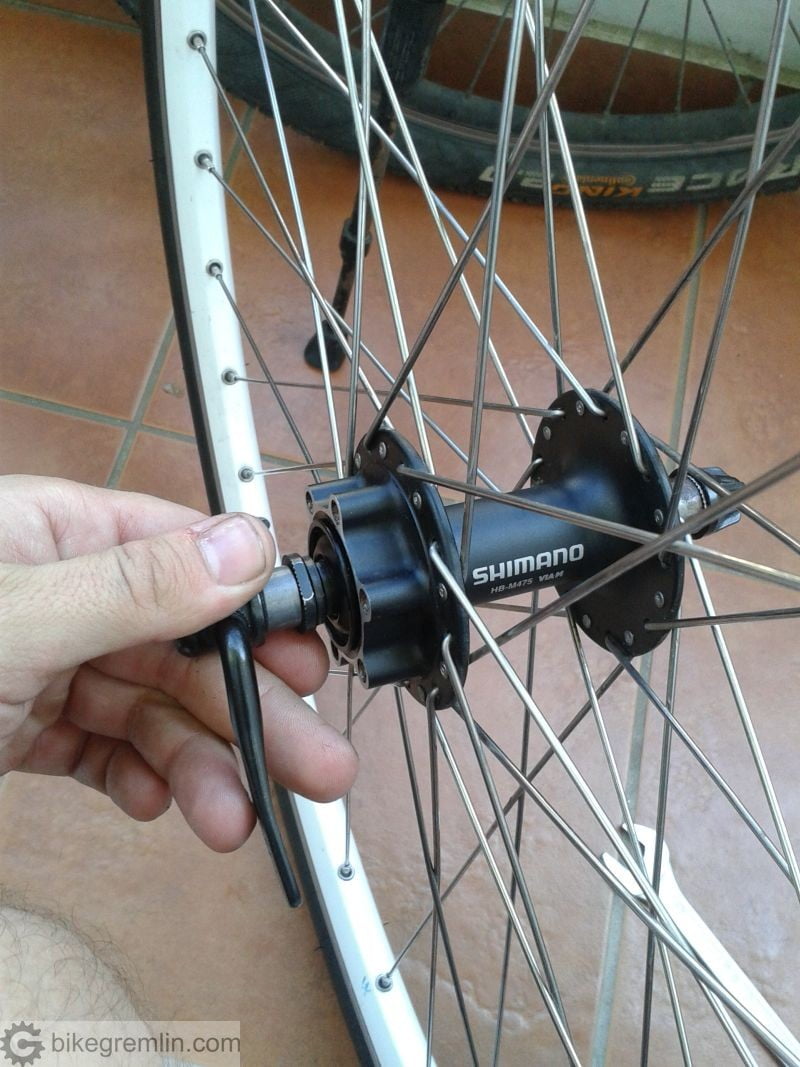
If the wheel is with a quick release, remove the QR nuts and “needle”.
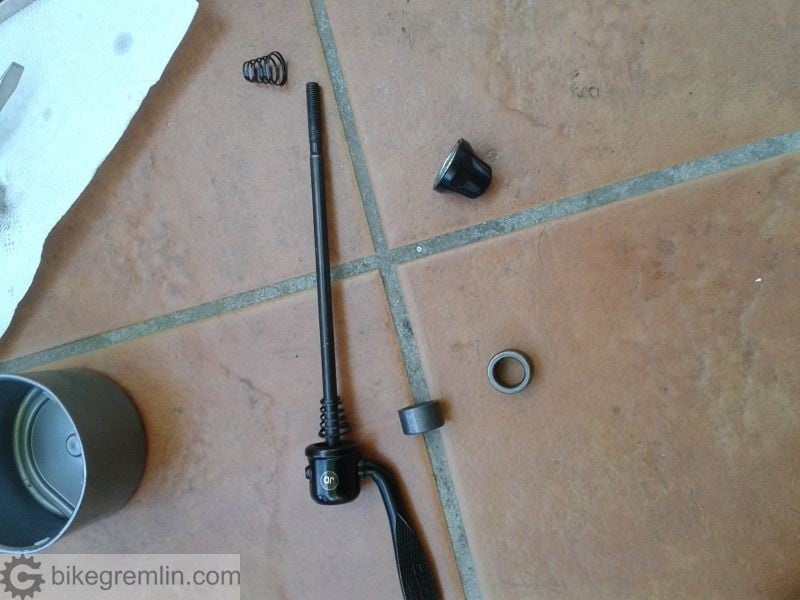
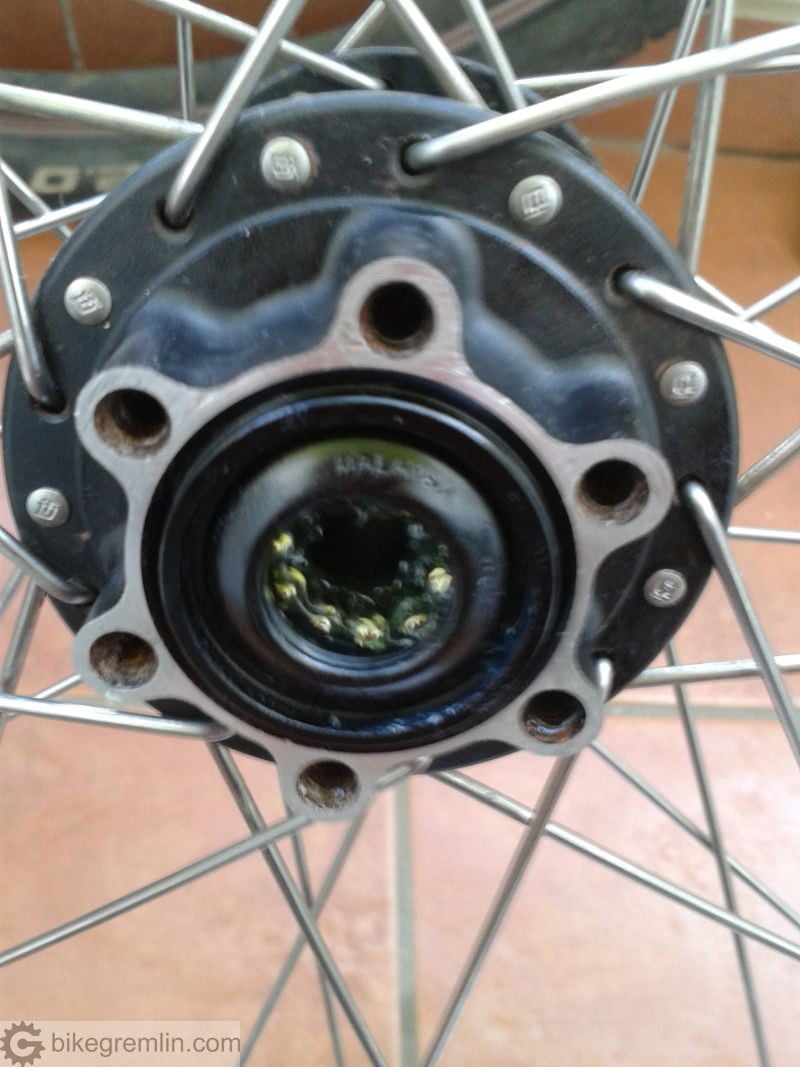
Two metal bushings on the right are not it’s part, but they will have some use later explained.
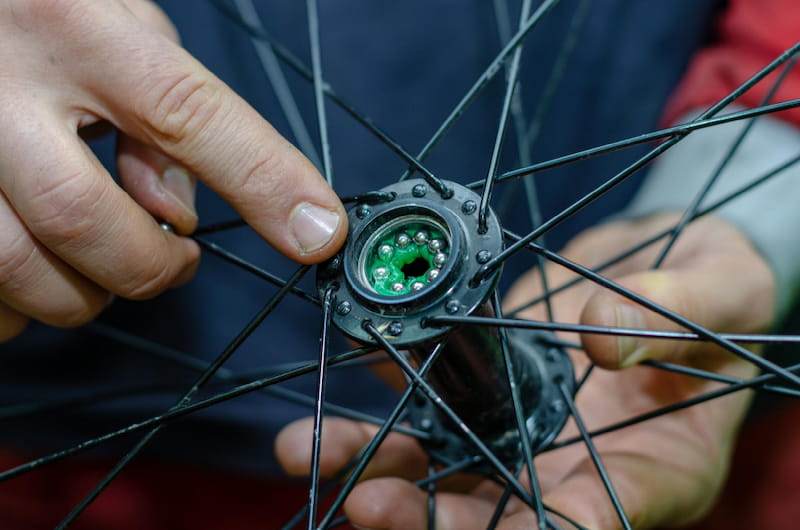
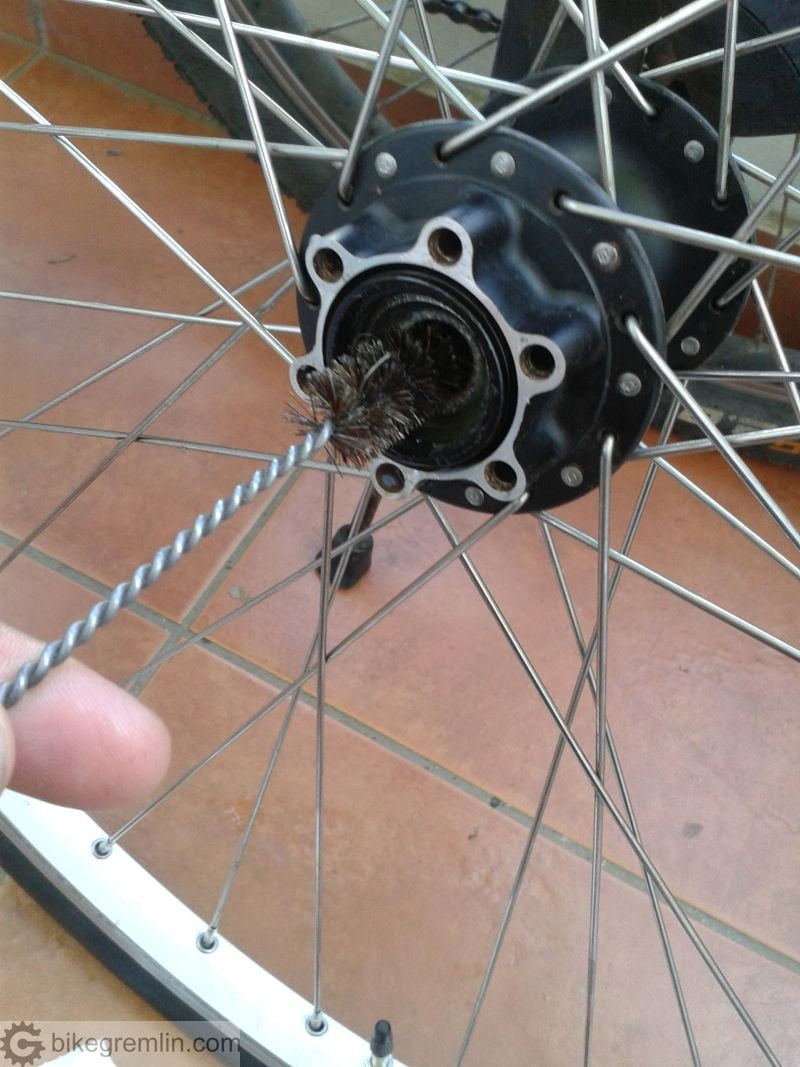
3. Clean the wheel of dirt, especially the hub


When a hub is opened and cleaned, before greasing and packing new bearing balls, make sure no dirt enters the hub. A single hair or a grain of sand can easily come inside the hub when it is open and ruin the fun if they enter the hub bearings. They can make the wheel turn less smooth or even damage the bearings.
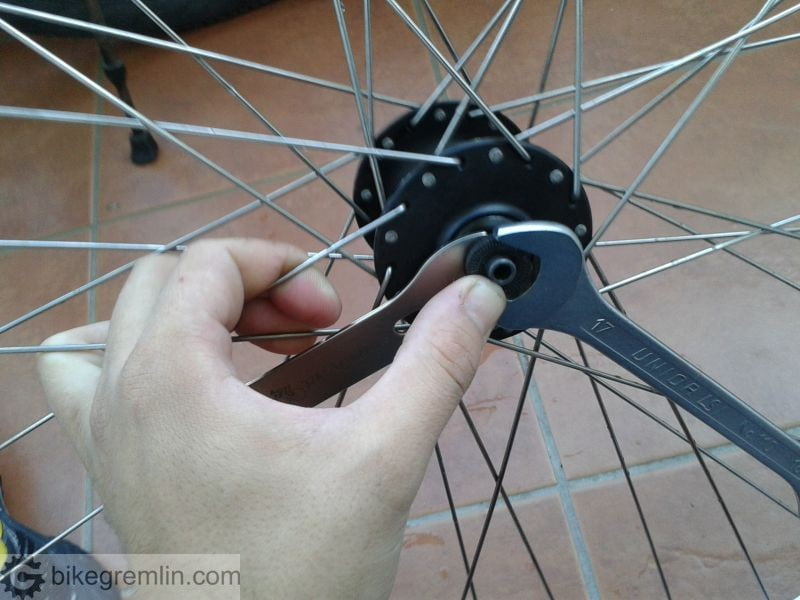
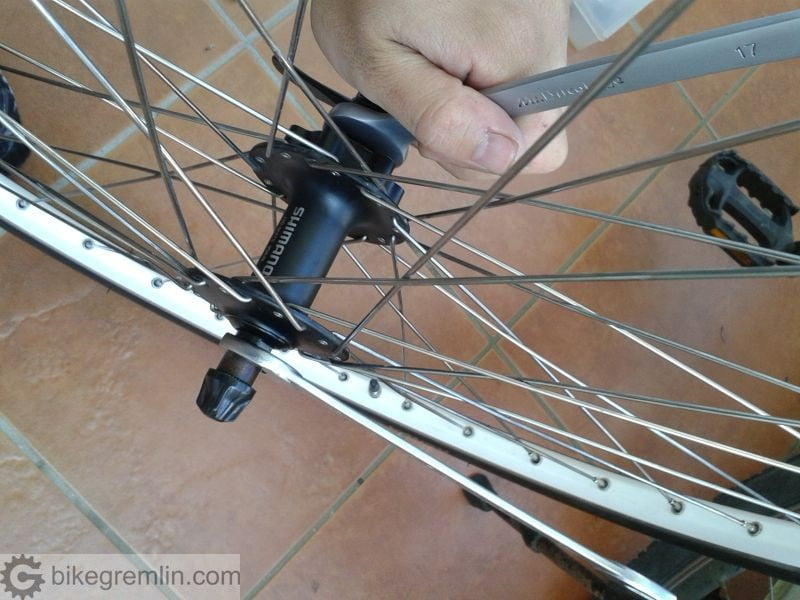
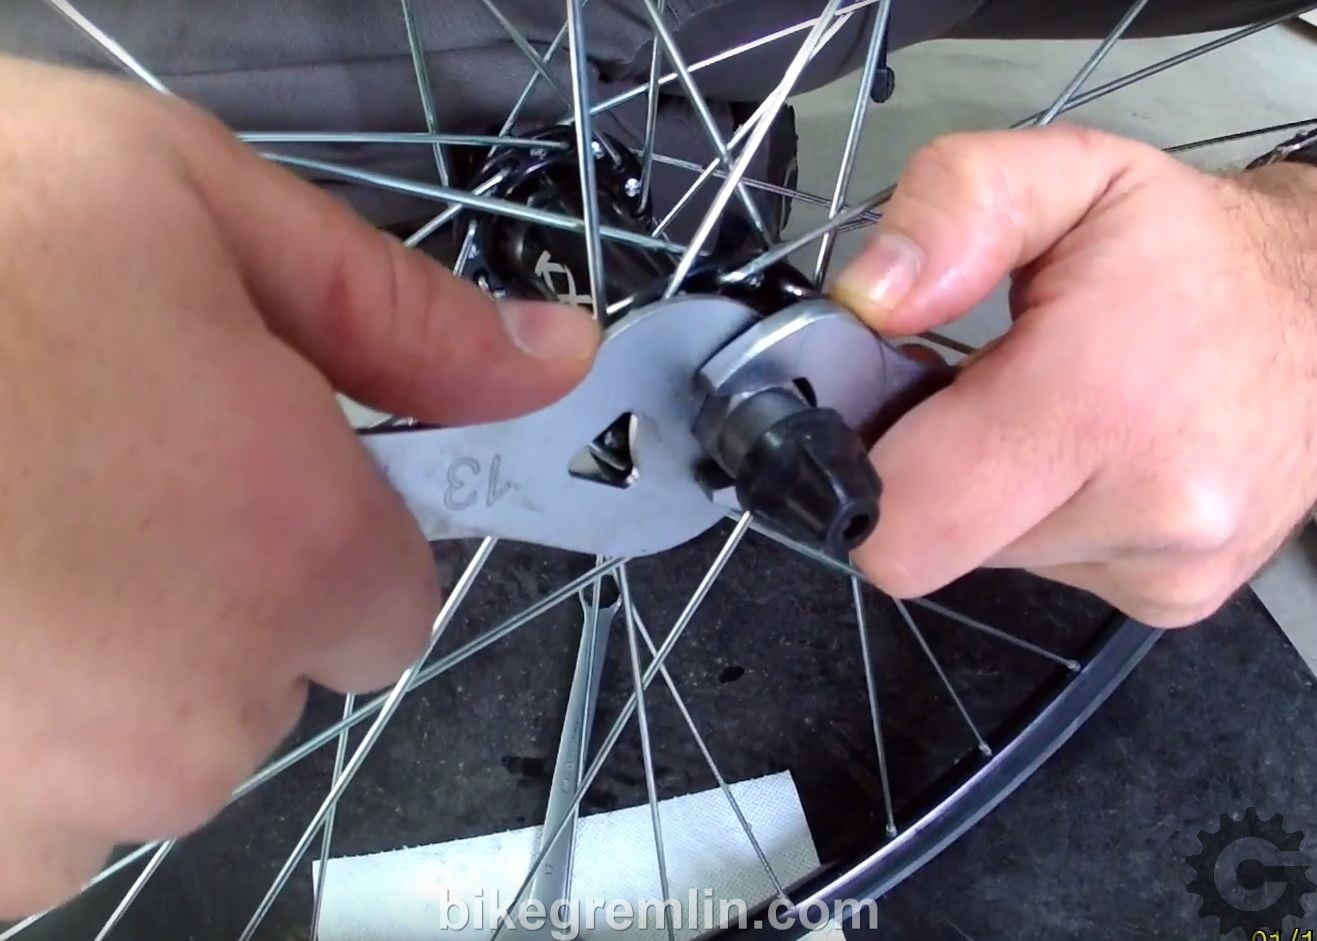
4. Loosen a cone locknut
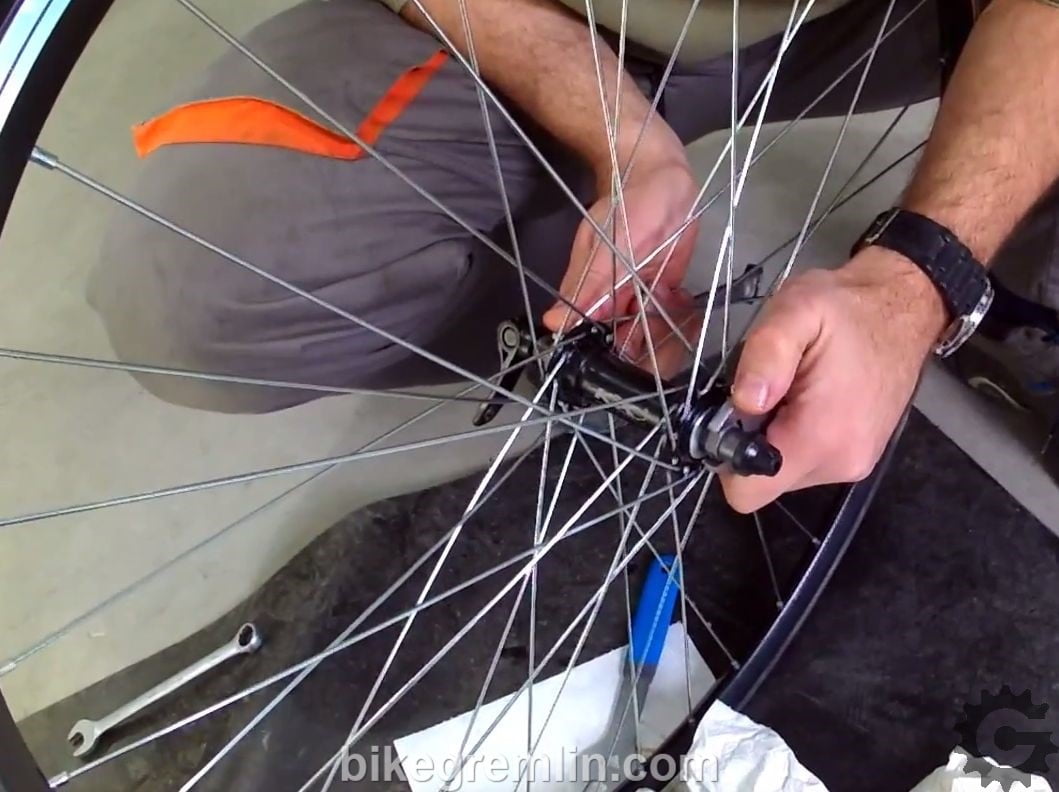
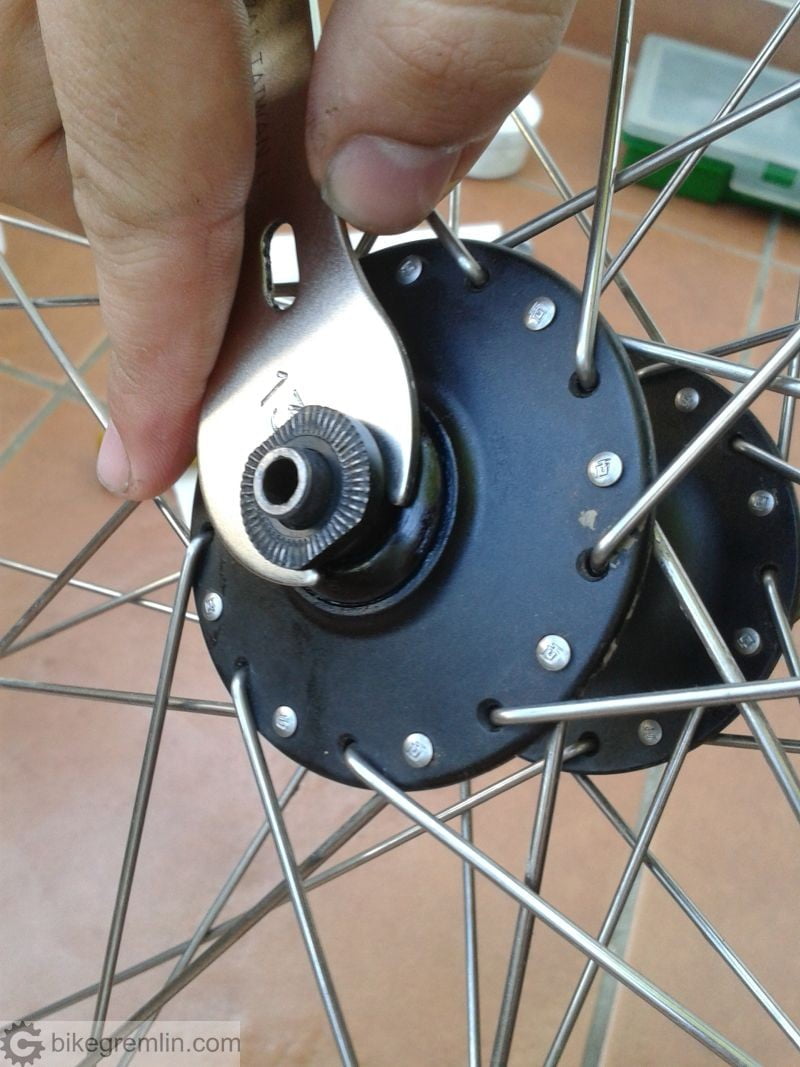
One locknut needs to be loosened. It doesn’t matter which one – left, or right. Just to note it when assembling the hub. Cones are usually symmetrical and identical, but it doesn’t harm to put it all back exactly the way it was. Locknut is unscrewed, counter clockwise, with a locknut wrench, while a cone wrench is used to counter the torque, preventing the axle from freely rotating.
Locknut usually loosens suddenly and quickly. Bare that in mind when placing hands, wheel, holding balance!

Some hubs have such locknuts that thin cone wrenches need to be used on it as well.
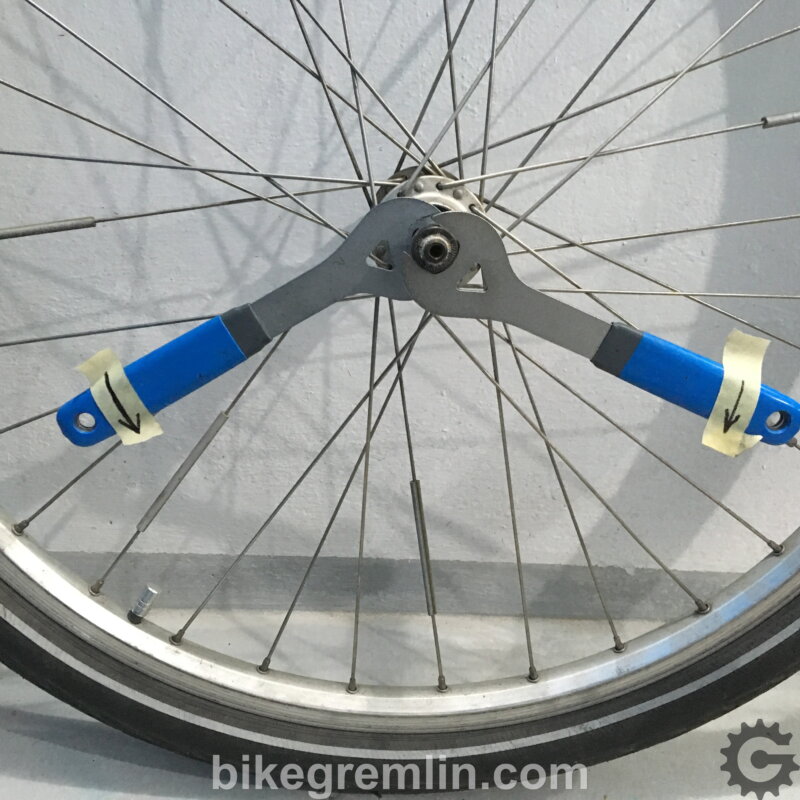
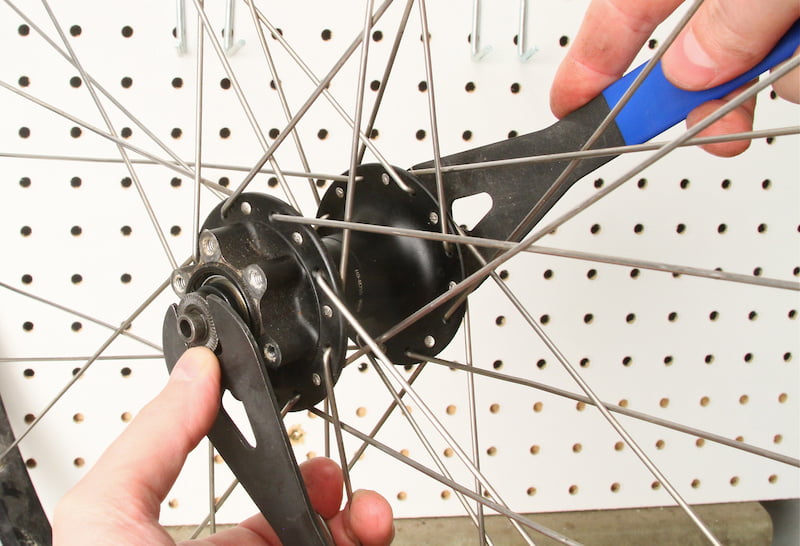
If locknuts can be held with regular (thicker and stronger wrenches) and are really stuck, then a brute force method can be used: both locknuts are held with one wrench at each side, then one is used to counter, the other to unscrew – whichever locknut gives up first.
One big wrench at each side.
The wheel needs to be firmly held with legs and chest to stay in place while doing this.
Watch your balance. Locknut will loosen quickly and suddenly!
5. Take all the parts out, examine, clean
Gently pull out the axle (the other side still has the cone, washer and locknut attached to the axle). Remove dust caps and old ball bearings.
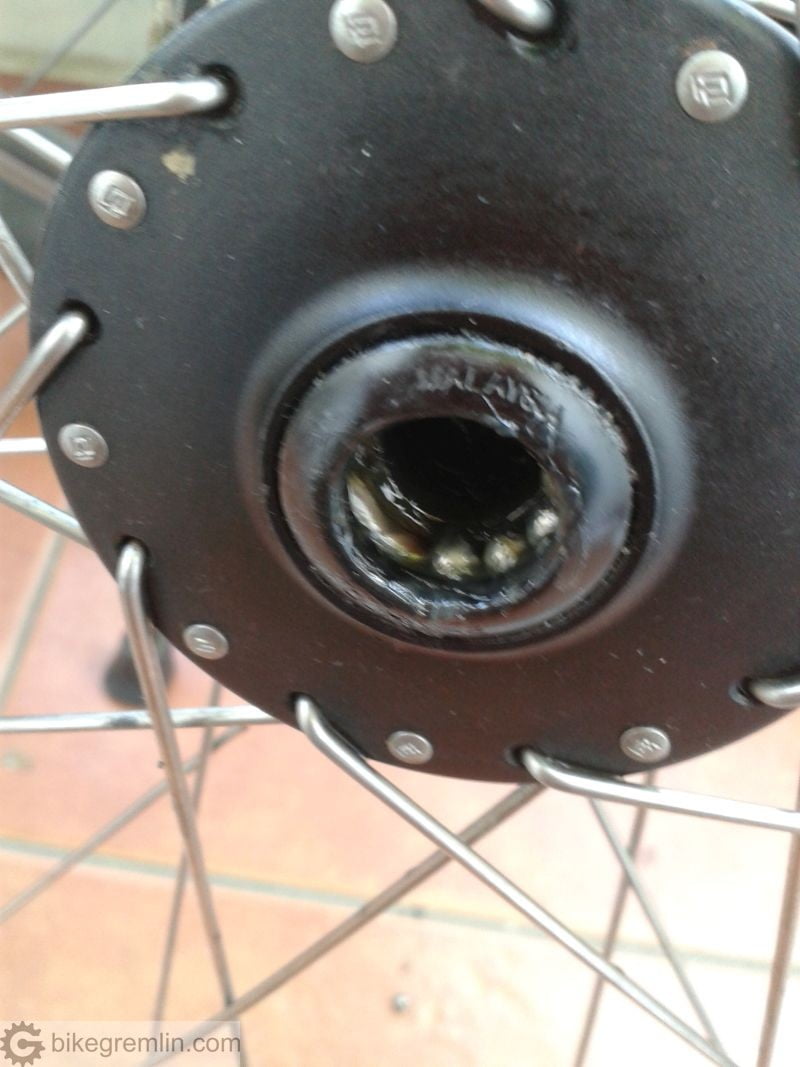
Now is the time to remove the dust caps. Some hubs have dust caps attached to the cones, so they come out together with cones, no need to pry them out of the hub body.
If old ball bearings are not “saved”, this step should be done first – ball bearings will often just fall out when the dust cap is removed.


Clean the axle, cones and washers. Inspect for any damage. Pitted cones, or bent axle.
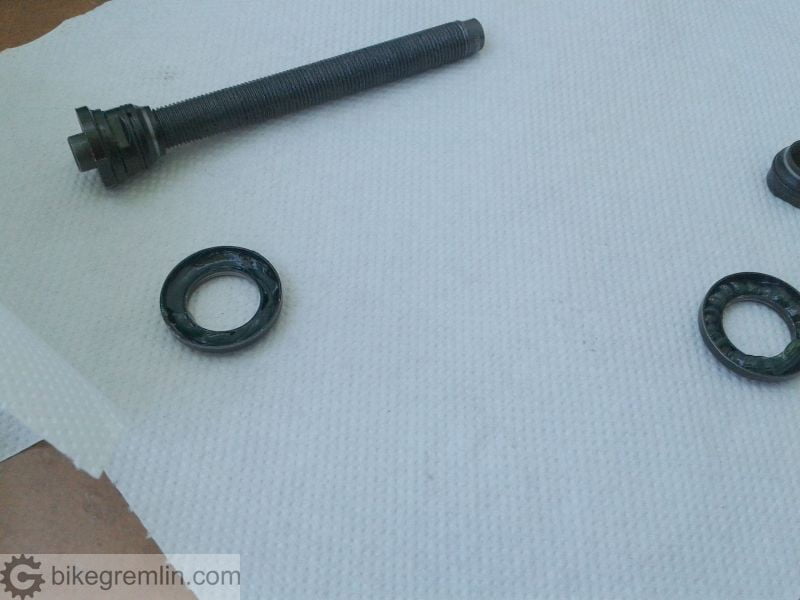
Axle with cone and locknut, dust caps, the other cone, washer and locknut –
All cleaned and ligned up, ready for inspection.
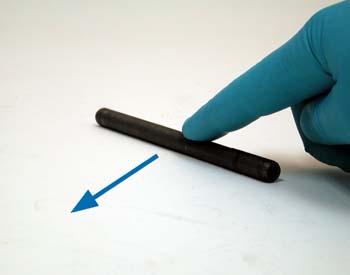
Closely examine the other cone (on the axle) as well. To check if axle is straight, remove the other cone and roll the axle over a flat area (glass is good) – any twisting will quickly show.
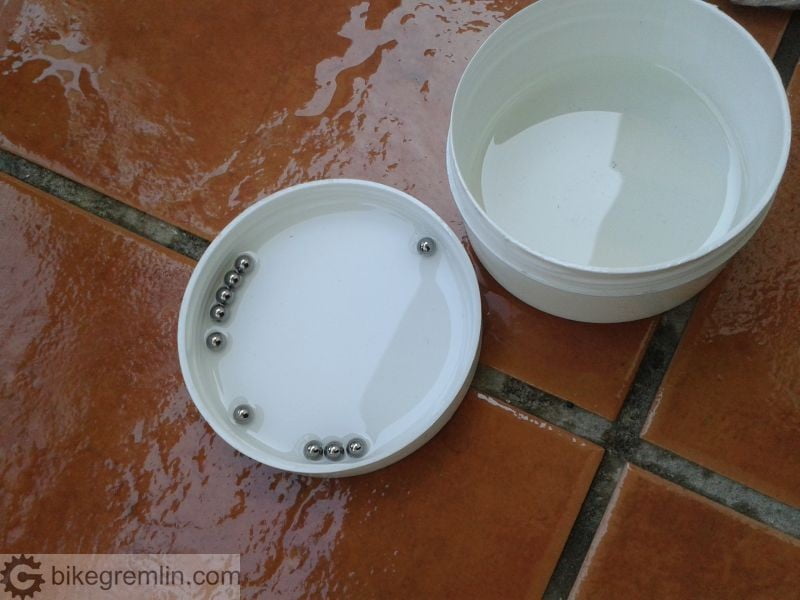
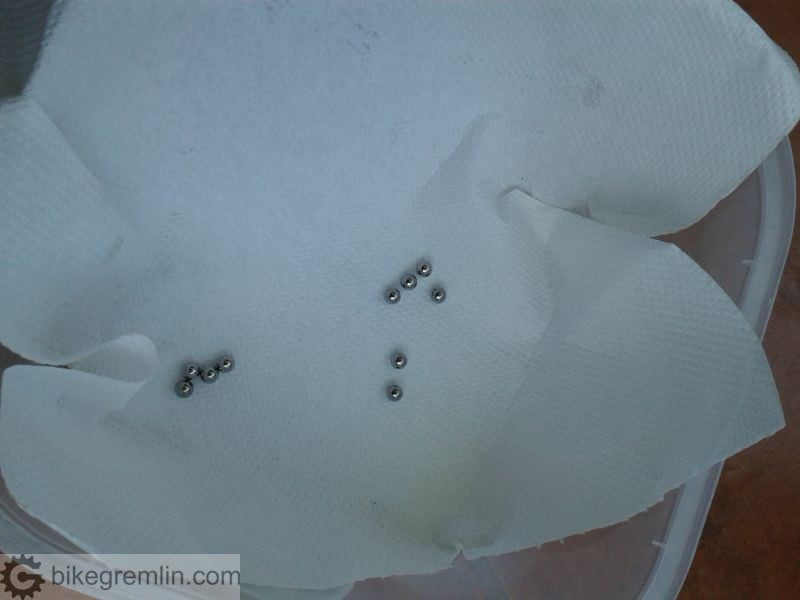
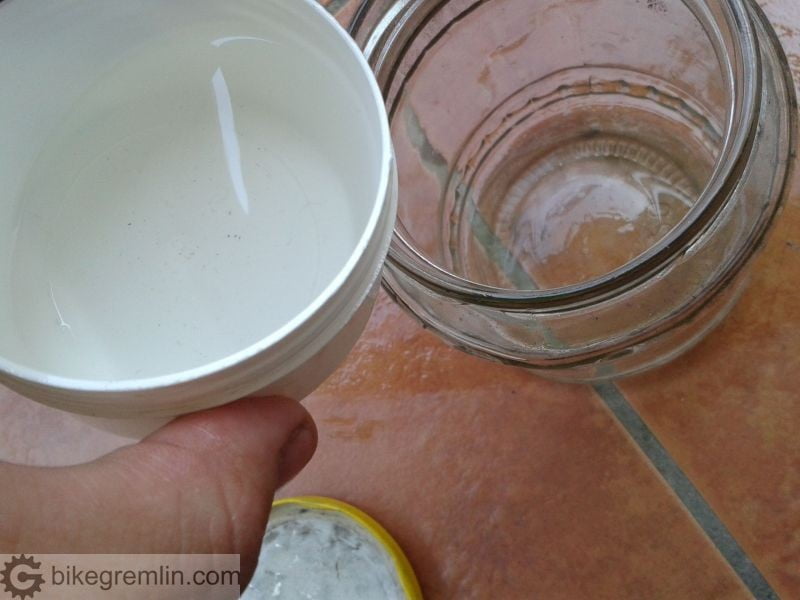
If old ball bearings are re used, wash them in degreaser, clean, dry, closely inspect for damage (pitting, like the cones). Used mineral spirits can be poured into a jar, to be re used later for less clean-critical jobs, like washing chains and sprockets.
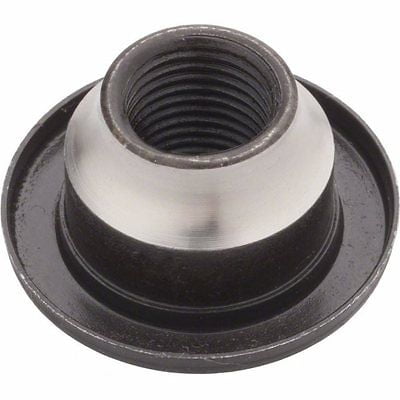
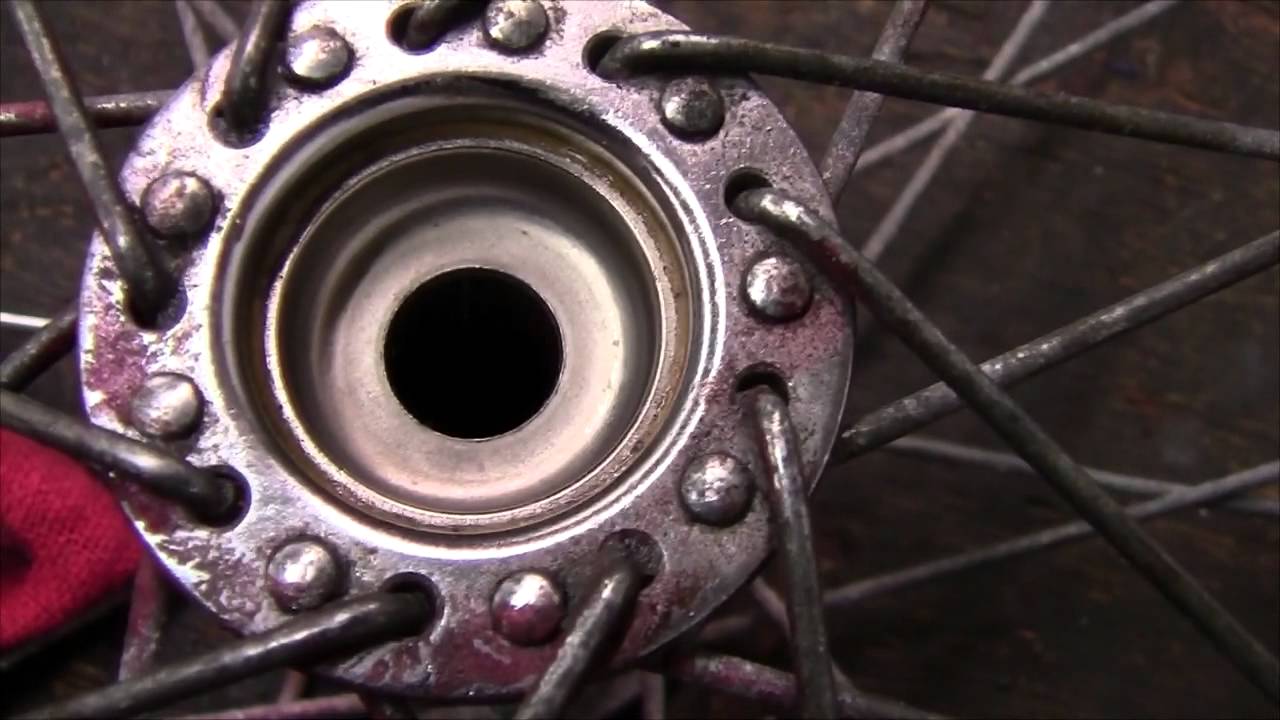
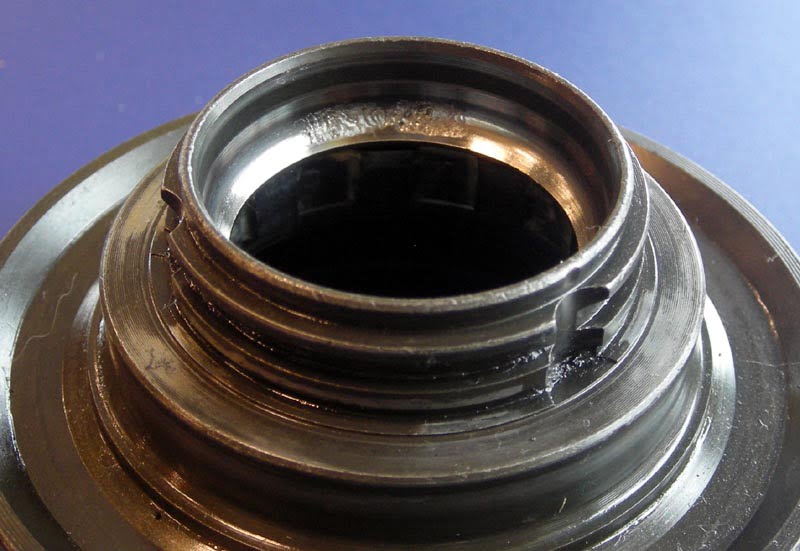
It doesn’t harm to clean the inside of the hub as well, while hub bearing cups need to be thoroughly cleaned and inspected for damage, or pitting (like cones).
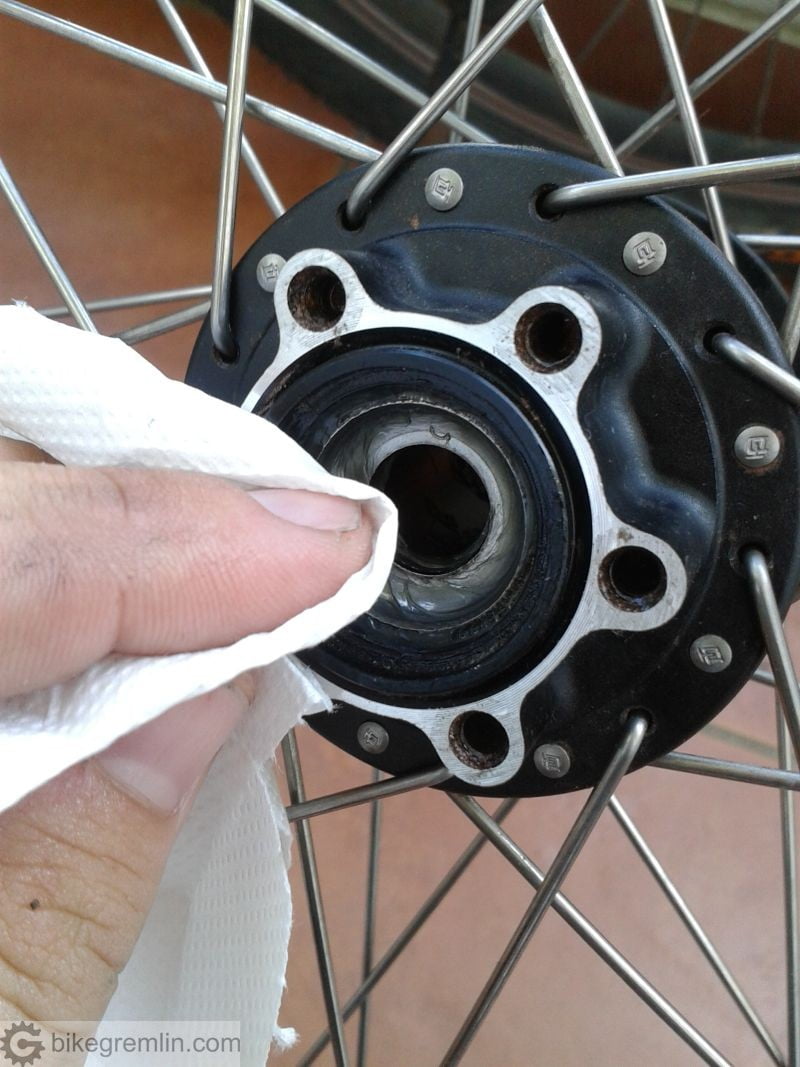

Now is time to check cups for damage. If they are pitted, hubs are soon busted. Wheel will need to be relaced with a new hub. Damaged cups are the hardest damage to “fix”. If the hub is well assembled, without play, first thing that gets damaged are ball bearings, then cones and only then, if hub is not serviced in time, do cups get damaged. For rear wheels, critical cup (and cone) are on the right side, where the sprockets are – it takes the most load.
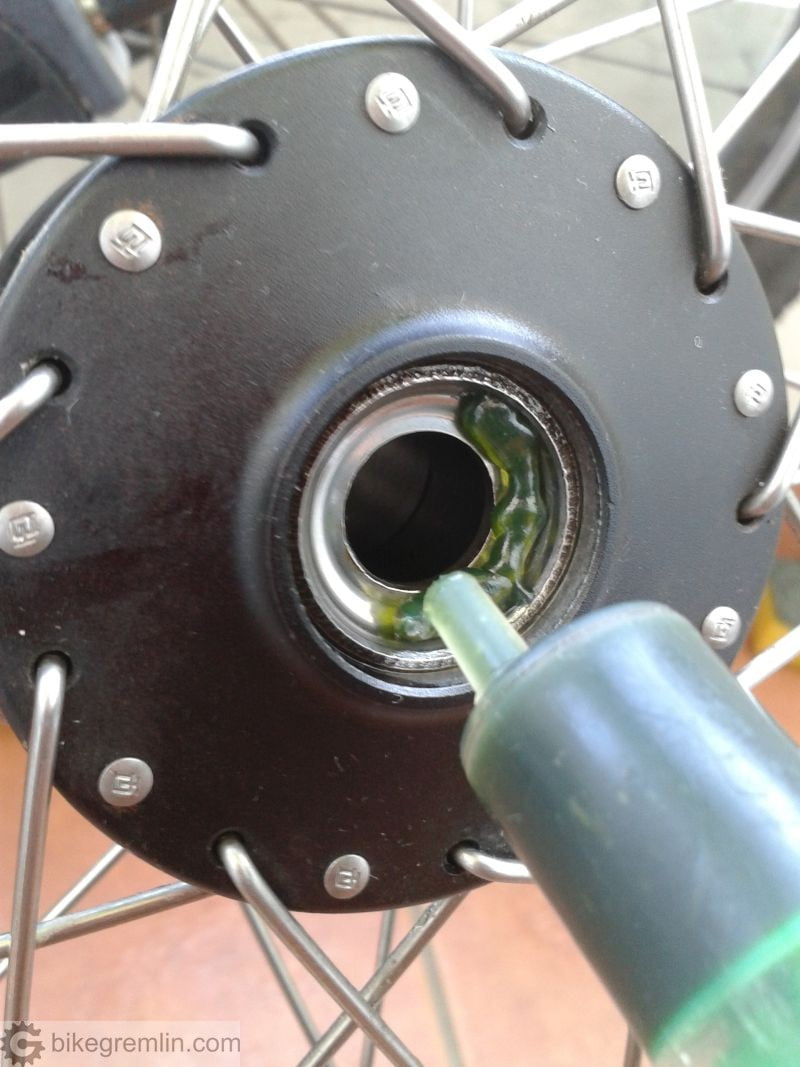
6. Grease hub cups, put new ball bearings and reinstall axle with cones
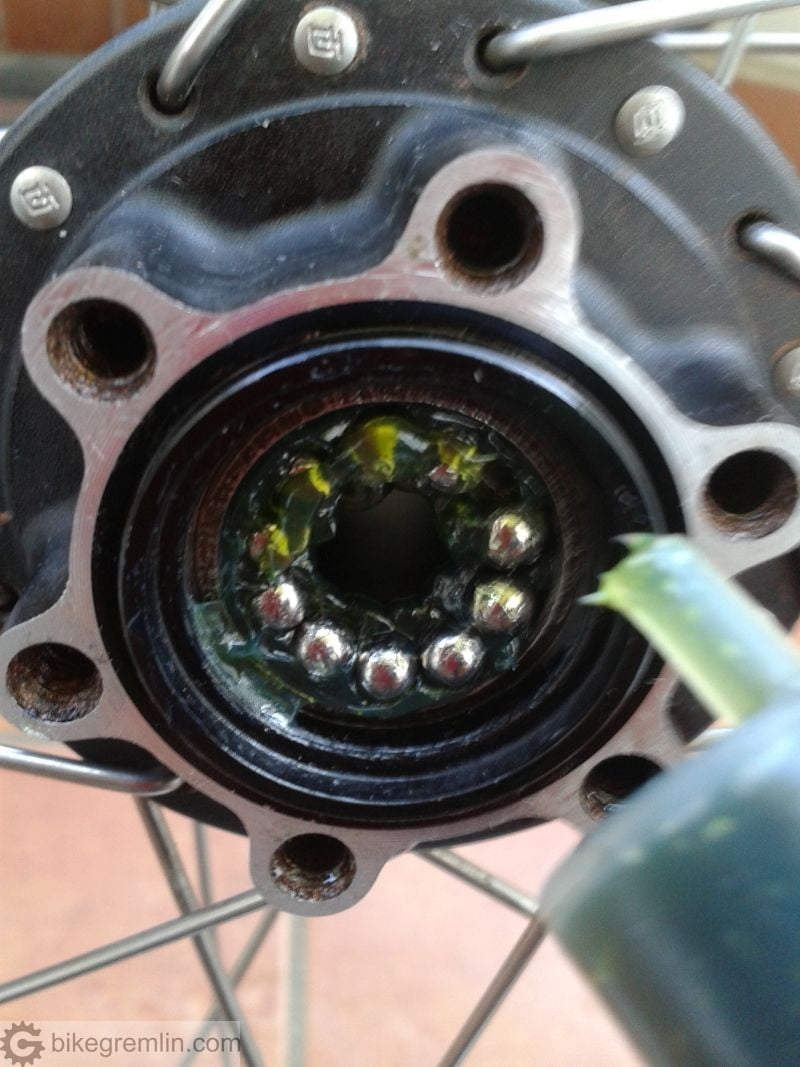
Hub bearing cups need to be packed with grease, then ball bearings placed into them, one by one. I like to put some grease into the dust caps, just to make sure there’s plenty. If in doubt, add more. 🙂

When balls are placed, some more grease can be smeared over them. Be careful to keep them in place. Now dust caps can be put in place (unless they are attached to the cones, in which case they will come back along with cones screwed on).
When the balls are in place, carefully slide the axle with one cone, then screw the other cone on, place the washer, screw the other locknut onto the cone, by hand. Make sure there’s just very little play.

7. Setting up the bearing preload
Cones are used for bearing preload adjustment.Tightening them increases the preload.
They should be set just tight enough to eliminate play.
Play is felt by hand as slight rocking of the axle (or wheel). Moving the axle up-down (or the wheel left-right, while holding the axle) it will rock a little. As if it moves by a fraction of a mm, then hitting a stop.
Set up procedure is the following:
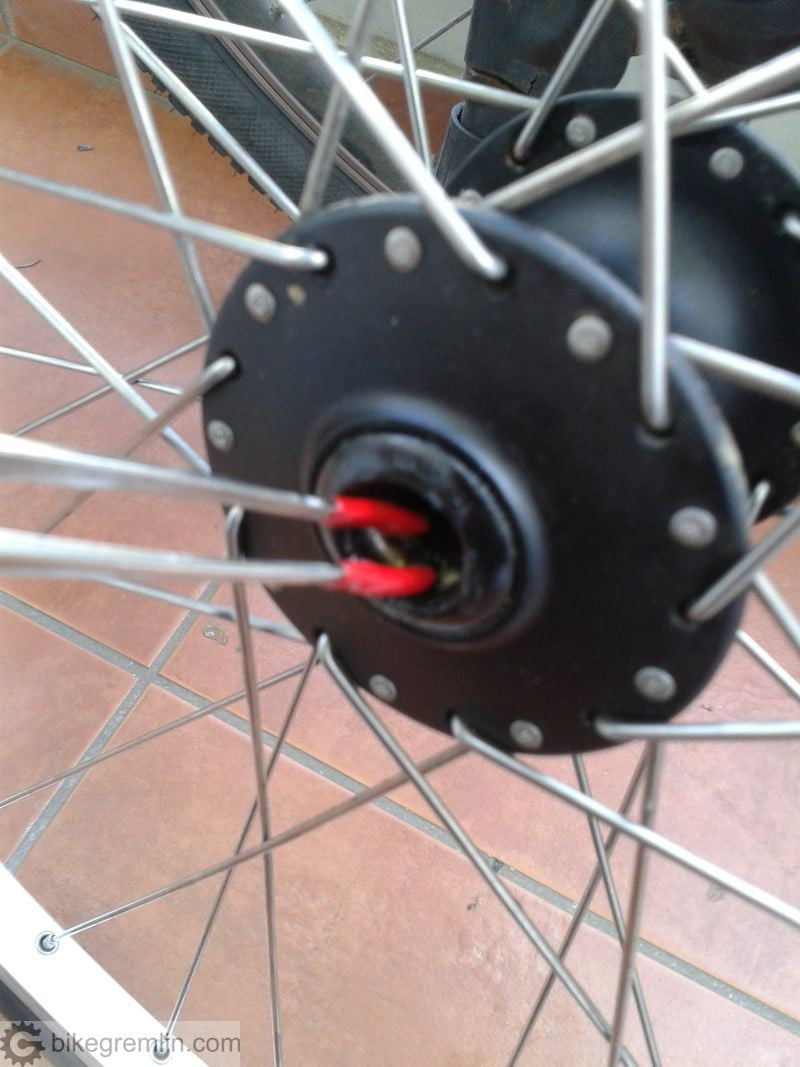
a) Centering the axle
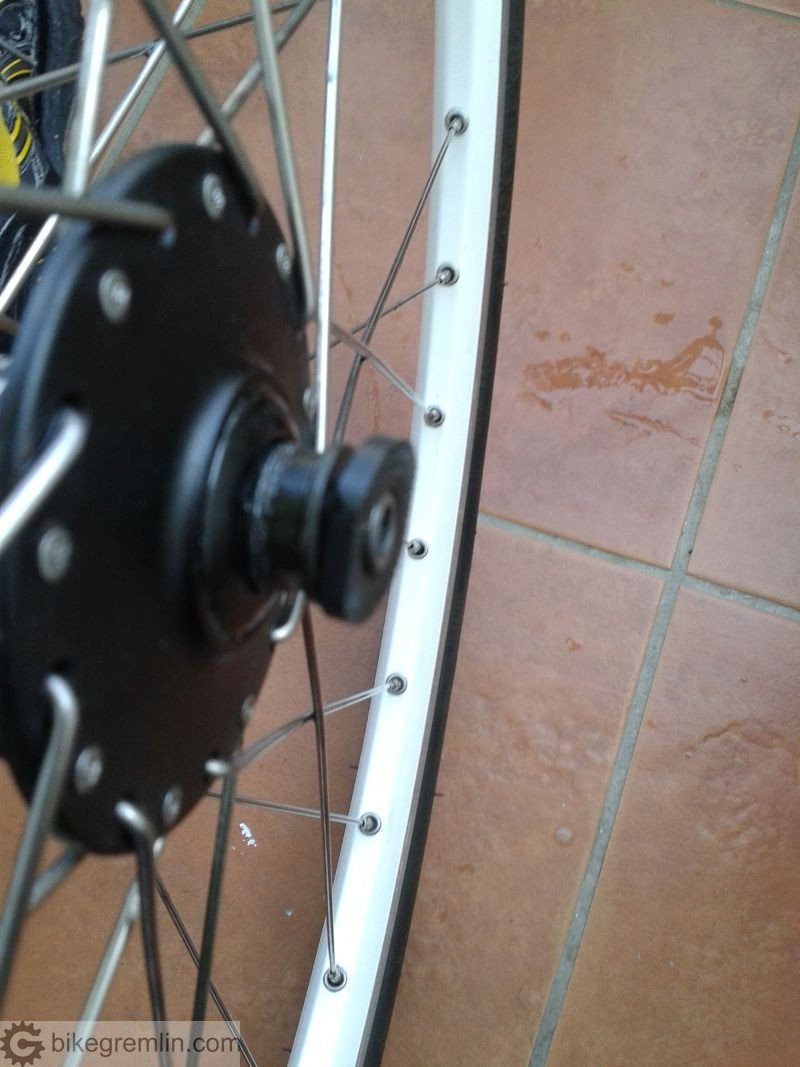
Tighten one cone with locknut, slightly, just to stop them from getting loose. Screw in the other one by hand, until there is no play in the axle. Screw in the locknut as well, by hand. Check whether the axle protrudes by the same amount from both sides. If it doesn’t, then loosen both cones and screw one in, the other one out, until the axle is centered. This step can be skipped if one cone is not loosened at all during overhaul, but then there is no way to check whether the axle is straight.
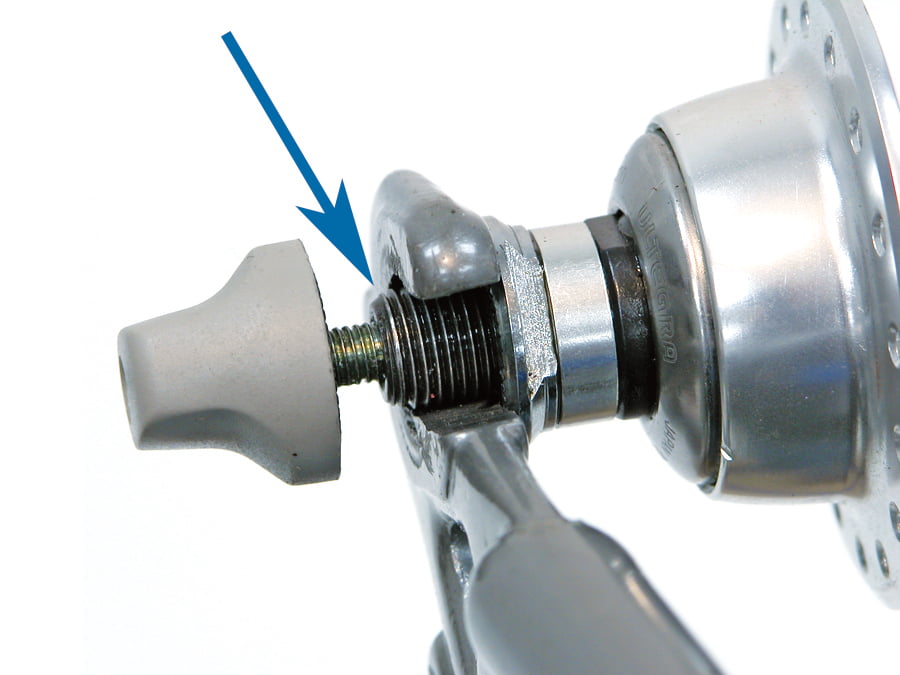
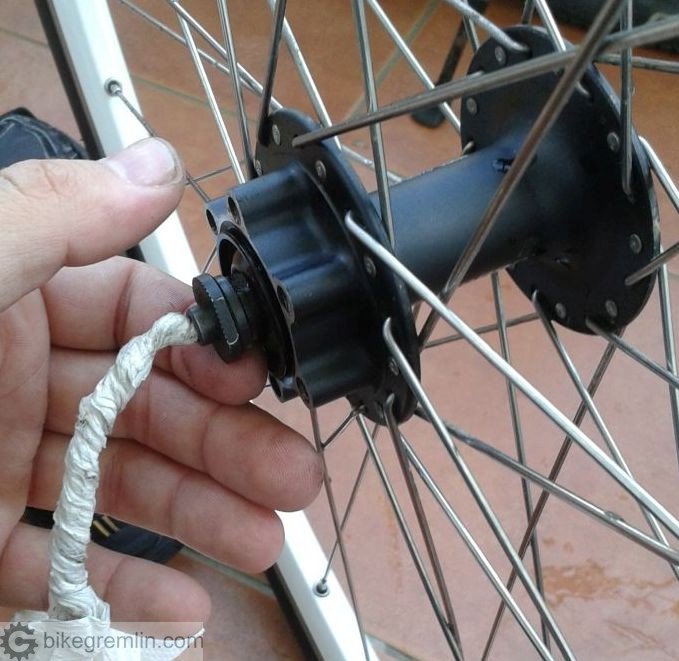
This side locknut and cone need to be unscrewed for a couple of turns, while the other side ones need to be screwed in – to move the axle and make it centered.
Then the wheel will be able to be tightened in the dropout.
b) Setting up preload
After the axle is centered, preload needs to be adjusted. Start with tightening slightly one side cone and locknut – just to stop them from coming loose. Turn the other side cone, until the play is eliminated and the axle stops rocking. Tighten the locknut of that cone slightly.
Now is the time to check for play.
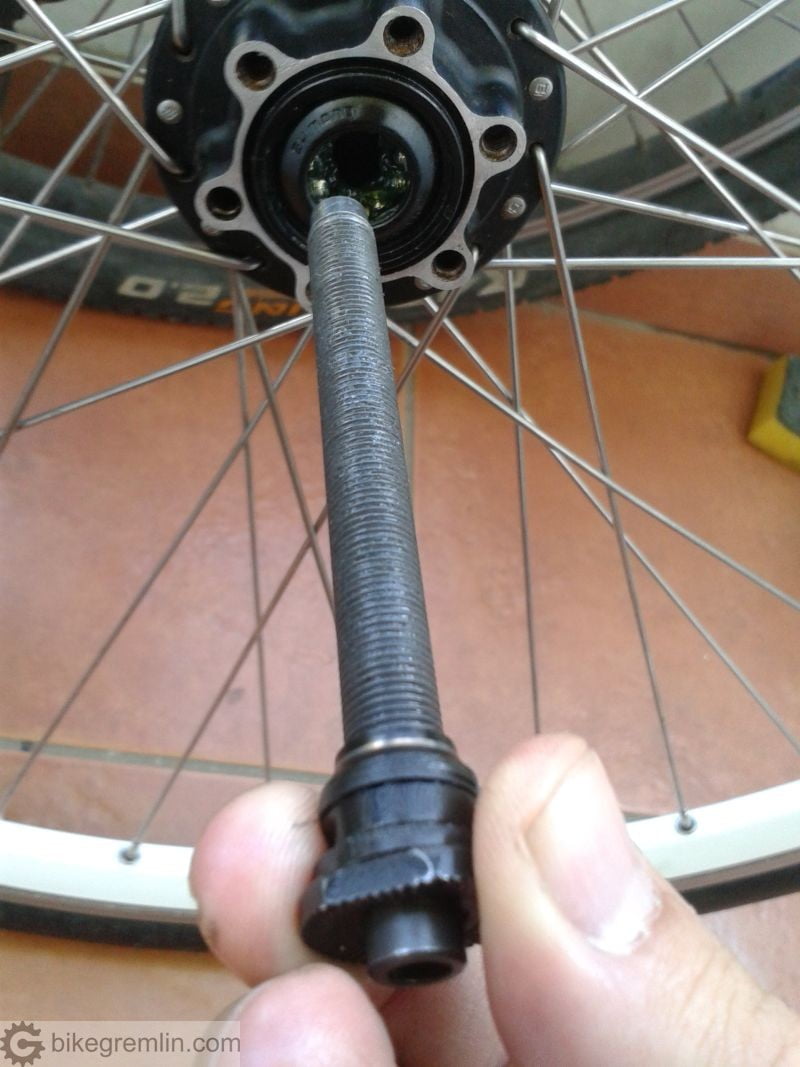
Quick release hubs (QR in the remainder of the text) have a hollow axle that compresses and widens a bit when the QR lever is tightened. That is why they need to have some play when the QR is loose, and that play should be eliminated when the QR is tightened. If there is no play with a QR loose, the cones are too tight. Rear QR axle is thicker and stronger than the front one, so it compresses less. This should be kept in mind when setting up the amount of play.
For axles that are not hollow, without the QR, i.e. regular thru axles, all the play should be eliminated before tightening the wheel in the dropouts.
I use the following method for setting up preload with QR mechanisms. “Full” axles (not hollow, quick release ones) use the same method, just don’t need (nor allow) the step of tightening QR lever before checking for play.

So the thru axle is just checked for play, while the hollow one (like in the picture above) first needs tightening the QR before checking for play. Repeating: make sure the hollow axle has some play before tightening QR lever – if not, loosen the cones a bit.
If there is some play, cones need to be fine tuned. Loosen the QR lever, and put wrenches over both outer locknuts. Tighten both lockunts – just not overdo it since it could damage the threads. Use moderate force. You will only make very minor adjustments this way, at best.
If the cones are too tight, the same principle is used, just with two cone wrenches, unscrewing two cones – also don’t overdo it since it could damage the threads.
For many rear hubs it is impossible to approach the right hand side cone when the axle is mounted inside the hub. In that case, go straight with the instructions from the next paragraph (right below the images).
Check for play again. If it exists, start by tightening locknut and cone on one side, so it is “locked” in place. All the further adjustments will be made using the other side cone and locknut. We’ll call this the “tuning side“.
Check for play again. When tightening locknuts, cone usually unscrews more than the locknut tightens.
For QR hubs – if the play was gone when the QR is released on a QR axle, loosen the tuning side locknut, unscrew its cone by 1/16 of a turn, then tighten the locknut again. With thru axles, too much preload results in axle turning a bit harder – so also loosen tuning side the cone a bit.
If, which is more likely, the play has increased a bit, so that it exists on a thru axle, and for QR – it remains after tightening the QR mechanism, loosen the tuning side locknut, then screw its cone in for about 1/16 of a turn, then tighten the locknut.
Check for play, or if it is too tight, and adjust accordingly. It is a bit slow, tedious, iterative process. Just do it patiently.
Finally, tighten locknuts properly (completely – strong, but not overdo it so you don’t damage the threads), check for play again, just in case. If there is any, adjust the cones (first looseining one locknut).
And that’s it! 🙂
Note: bearings rely on proper preload to function. Without preload (if there’s play), bearings will quickly become damaged/worn. With too much preload, bearing balls will get worn more quickly and bearing will also become worn. That is why it’s important to set the optimal preload (and why the instructions for setting it were so detailed).
8. Video demonstration – cup-and-cone hub service
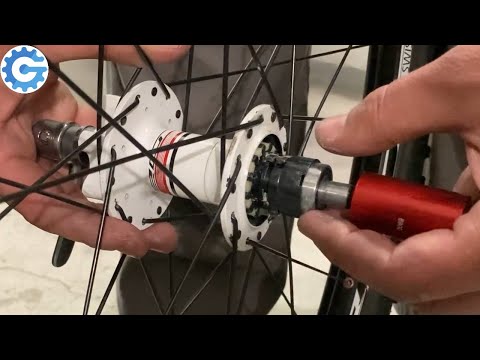
9. Cartridge bearing hub service – video demonstration
I’ve used a DT Swiss cartridge bearing hub to demonstrate the procedure for servicing those hubs:
10. Shimano Nexus Hub service (overhaul) – video demonstration
A step-by-step tutorial for a full Shimano Nexus gear hub service (overhaul):
– Longer version in Serbocroatian
Related post – Standard bicycle bearing ball sizes:

Last updated:
Originally published:
The existing comments posted under this article (questions and answers) have been moved to this BikeGremlin forum thread:
https://www.bikegremlin.net/threads/bicycle-hub-overhaul-service-article-comments.154/
After removing my road bike’s axels for maintenance and I found pitted cones :(, so they are due for replacement. I couldn’t find anywhere a number or model for ordering. Please advise how to identify the cone size/model.
Thanks
First thing I do is try to find the make and model – if they are printed anywhere on the hub.
Then I google, to see if manufacturer defines and offers spare cones. For example: Shimano does define all the parts of each product in their tech. docs.. They are often difficult (impossible 🙁 ) to source, especially locally, but at least you know exactly what to look for.
If that fails (either for not being defined and/or sold by the manufacturer, or for just not being available) – for me it’s a trip around the local bicycle shops with the damaged cone(s) – and comparing them to what’s available, trying to find the one that is the most similarly matched. Carrying axle along also helps – to confirm that the potential new cone’s threads are matching.
it can be very hard to find replacement cones and those cones vary so much in size on every wheel,they basically want you to go and buy a new wheel,what i do for any hard to find parts is go find any thrown away bent wheels,rusty old bikes and build my collection of parts that way,the bikes look very old rusty and damaged but they have so many good parts that you can clean up and use.alot of spare parts you just cant buy anywhere as we are now living in this throw everything away world,one reason i built up an older steel bike was all the parts are everywhere in my area as people throw away alot of older steel bikes,i just found one old mountain bike with stripped pedals then i found another old bike with the exact same old pedals,cleaned them up and put in some new bearings and grease and got two new sets of pedals for free,even changed out the stripped pedal.pedals were about 20 years old but now run perfectly.
in america they go dumpster diving for old bikes,in australia they will very often just lay 6 or so rusty bikes in a pile on the footpath or even ask you would you like to take away some rusty old bikes,thats my ebay and amazon shopping trip,free postage,free delivery,all the parts i need.some of those rusty old bikes even have good tubes and tires.i will pick up any rusty old bike,my friends even donate their rusty old bikes so i am most days saving rusty old bikes then i turn them into a rolls royce.
I find an indispensable tool for bearing work is a strong magnet – a rare earth magnet being best. It will fish out bearings that are hiding in a hub, find errant bearings that escape, and hold bearings and parts securely and in order.
Hi Stef,
Great tip! 🙂
I agree, magnets come in very handy.
With a note:
If I intend to reuse a bearing ball, I don’t use a magnet on it.
My reasoning is that a magnetized bearing ball is more likely to attract and keep any metal shards, or other ferrous dirt, so it increases the risk of pitted bearings.
I know that many mechanics use magnets and have no problems, but still, I prefer not to.
Colour me conservative (or OCD for that matter 🙂 ).
What about if hub is designed for 9 balls for each side and it has 1 ball gap. Is it wise to put more, not leaving a bigger gap. Will it give more smoothness or it will cause bearings to wear off more quickly?
Hi Mantas,you allways leave a gap on all loose bearing in a cup and system,at least a one ball gap,cheers
if you fill up the whole space you certainly will notice the difference and yes the bearings will run very rough.
i use the mechanic long magnetic tool,the one that has a spiral spring on it so you can fish out any bearings,bearings becoming magnetic is no issue,to make another bit of steel magnetic you would have to stroke a magnet up and down on it atleast a hundred time for it to become magnetic,i have been fishing out bearings with magnetic tool for many years