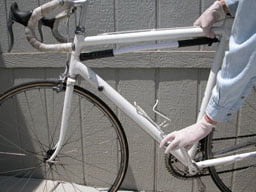
Knowing how to remove a bicycle wheel is useful in case a puncture needs to be fixed, or if a tyre, rear sprockets, or wheel itself need replacing. This post will explain procedure for rear wheel removal and mounting. For removing the front wheel, procedure is the same, there is just no messing with the chain. 🙂 Post that deals with a common reason for wheel removal: How to remove bicycle tyre and tube.
In order to remove a wheel, following steps are done:
For mounting the wheel the procedure is done in reverse order, putting everything back like it was. For the front wheel, the procedure is the same, except there is no chain and step 4 is needless.
1. Shifting to the smallest sprockets
If the bicycle doesn’t have more than one chainring at the front, or at the rear, skip this step and go directly to step 2.
If the bicycle has derailleur(s), when removing the rear wheel it is important to first shift to the smallest chainrings at the back and at the front. This can be done while riding, or when off the bicycle, by lifting the rear wheel with one hand and shifting gears while spinning the pedals with a hand, or foot.
Switch one or two gears with a shift lever, then spin the wheel so that the shift is performed (chain moved).
Repeat until the chain is on smallest chainrings. First at the rear, then at the front chainrings.
2. Releasing the brake
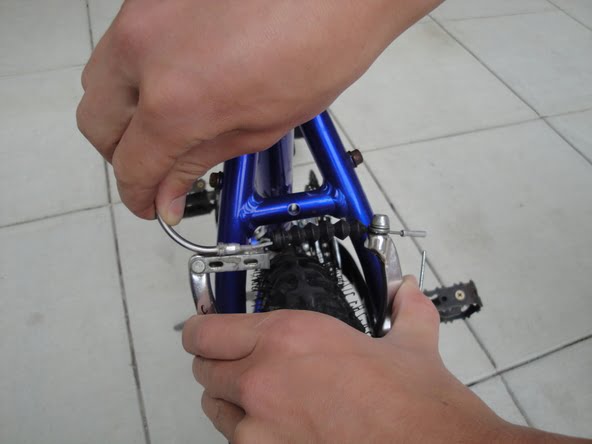
The procedure differs depending on the brake type. For all the brake systems that don’t use discs, there is usually a quick release system for releasing the brakes. If the quick release doesn’t work for any reason, it is always an option to just deflate the tyre. The wheel will then be squeezed out between the brake pads (with more or less hassle 🙂 ).
First screw barrel adjuster all the way in – there is usually one on the levers, or on the frame, or brake callipers themselves, or all of those.
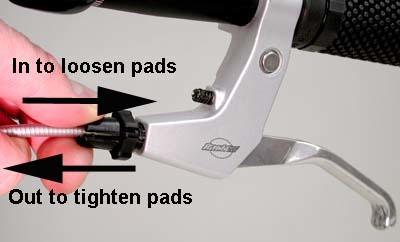
After replacing the wheel, make sure to readjust cable tension and screw the locknut all the way to the brake lever (or calliper, whichever is used).
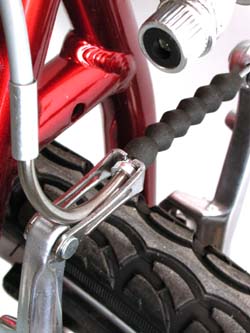
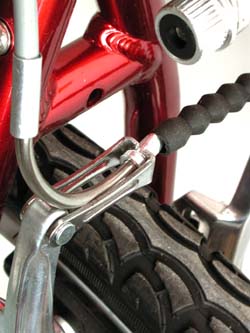
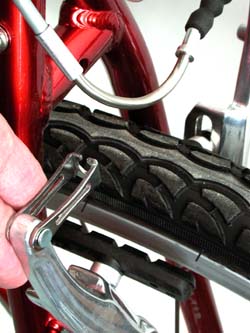
2.1. Cantilever brakes
If the callipers are squeezed together with one hand, the cable will become slack enough, so that cable can be removed from the left calliper.
For reinstalling the cable use the same procedure.
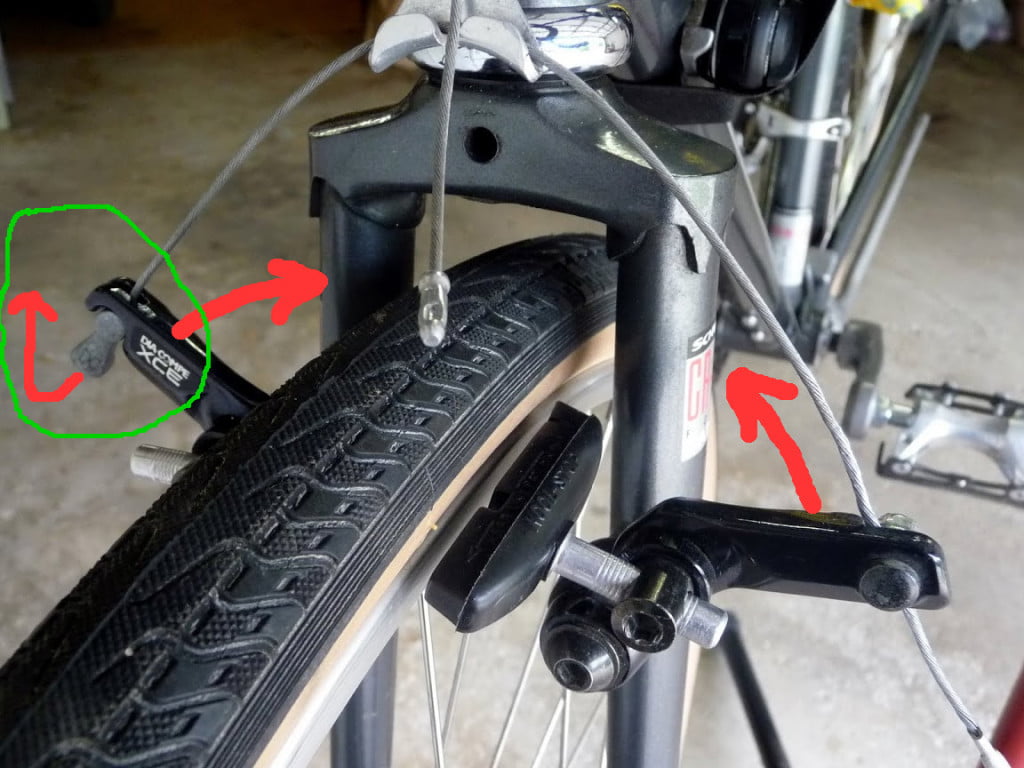
2.2. V-brakes
2.3. Coaster brakes
It is very important not to forget tightening it back after reinstalling the wheel!
If the bike has geared hub, gear changing cable needs to be detached. The procedure differs on the system used. Check service manual for the model on the bicycle.
2.4. Road brakes

2.5. Disc brakes
No need to touch the brakes here. 🙂 In fact the only thing to look out for is not to press brake lever while the wheel is removed. If that happens, brake pads will be stuck together and they must be gently separated with a (degreased) flat screwdriver.
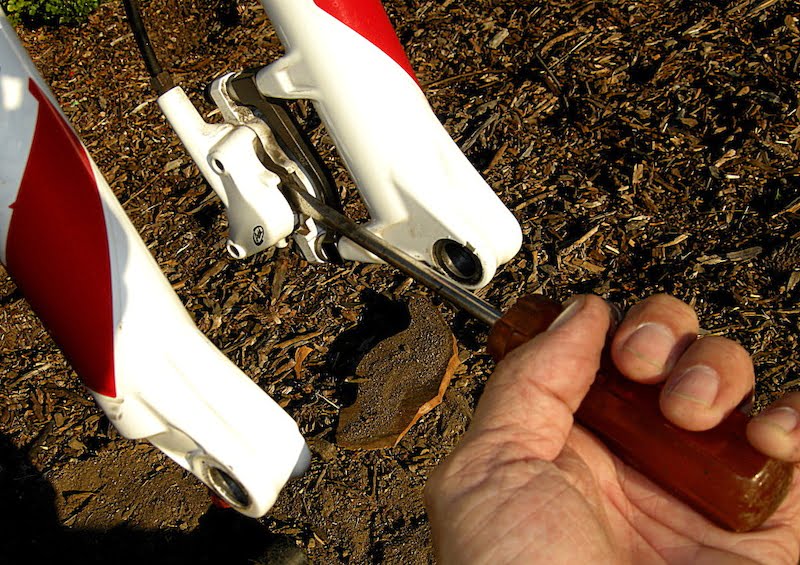
Gently, twisting left-right separate brake pads. Paying attention not to damage them.
Colleague Saša Grbić’s tip: when putting hydraulic disc brake wheel back, in order to keep the brakes aligned (if the pads were aligned before wheel removal): place the wheel in the dropouts, but keep tightening bolts (or quick release) loose. Pull the brake lever and hold the brake tight, while tightening bolts/quick release at the same time. This should keep everything aligned as it was before.
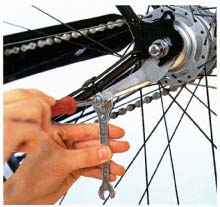
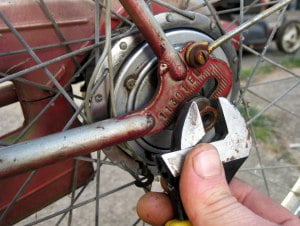
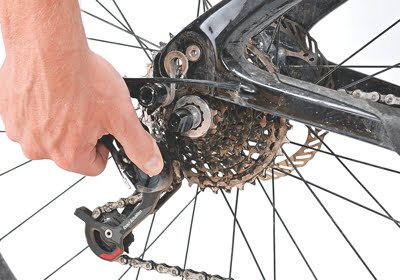
3. Releasing the axle
If the wheel is fixed with bolts, it is best to use ring wrench for better grip. 13, 14, usually 15 mm.
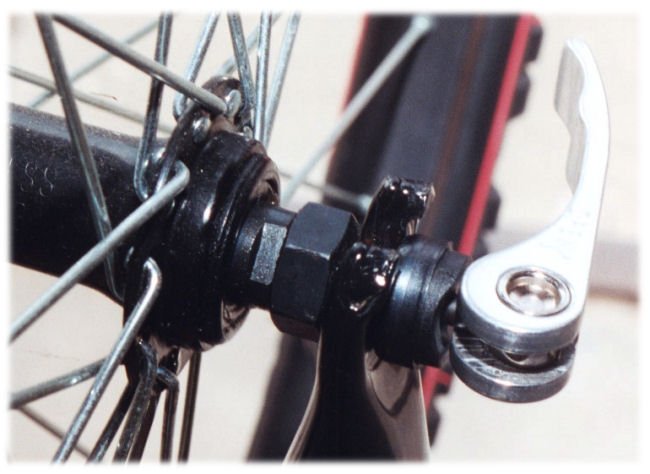
If the wheel has a quick release lever, just open it and unscrew the opposite side a bit just to loosen it – no need to remove the whole skewer.
When mounting the wheel, make sure it is properly seated in the dropouts, all the way.
With cheaper quick release mechanisms, make sure that the lever is well seated – so it doesn’t come loose when riding:
Video – how to properly open and close the bicycle wheel quick release mechanism
4. Removing the chain of the sprockets
If bicycle has a rear derailleur, it has to be pulled back in order to make room for the wheel to come out (and rear sprocket to disengage).
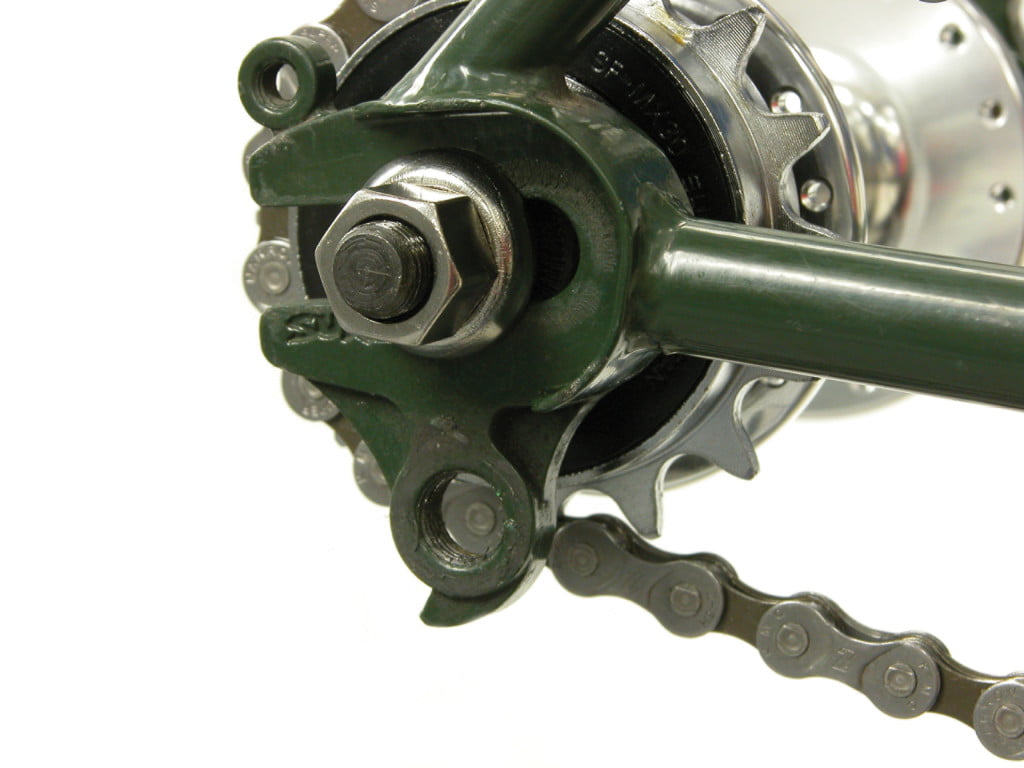
For single speed bicycles, the wheel is slid forward in the dropouts, so that the chain can be moved off the sprockets. The wheel is then removed.
5. Wheel removal
If previous procedures were done correctly, all that’s left is to pop the wheel out. 🙂
6. Jockeying wheel in the horizontal dropouts

Some people have problems with setting an optimal chain tension on bicycles with horizontal rear dropout. They find it hard to move the wheel just little enough to make it right. This is because they don’t use jockeying technique to move the wheel back and forth in the dropouts. Use the following procedure:
- Insert the wheel in the dropouts with loose wheel bolts. Put the chain over the chainrings, it should be loose as well.
- Wheel is then moved to the left – away from the chain. Non drive side bolt is therefore put slightly to the back. Then the non drive side bolt is tightened.
- Now the drive side bolt is moved back and forth to achieve desired chain tightness. Then it is fastened.
- Non drive side bolt is loosened. The wheel should now align itself if proper chain tension was set up. If it doesn’t align 100%, align it by hand. Then tighten the non drive side bolt and you’re good to go. 🙂
7. Video demo: wheel and tyre removal
My video demonstrating wheel and tyre removal, replacing a punctured tube, and putting it all back:
![How to fix a flat tyre on a bicycle [1020]](https://bike.bikegremlin.com/wp-content/plugins/wp-youtube-lyte/lyteCache.php?origThumbUrl=https%3A%2F%2Fi.ytimg.com%2Fvi%2FaX11CmCOdsU%2F0.jpg)
Last updated:
Originally published:
Very useful article!!Thanks for sharing!!!
Thanks, glad you like it. 🙂