A colleague I had cooperated with for over 15 years (worked together for almost 10, in two terms) decided to continue his career in a different company. We wanted to give him a farewell he deserves. A small farewell party was arranged, but some symbolic present was needed to complete it. We were thinking what to get. I said: “I know what he needs, what he would love to get, just not sure how appropriate that is”. 🙂
The man rides bicycle whole year long. He is tall and big and often rides his kids on the bike in child seats. He always had problems with rear hweels – either axles breaking, or spokes (or both). Whenever I explained what is needed and how much it costs to make a good, durable wheel, the answer was always: “that’s not cheap, I’ll look for a decent second hand one”. In time, he changed several wheels, can’t even count the spokes.
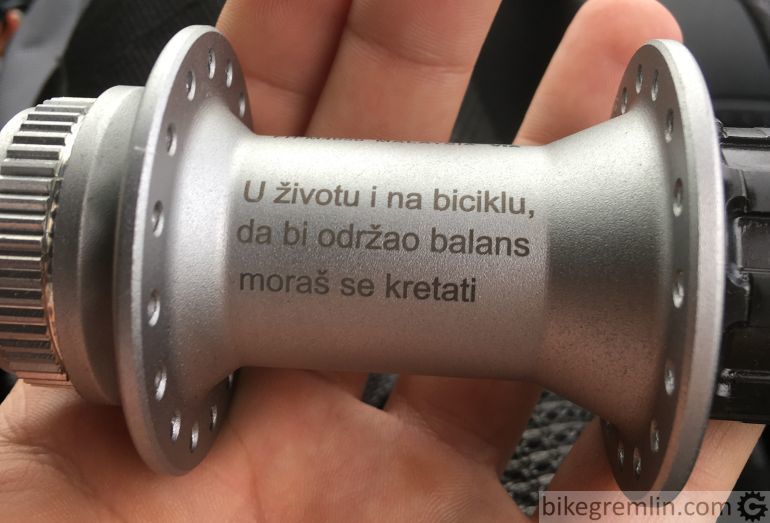
OK, you can guess now what my proposition for the present was. 🙂 One colleague came to an idea: we could make an inscription on the rim, or the hub, with a suitable quote he had found. That’s it! Since I consider rims an expendable resource (especially if using rim brakes), while good Shimano hubs last forever, with regular hub ervice, I decided to engrave inscription on the hub.
General considerations about wheel building, wheel strength and a demonstration of a building procedure are given in the article: Bicycle wheels – how many spokes?
1. Wheel component choice
1.1. Hub
For hub, I chose a freehub (instead of freewheel) mechanism one, since it is stronger (for details see: Bicycle rear hub). Also, for versatility, I decided to get a centerlock disk hub (since that mounting system is safer and superior design compared to 6-bolt type). In case, in the future, he gets a disc brake bicycle. So I went with Shimano Alivio FH-M4050 hub.
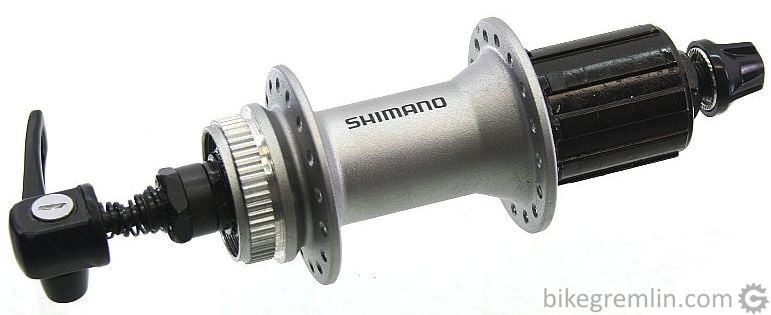
It was available only with 32 holes, although my first choice would have been 36. Serbian market… 🙁
1.2. Rim
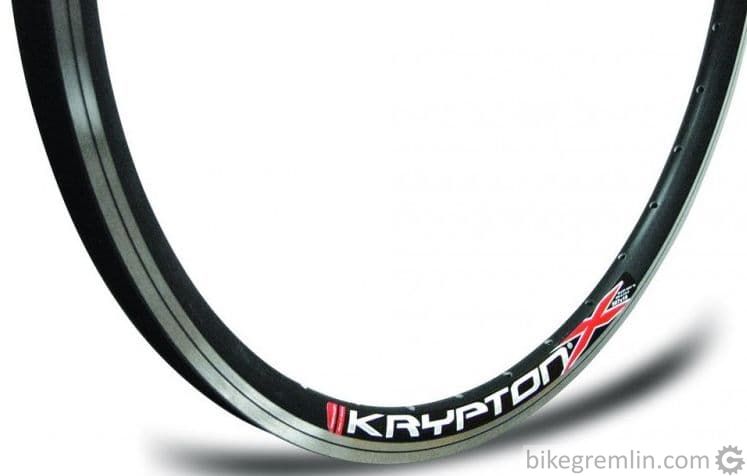
For rim I opted for Krypton double walled aluminium rim. Since there is not much choice for good quality rims here. Krypton is a bit heavier, but it is very strong. Minor manufacturing imperfections of the rim can be easily fixed, as shown in this video.
1.3. Spokes
Finally: the spokes. I tried to find DT Swiss, of SAPIM of the appropriate length. To no avail. None of the DT Swiss, or SAPIM distributors for Serbia had any in stock, nor knew when/if they will be getting any. I had already emailed both DT Swiss and SAPIM about this distributor problem and they just said to try the “nearby” Chech Republic. I think that is “lovely”.
So I had to opt for some better quality Chinese made spokes. But that did not end my troubles. My favourite spoke length calculator gave optimal lengths of 288.5 mm for right and 287.2 mm for left hand side spokes (if using 12 mm long nipples). However, the only dimension available, even for “not the lowest quality” spokes was 286 mm. Luckily, I had a solution for this – as will be explained later.
2. Challenges
2.1. Engraving inscription on the hub
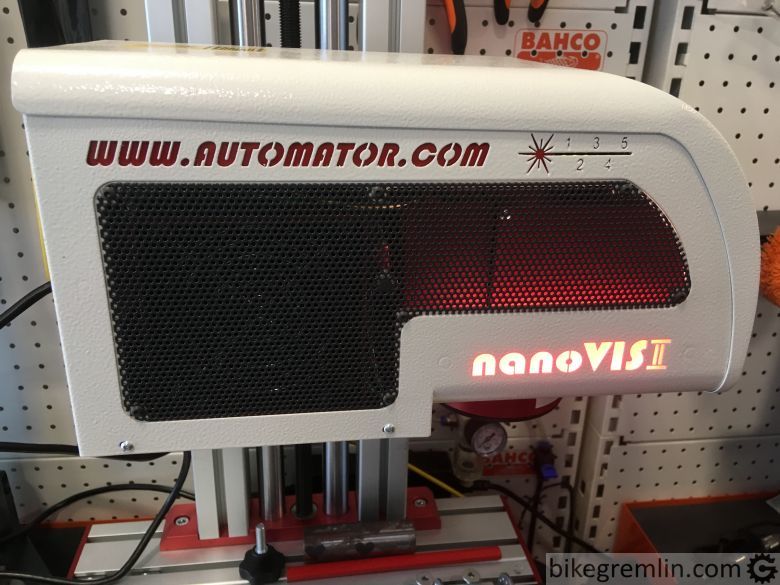
The first problem was how to engrave the inscription on the hub. I had remembered that Veltool company, from Novi Sad (top class people with who’s help I’ve been buying tools for years now) had a laser engraving tool – that they had proudly showed to me after buying it.
“Technik ist der unsere Welt” 🙂
I went there, explained what the occasion is and what I’m planning – and they were happy to help me. 🙂
They prepared text and font on a computer and then the machine started to do its thing:
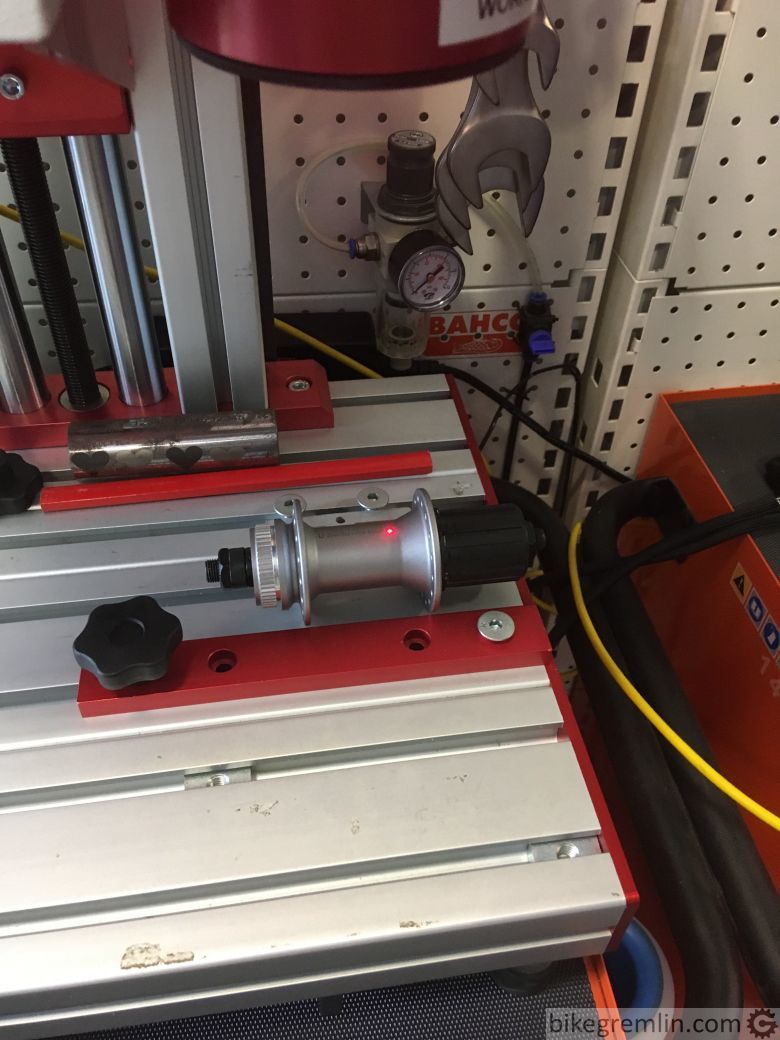
They did a top class job, paying attention so that the adonized aluminium hub surface doesn’t get burned even a fraction of a millimetre deeper than necessary for the engraved letters to be clearly visible. Additional challenge was the curved hub shape – and preventing the letters to be deformed as the laser beam meets it at different angles as it goes up and down along the hub. In the end, it turned out beautifully:
2.2. Compensating for improper spoke length
After this was done, I had to tackle the next problem: not having any spokes of proper length! Since this situation is usual for Serbia and I can’t afford to store thousands of spokes of various length at the shop, I did what I could: got lots of various length nipples – Sapim and DT Swiss, whichever I could find. Before that I had done a small experiment:

My apologies for the awful handwriting
So, if calculation gives a certain optimal spoke length, while I can only find 2 mm shorter spokes, if I use 16 mm nipples, instead of 12 mm ones, it will all be good, since the 16 mm nipples effectively “lengthen” the spoke by 2 mm.
14 mm nipples lengthen the spoke by around 1 mm. Which was the solution for the right hand side spokes (needed 287.2, got 286).
2.3. Solving the problem of different nipple lengths
For threading in the nipples I use a modified flat screwdriver, that has a 3 mm long pointy tip in the middle. That way, when nipple is threaded in, the driver gets pushed out by the spoke at exactly the same point with every one. However, when using 14 and 16 mm long nipples, the point would have to be 1 and 2 mm longer (respectively), otherwise spokes would be too tight right from the start.
Filing a flat screwdriver so it has 5 mm long pointy tip is a challenge. Instead of doing that, I did some maths. 🙂
Standard spoke thread pitch is 56 threads per inch. That is 56 threads per 25.4 mm. That is 2.2 threads per 1 mm (56 / 25.4). So, if I screw the nipple in with my modified screwdriver, then unscrew it by 2, or 4.5 turns, It will have moved back by 1, or 2 mm (respectively).
It is very important to start with a wheel that has equally tightened spokes, so figuring out how to do it is crucial for doing a good job. Afterwards it is easily just tightened further, again, equally (with small touch-ups).
3. Finished wheel
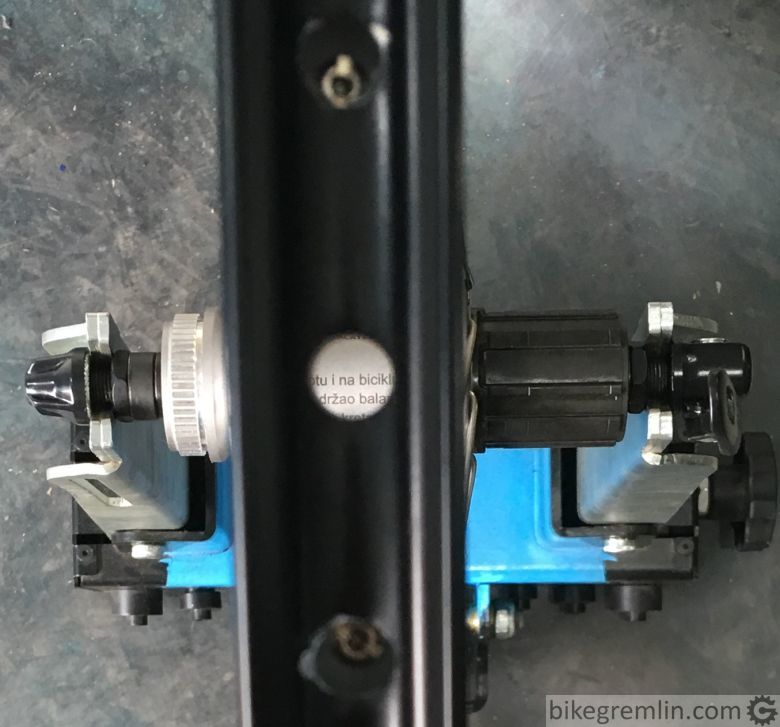
After having solved these problems, building the wheel was routine. I laced the spokes so that the inscription is visible when looking through the valve hole of the rim. 🙂
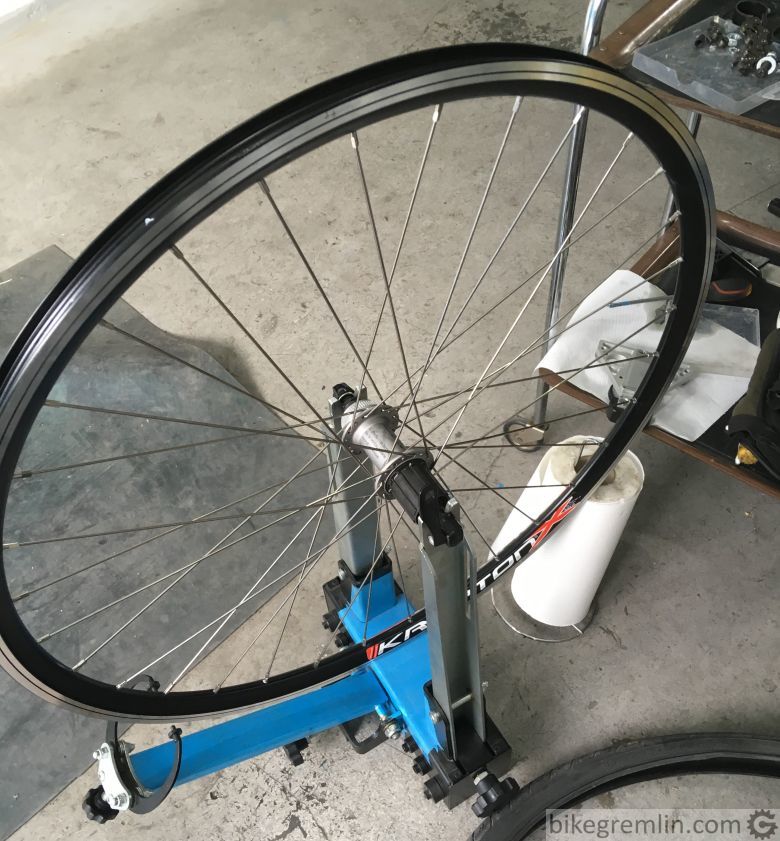

All the spokes were tightened sufficiently and evenly. Would have preferred swagged DT Swiss spokes, but I worked with what I had. Hope the wheel will last for years.
4. Experience after the first season of riding
In spite of the info provided in Roger Musson’s book Professional Guide to Wheel Building, on Sheldon Brown’s article about optimal spoke length calculation, as well as my previous experience, in this case, not even the good quality brass nipples didn’t survive the “abuse” of a heavy, strong rider on bumpy roads, without the spokes being screwed in all the way.
Because of a lack of optimal spoke length, I had opted for longer nipples. So we had the situation A in the picture below:
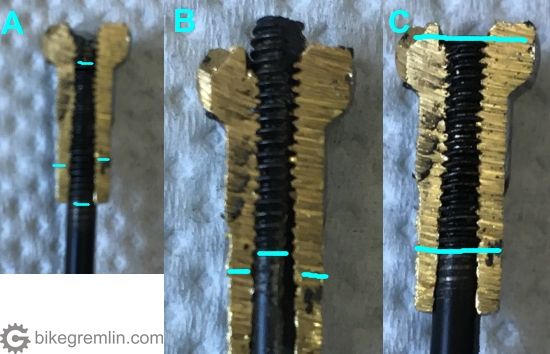
Because of the shorter spoke engagement, spoke pulled stronger on the lower part of the nipple, with the top part lacking the support on its hollow inside. Picture C above shows what it looks like with optimal spoke length. This resulted in two right hand side spoke nipples broken at their heads (right hand side spokes are under higher tension than the left hand side ones).
After few thousands of kilometres, two nipples broke at their heads (top part of the nipple). So now I’m looking for longer spokes (of the optimal length) and will be doing the same job again. With a good lesson and experience for the future. They say in my country that a man learns for as long as he lives (and still dies stupid 🙂 ).
Last updated:
Originally published:
Hello mr Relja.
I’ve just discovered your site a few hours ago …
while searching for “opinions” about cantilever brakes.
First, I was impressed from your ultra-clear explanations about mechanical brakes.
They are well organised and “boosted” by your drawings and pictures.
Then I reed about yourself, then Unior tools, …
and finally the rear wheel “created” for a long time friend.
This is very touching and “personnalized”, and the “kind of gift” I would have try to do.
It’s a nice and clever idea to use longer nipples. And to “modify” tools to work with them.
I’m sure that your friend will appreciated this … for the rest of his life,
or at least for the rest of this wheel_life (minimum 50 years !!! hi hi hi).
Keep on the good work !
Christian P.
(Please, excuse my “basic english”, because I’m a french-canadian from Montreal, Quebec, Canada)
Hi Christian,
Thank you very much for the kind words and sharing the appreciation and fascination with bike mechanics. 🙂
P.S. I’m sure your English is still better than mine. 🙂
Relja
You’ve built quite a resource for riders! Trimming long spokes is easy with a Dremel cut-off wheel. With your calculations, you could even do it before lacing the wheel. I’ve had wheels that were trimmed _after_ lacing (not by me); not ideal since the nipple slots are often ruined.
If spoke threads are long enough to engage fully inside the nipple – than that’s fine. For most double walled rims, there’s even no need to cut the spokes shorter – they can just be left as they are. With a few caveats:
Cutting the spokes shorter before lacing will make initial tightening more difficult to do evenly. Unless one cat cut them all evenly, to within a fraction of a millimetre.
While leaving them as they are (if they are too long) will make lacing a bit more difficult.
Also, if spokes are more than 2 mm too long, then lower nipple threads often get ruined by the spoke – since they end on a part of the spoke that has no threads. Which results in more difficult wheel building, and less good spoke to nipple engagement.
presta vs schrader valve,if you do not like running presta valve tubes in your bicycle rims you can drill these out to take american schrader valve tubes,commonly known as car valve tubes, they do make 700×19-23 tubes with schrader valves,innova,schwalbe,cst,xtech makes these tubes,presta valves will hold much higher air pressures than a schrader type but if you have older retro style skinny alloy box rims these schrader type tubes are fine running on 85 psi,a schrader type tube is more reliable,i have succesfully drilled out many presta valve holes on skinny alloy box rims and modern double walled alloy rims,its does not effect the rim at all,i have been doing this for many years now and not one rim has failed.