Explanation of various hand positions and grips on the bars is in this post: Road bar hand positions
In case no set up enables comfortable position, perhaps a bar with a different shape is needed. This post explains different road bar geometries: Road bar geometry
This post addresses setting up drop bars (road bicycle handlebars). Many people, especially those used to flat bars, coming from city, or mountain bikes, have problems setting up comfortable position on a road bike. Some things are not intuitive enough and require a lot of experience, trial and error to get them right. This article is a shortcut. 🙂
If you have any questions (or additions and corrections), please use the BikeGremlin forum:
www.bikegremlin.net
Table Of Contents (T.O.C.):
- Starting notes
- Available bar adjustments
1.1. Bar height
1.2. Steering axis distance
1.3. Bar angle adjustment - Position adjustment
2.1. Bars height
2.2. Bars angle
2.3. Stem length
2.4. Test ride
2.5. Adjusting brake levers position
TL/DR
Here I’ll try to help you get comfortable on your road bike. Briefly put:
Road bar setup it not very intuitive, so I recommend a “general” setup that works for most people. Even if that doesn’t work for you 100%, it is a good starting point for fine-tuning the setup to match your body and preferences.
I also hit the high-points of the common discomfort and pain causes.
Make sure to do one change at a time after the initial setup (slower and gradual does it) and ride a lot in between changes to test and confirm if your comfort is improved, or you should make adjustments in the opposite direction. 🙂
0. Starting notes
- This sounds stupid and obvious, but: don’t adjust handlebars while riding. If you get impatient and tempted to try a new angle for example as soon as possible, on the go, remember this. Make sure all the bolts are fastened tight before going for a test ride. Always.
- Don’t make adjustments away from home. I case a bolt threads strip, or a cable gets pinched, snaps – it is better not to risk being left stranded on the road. Preferably make adjustments during local bike shop working hours – just in case. 🙂
- Get proper tools before starting. In the “heat of the moment” one can easily reach for a small flat bladed screwdriver in stead of a phillips, for example, “it will hold”. So inspect all the bolts on and around the handlebars and make sure you have all the right tools. Usually it is allen wrench 4, 5 and 6, flat and phillips screwdriver 1 and 2. But do check.
- When tightening, if you don’t have experience, use a torque wrench and follow producers torque recommendations. This is critical with carbon parts.
- If moving brake levers, bar tape will need to be unwrapped, then wrapped back again. It does get damaged when doing so. Do a few test rides to make sure the fit is right, before putting a new tape on the bars.
1. Available bar adjustments
Adjustments can be made to bar height, distance from the steering axle (and saddle), and angle.
1.1. Bar height
Depending on fork type, there are two standards and two ways of height adjustment. Explanation how to adjust height can be found in this post: Bar angle and height adjustment.
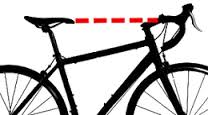
1.2. Steering axis distance
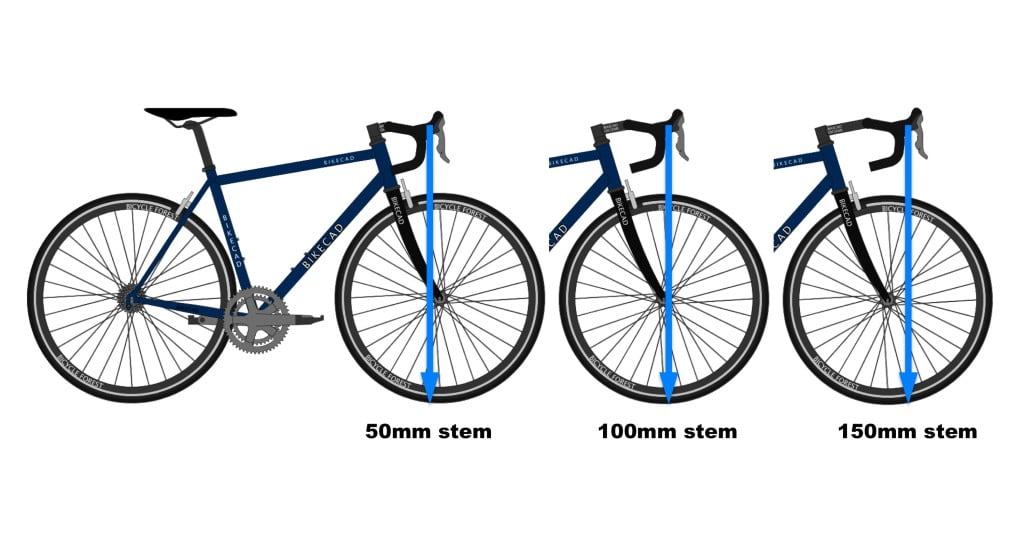
This is altered with changing the stem (length).
1.3. Bar angle adjustment
By loosening bolts holding the bars to the stem, bars can be rotated upwards-downwards.
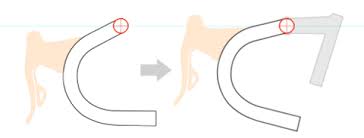
Bars on the right are rotated upwards compared to the ones on the left.
2. Position adjustment
Before adjusting bars, make sure the saddle is properly set up, using these instructions: Setting up riding position – bike fitting.
2.1. Bars height
Set bars height so that top of the bars is about one or two cm below saddle height.
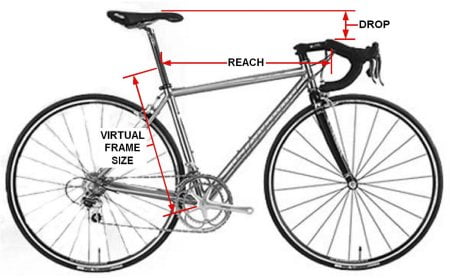
For riders who aren’t super-fit or competitive: if you can’t comfortably ride in the drops, it can be a good idea to set the top of the bars a few inches above the saddle height. That way, you will be able to use the drops normally (which allows you stronger braking and a more stable grip). If reaching the drops is a problem, or if pedalling when in the drops isn’t comfortable or possible, there’s no shame in raising the bars. I see far too many road cyclists using the tops exclusively, even during descents, because the bars are set too low for them (pun not intended 🙂 ).
“Aggressive,” racer-like low bar height shouldn’t be used if it’s not beneficial to the rider. A bike should fit you, not the other way round. Besides, you get more aero, and finer control, if your bars are set high enough for you to reach the drops with bent elbows, than if you have to stretch your hands straight in the elbows in order to reach the drops.
2.2. Bars angle
Start with loosening stem bolts that hold the bars, so they can be rotated.
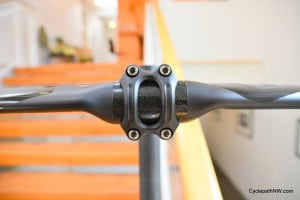
Loosen them all equally by little.
When fastening, fasten the opposite bolts, until all are tight.
Sit on the bike (make sure it’s stable and stationary) and place hands in the drops. Rotate bars to a comfortable natural position.
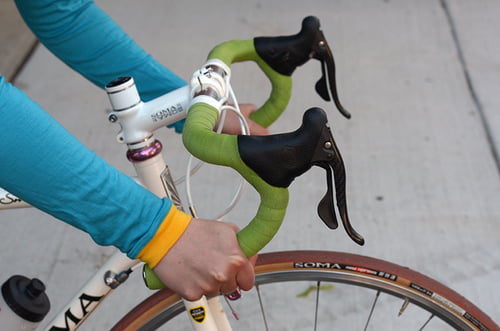
Don’t worry about brake lever, just rotate the bars so they are comfortable and feel natural in the drops. Set position and fasten bolts. Comfortable position is usually when the lowest part of the bars is parallel to the ground, or points slightly downwards (towards the rear wheel axle, or a bit higher). But the only correct position is the one that feels comfortable and natural to the rider.
2.3. Stem length
Sit on the bike, hold the bars in the drops, with hands slightly bent at the elbows. The bars should be blocking the view of the front wheel axle – it shouldn’t protrude from the bars by a lot in any direction (in front or behind).
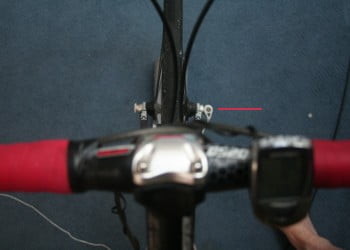
In the picture, up is the front side of the bike.
This stem is on the border of being too short, but not too much of axle protrusion is visible so it’s probably acceptable.
- If the wheel axle is too far in front of the bars, the stem is probably a cm or two too short.
- If the axle is far behind the bars, the stem is too long for a few cm.
This is just a guideline method. Only extreme misalignment should be dealt with. If it’s like in the picture above, don’t change the stem before a long test ride and doing some other tweaks explained here. The most valid test is a test ride. If during a test ride, rider feels cramped, like bars are too close and the front axle is seen in front of the bars (like in the picture above), stem is definitely too short. If, on the other hand, the rider feels too stretched in order to reach the bars and the front axle is visible closer than the bars (opposite side to the one in the picture above), the stem is too long.
What this looks like is shown and explained at 7:40 to 11:20 in this video (it also explains road bicycle frame sizing):
2.4. Test ride
Now take a test ride. Check if all the bolts are tight. The emphasis is still on the drops. Brake levers should be left as they are for now. This position should be comfortable for over 20 minute ride period (in the drops).
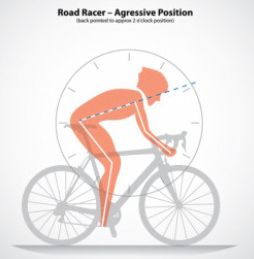
Torso is almost level with the ground.
Less flexible riders might prefer bars a bit higher set.
If the neck is stiff from looking ahead and bending it during riding, bars could be set too low. Try raising them for a few cm and try again.
If there’s pressure on palms and hands, first check if the saddle nose is tilted down. If it is, make sure the saddle is level with the ground. Then, check if the saddle isn’t placed too far forward in the post rails. Perhaps a post with a (bit more) setback is needed. If there is hand pressure with a saddle level, move the saddle 1 cm behind KOPS position for a start.
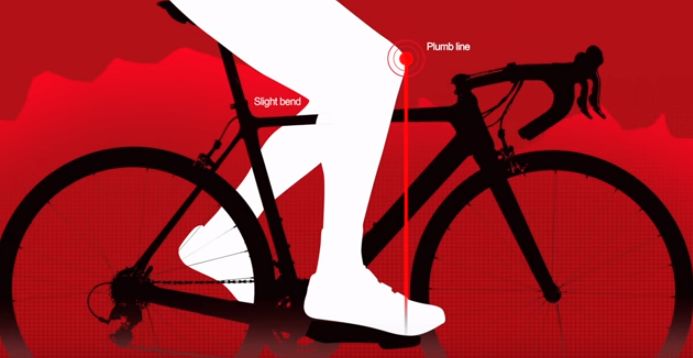
When pedals are parallel to the ground, knee cap is right above pedal axle.
Then take another test ride. If the pressure on the hands persists:
- if the top of the bars is level with the saddle (or even higher), lower them for a few cm.
- if the top of the bars is lower than the saddle, first try lifting bars for a few cm.
Now check for bar angle once more, step 2.2. Take a test ride again and see if the situation is better or worse. If it’s gotten worse, then change bar height back to the way it was, and then further a few cm in the opposite direction (if it was lowered, raise it and vice-versa).
After a number of iterations, a comfortable drops position will be found. Give it time and patience, don’t expect to get it right at first. Just make sure you’re making progress, getting comfier and more natural with each alteration. Experienced bike fitters can often just by looking at a rider on a bike get a 90% of the optimal setup – so the rider can just do minor tweaks later.
After a comfortable position in the drops was found, it is time to set up brake levers.
2.5. Adjusting brake levers position
Unwrap the bar tape, then loosen clamp holding the levers. The procedure of loosening the clamp differs with type of brake levers. Check the user manual for the model on your bike. Usually it is a 5 mm allen screw, but not always.
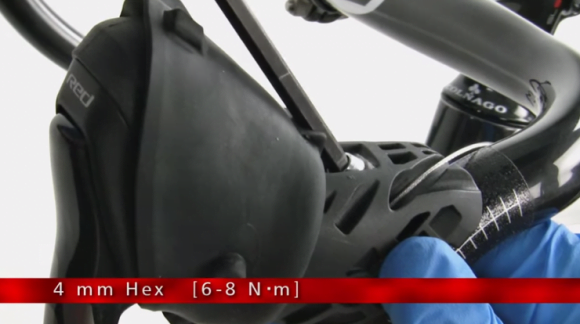
Next, set levers so that the top part is level with the ground, or pointing upwards by a few degrees. Never pointing down. Brake levers should be about vertical. Remember to tighten the lever clamps.
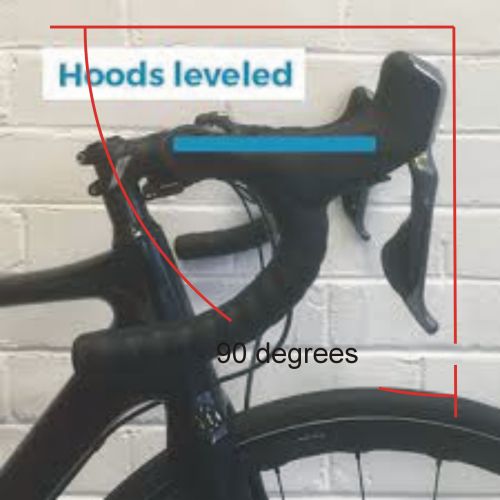
Bars in the pics above are modern, compact handlebar geometry. The hoods are almost in line with the top part of the bars before them. With classic curved bars, there will be a drop before the levers, which are mounted to be level on these bars as well. Here’s what it looks like:
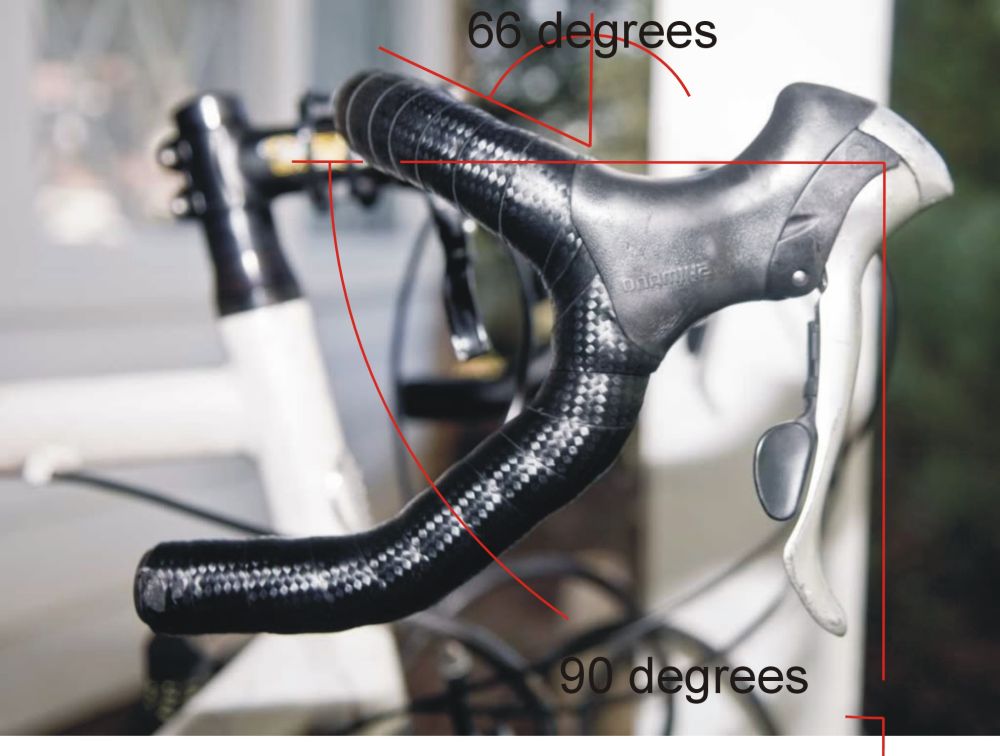
Because of different bar shape, it appears as if levers are pointing up, more than they actually are.
Some riders prefer this curve. Other prefer tops to be flat – in line. Changing this requires bar change. 🙂
When it’s set up like this, levers are easily reachable both from the drops and from the tops (hoods). Riders with smaller hands might prefer setting brakes so that pads start braking when the lever is pulled by a cm or more, when they get the hold of the levers with whole fingers.
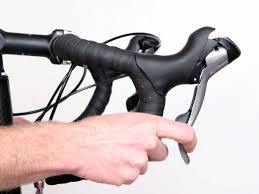
MAKE SURE not to overdo it, there must be enough lever travel left for hard braking!
Brake lever setting up put into numbers, just for orientation:
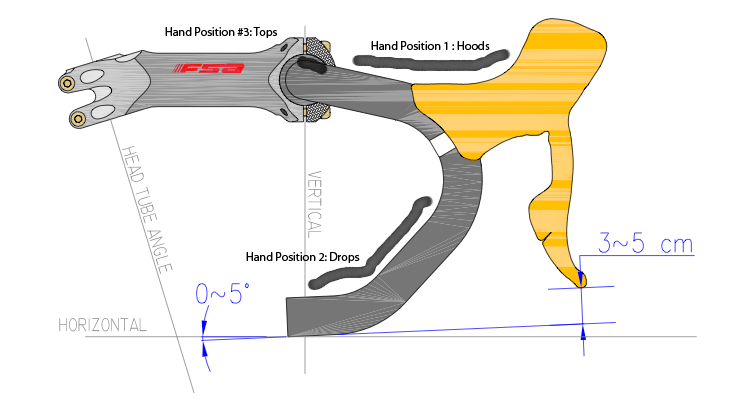
This is just for orientation, some average, “perfect” positioning.
Here’s what should be gained in practice:
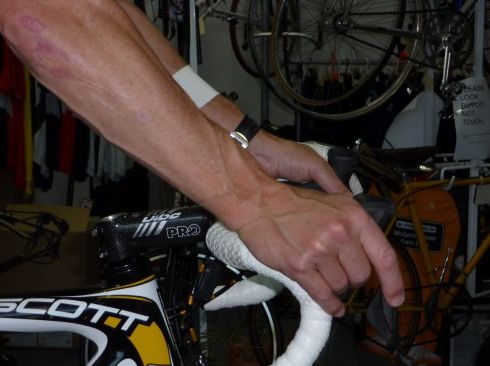
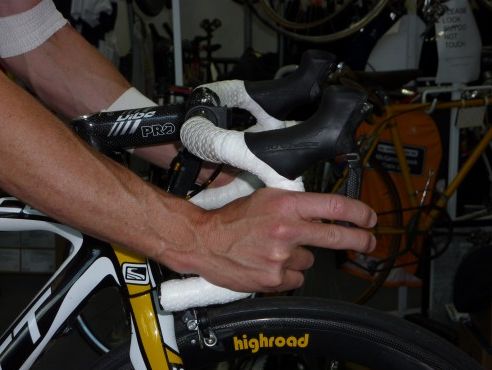
Finally, a “secret” that not everyone tells: levers can be set to be 100% natural and comfortable only for one position: hoods, or the drops. The other grab will be about 80% from perfect when everything is set up correctly. So either choose which position is more important to be set up perfectly, or go for a compromise, with both positions being about 90% perfect, but not 100%.
Help BikeGremlin
stay online & independent
This website is educational, free, objective, and not commercial
(sponsors don’t enjoy paying if you mention all the product downsides that you notice 🙂 ).
How much does a WordPress website cost?
If you find this site to be good and helpful,
and if $5 per month is what you can afford to set aside,
please consider supporting my work with a Patreon donation:
My video explaining the basics of bicycle fitting, and frame geometry differences:
Related post – “Stack and reach” – the “real” size of a bicycle frame:

Author’s choice for bars and bar tape from Amazon.com (click on the image to open Amazon shopping search). As an Amazon Associate I earn from qualifying purchases.
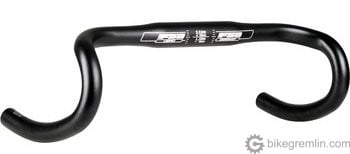
Given widths are measured from end to end of the bars.
Durable and comfortable to hold, even with sweaty hands.
If you have any questions (or additions and corrections), please use the BikeGremlin forum:
www.bikegremlin.net
The existing comments posted under this article (questions and answers) have been moved to this BikeGremlin forum thread:
https://www.bikegremlin.net/threads/setting-up-drop-bars-article-comments.155/

Ty so much this! It helped a bunch!!
Glad to hear it. You’re welcome. 🙂
When adjusting just the handlebar angle, i don’t have to undo the bar tape right? Coz the angle lof my handlebar is a bit up, and i’d like to make it neutral.
No need to touch the bar tape, unless moving the shifters/brake levers up, or down. However, any significant change of bar angle might also call for lever re-positioning.
Looking at the lever angle, it is actually perfectly positioned with the bar if they were in a neutral position. So i think i can move the bar without repositioning the lever.I’ll give it a try. Thanks for the reply.
Sounds good. 🙂
With the risk of stating the obvious, just in case: even in the “worst case scenario” – you don’t have to unwind all the tape – just from the top, to the levers (or including one turn just below them if moving them downwards).
Hi guys, good explaination about setting handlebars, I’d like to know your opinion about my set up, can I share with you a photo of my bike with new handlebar? How can I send you a photo?
I’m looking forward to hearing from you soon
Thanks
Antonio
Hello,
This free service is what I use for easy uploading images for on-line sharing:
https://imgbb.com/
You could also try bikeforums.net – road bike section:
https://www.bikeforums.net/road-cycling/
There, it is possible to hear many different opinions, not just mine.
Relja