
This post explains a proper braking technique on a bicycle. How to stop in the shortest possible distance, how to use front and rear brake correctly. Separate posts explain mechanical brake working principle, and pros and cons of bicycle disc brakes.
Table Of Contents (T.O.C.):
- What are the brakes used for on a bicycle?
- Braking weight transfer and tyre traction
- Using brakes to control a bicycle
- Hard braking
4.1. Won’t I fly over the bars?
4.2. What to look out for?
4.3. What if a wheel starts to slide? - When to use (with greater force, or) exclusively the rear brake?
1. What are the brakes used for on a bicycle?
Apart from the obvious: braking and stopping, brakes are also used for controlling and steering the bicycle. This latter use is a bit advanced riding technique, but worth mentioning.
In order for brakes to fulfill safety criteria and allow better control of a bicycle, they need to be present at both wheels in two separately working systems, so that each wheel brake can be controlled independently and in case one brake breaks 🙂 there is a backup. Both these functions are important!
2. Braking weight transfer and tyre traction
The first thing that happens when brakes are activated is a weight transfer – to the front wheel. The harder the braking, the more weight transfer there is. This affects handling and wheel traction. Once braking is started, front tyre gets loaded and has a better grip to the road surface, while the rear is unloaded and has weaker grip.
That is why, once a braking is started, with both brakes, one should gradually release the pressure of the rear brake, since the rear wheel is gradually loosing traction as the weight is transferred. Simultaneously, one should gradually increase the pressure on the front brake – to use the weight transfer to the front tyre and resulting increase of front tyre traction. Even when braking hard and doing this in split seconds, it should be done gradually – fast, but gradual.
Using brakes gradually and minding traction is important because, while a rear wheel slide can be controlled, a front wheel slide usually ends with a fall. This, however, is not a reason to use the rear brake only, because it has a lot weaker stopping power and will cause rear wheel skid quickly – it is a reason to practice controlled, but hard braking with a front brake.
3. Using brakes to control a bicycle
A typical example is making a tight u-turn. Rear brake only is used to control the speed when doing such slow manoeuvres. Using front brake causes abrupt leaning of the bicycle towards the inside of the turn, perhaps even causing a fall.
Trial technical riding sometimes requires alternate locking of front and rear wheels – so both brakes are used, one at a time.
4. Hard braking
Many cyclists mostly rely on the rear brake. In case of a sudden need for hard braking, rear wheel doesn’t provide nearly enough stopping power (due to loss of traction from weight transfer when braking). If such cyclist decides to use front brake, without practice and experience, it often results in a fall.
Another common mistake is treating the brakes as an on-off switch. Brakes, in fact, are more of a fine tuning regulator. They can be squeezed harder and released a bit – finely regulating the required braking force to the available wheel traction, weight transfer, and the desired speed/slowing down.
Proper hard braking technique is the following:
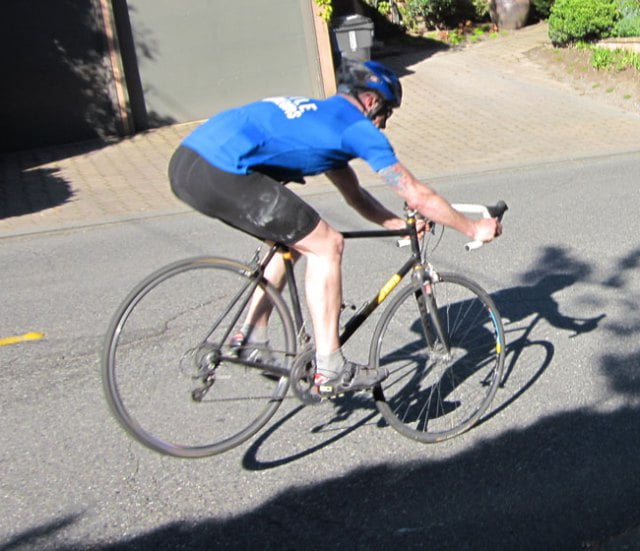
- Shift weight to the rear
- Arms are bent at the elbows – allowing better shock absorption, control and grip of the front tyre
Body – weight moved to the back as much as possible.
- Slight pressure on the rear brake – a split second before activating the front brake too (weight starts being transferred to the front tyre, providing it a better traction before the front brake is activated).
- Strong and quick pressure on the front brake, with progressive increase. A move like squeezing a lemon – no jerking, but swift, with gradual increase.
- Rear brake stays just feathered after initial light pressure, just enough to slow the rear wheel inertia.
Explanation: as the braking starts, weight shifts towards the front wheel. Rear wheel has very little traction left, so slowing it down can only result in sliding the rear wheel, but won’t slow the bike down significantly.
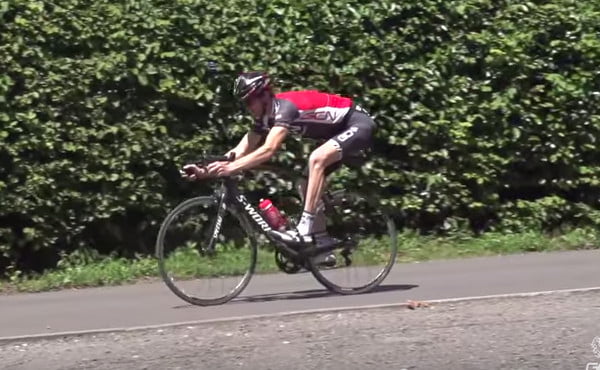
Hard braking on a downhill.
Rear wheel is literally lifted off the ground.
Thanks to proper body position and braking technique, there is no risk of “flying over the bars”.
There is also little sense of applying the rear brake at all. 🙂
Good exercise (best performed on an empty parking lot) is to try riding at some moderate speed, then braking with rear brake alone, as hard as possible. The rear wheel will easily start skidding, and it will take some distance to stop.
Then at the same moderate speed try braking with the front brake alone. First moderately, a few stops. Then just a little bit harder. Then even harder. With moving body to the rear and bent elbows.
Speed and braking should be such that the rider is never scared, just so that weight transfer and brake behaviour can be felt.
Is the stopping quicker with the front, or the rear brake?
Finally, practice using both brakes. Rear wheel should be kept below the point of skidding (when a wheel skids, it provides very little braking and traction). Majority (99%) of the braking is done with the front wheel. As the weight is transferred forward, the front wheel gets more traction, allowing for even harder braking. The critical point is just before a complete stop. A fine border must be found between front wheel sliding and hardest possible braking.
With enough practice, this becomes a second nature… just like riding a bike. 🙂 It will be repeated: brakes should be treated as increase-decrease instruments, not as on-off switches. Squeezing them in and out, with feel and mind of traction makes the best stopping distance and safest braking.
4.1. Won’t I fly over the bars?
Front wheel provides over 90% of stopping power. That is why it is important to practice weight transfer and control of the front brake. Many novices are afraid of flying over the bars when using the front brake. With good braking technique, this doesn’t happen, unless the rider deliberately shifts the body forward, making the bike stand on the front wheel.
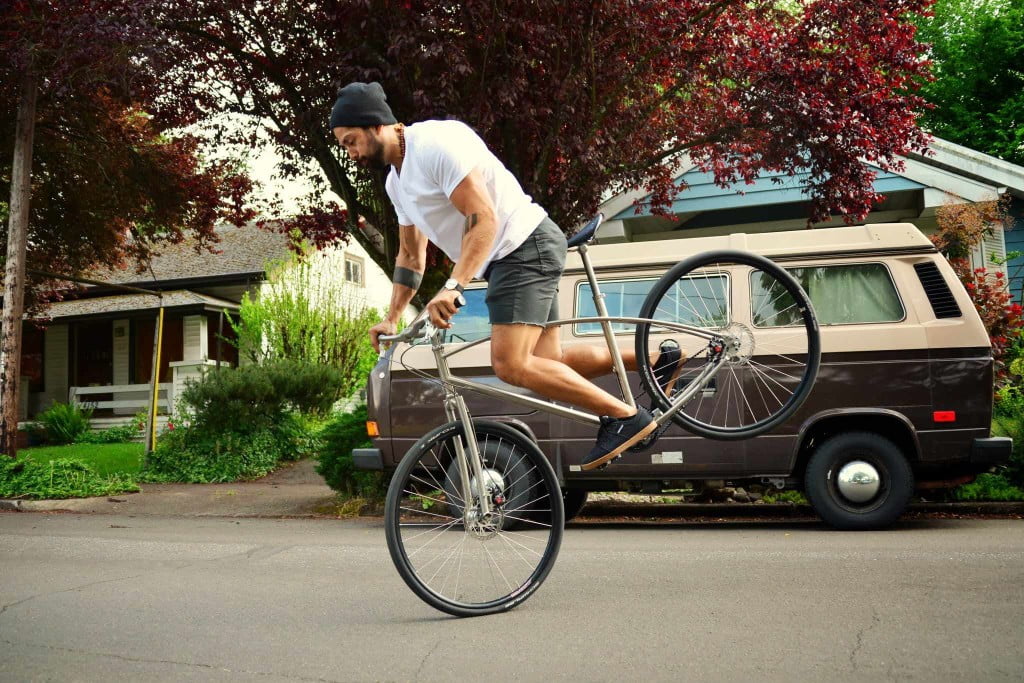
Body is deliberately moved forward (saddle is behind the rider).
Front brake is jerked, not squeezed.
As long as the weight is transferred towards the rear and hands are bent but the rider is holding strongly resisting the inertia, there is no risk of flying over the bars.
4.2. What to look out for?
If the bicycle is leaned, or the surface is slippery, hard braking with the front brake can cause the front wheel to slide. While a rear wheel slide can be controlled, a front wheel slide often causes a sudden fall. Practice makes it possible to feel when a wheel is about to slide, so ease the brake a little bit (but not release completely, no need).
A quick and safe way to test surface grip is to try using rear brake alone when riding at moderate speed. Rear wheel slide is not that dangerous and it can easily be felt how easily the slide happens.
It is important to watch out for overheating of brakes and tyres, which is explained in the post: Bicycle braking technique on long descends.
4.3. What if a wheel starts to slide?
If a rear wheel starts to slide, the proper action depends on whether the rear end of the bicycle has moved significantly sideways. If the rear end has moved significantly to the side, it is often better to leave the rear brake and the tyre locked, than to release the rear brake, since that could cause the rear tyre to “bite” the surface again, abruptly throwing the bike and the rider to the side where the rear end was sliding (and has now abruptly stopped sliding). In case of a minor rear end slide, ease off the rear brake.
If a front tyre begins sliding, immediately decrease the pressure on the front brake. There’s usually no need to release the brake fully, just decrease the pressure, ease off a bit.
5. When to use (with greater force, or) exclusively the rear brake?
For riding in mud, snow, or ice, front brake shouldn’t be used. However, in these conditions, sudden hard braking is not possible.
On harsh bumpy roads, wheels can bounce. If brake stays applied when the wheel lands, it can skid. This is another situation where rear brake alone should be used, with very moderate (if any) front braking applied.
Other situations when using front brake should be avoided are the following: flat front tyre (of very low pressure), bad front brake, bent front rim (if using rim brakes), bent front disc (if using disc brakes), unknown bicycle or road surface.
When I was about 12 I inherited an old bike, relaly old bike. It had been somehow neglected. I took it apart piece by piece. Even each individual ball from the ball bearings, and the bearing surfaces I cleaned with gasoline, dried and packed with new grease. Same with the steering and the three speed sifter. I undid each bolt and each part and reassembled it. I think I had greasy components on the house for months, lol. How mom dealt with that I don’t know but I had a pretty nice bike at the end. If you have rust in the frame you need to sand the metal clean. Do not ride a rusty frame. To sand the rust and the paint start with a 400 grit sand paper, to get most of it and then more sanding with a 600 grit or 800 grit to leave no scratch marks from the sandpaper. Use a mask while sanding. In the old days, you would use a torch to add some metal where the rust had eaten some away, now you can use a paste that will reinforce that, something like epoxy that actually makes the metal as strong as new. Then you need to prime and paint.You can put the chain in a coffeee can with gasoline to soak for a few days, if it has no wear, oil again and reuse. Instead of gasoline you can try cleaning it with a degreaser that is lemon based, better for the environment. You will need new tires, rubber desintegrates with age.At the end, even if the bike is not your size you could sell it and buy what will work for you. In the process you will learn quite a lot from such a project. Seems like too much work? It provably is.
For me all the work pays off – you learn.
However, not sure how this comment relates to braking technique. 🙂
Regarding that last section (5- when not to use the front brake), there is one exception to the proscription for front brake use on snow and ice. When the bicycle is equipped with studded tires, the front brake can be used effectively. This will depend to a great extent on the composition of the snow/ice mix and its temperature, so some familiarization is necessary with the particular conditions. But generally the front brake can be used to a significant fraction of its potential.
Good review of braking technique!
Good point. Though that’s why the heading bracket has (with greater force, or exclusively).
Might edit the text to be more precise. It boils down to one’s ability to determine the front wheel (tyre) traction.
An excellent article!