This post explains how to check when buying a used bicycle.
Tips for choosing which type of bicycle to buy can be found here: Which bicycle type suits my needs.
Choosing a correct size: Real frame size.
Choosing equipment class (Deore, Ultegra, SRAM, disc brakes etc): Which bicycle to buy.
BikeGremlin buying guides:
- Road bicycle buying guide
- Mountain bicycle (MTB) buying guide
- Trekking bicycle buying guide
- City bicycle buying guide
- Commuting bicycle buying guide
- BONUS: Is it better to buy a new or a used bicycle?
- Kids’ bicycles – how to pick the right size?
Table Of Contents (T.O.C.):
- General first impression
- Frame condition
- Symmetry – alignment and wheel trueness
- Bearings and wheels
- Brakes and derailleurs
- Test ride
1. General first impression
Is it day, with good daylight? Try to check bikes during good daylight if possible.
How does the bicycle look? It doesn’t have to be all shiny, but does it look OK, rideable? Does the seller and the place where bicycle is stored look decently? Trust your instincts, if something doesn’t feel right, it probably isn’t, you just can’t put a finger on it yet. Thank them for their time and leave.
2. Frame condition
Frame can be all muddy, with lots of stickers etc, but you must confirm in which state it is beneath. If needed, see with the seller if you can clean the bike and remove stickers (if there are many big ones), or don’t buy the bicycle.
Frame mustn’t have any dents. Any. I can not stress this enough. Steel frames can be fixed, but not always and let the seller do that – before you count the money.

Don’t buy it.
Frame dents can also be checked by running hands along the frame tubes. This is especially useful in poor lighting conditions. Though it is best to check bikes in good daylight.
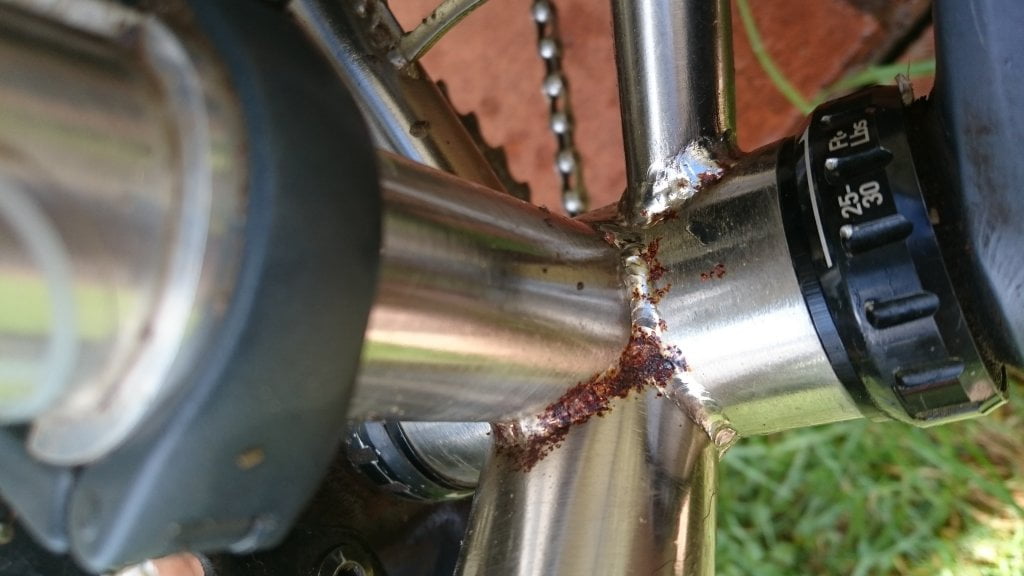
Steel frame mustn’t have any rust. If you aren’t expert to tell whether it is just surface rust and can be fixed, don’t buy it. If you are, just bear in mind that for painting the frame, all the components must be removed, then put back. This costs around 30 euros for replacing components, plus 50 to 100 euros for painting in Serbia. Do check local prices. If there is no rust, look for damaged paint. The more damaged paint, chipped, the more chance for rust to occur soon. Small scratches aren’t too much of a problem, usually.
Better to avoid it.
Aluminium frame isn’t prone to rust. So chipped paint is not a problem, but the frame mustn’t have any deep cuts, deep scratches.
This is no problem – except the looks.
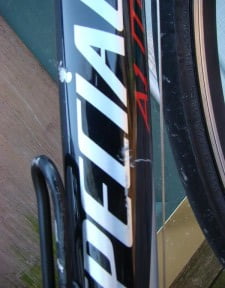
Carbon frames don’t rust, but damaged paint allows water and sun to damage glue holding carbon fibre threads together. This can be fixed with a paint touch up, but you must judge for yourself how big the damage is and whether it can be mended with a paint touch up.
Pay special attention to cracks. They are often hardly visible, as thin as strand of hair.
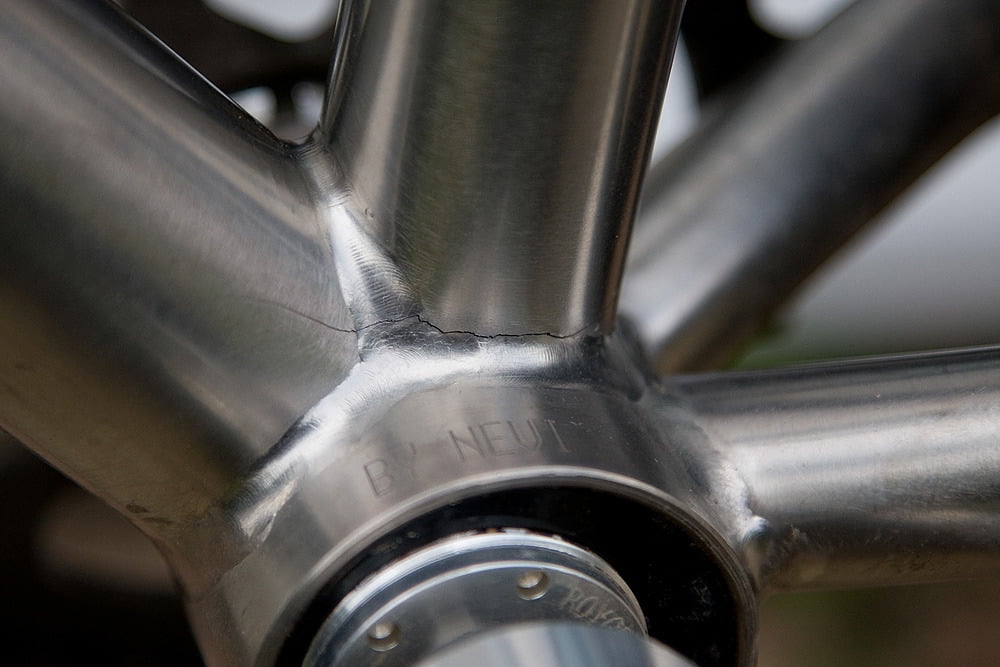
Cracks often occur near welds.
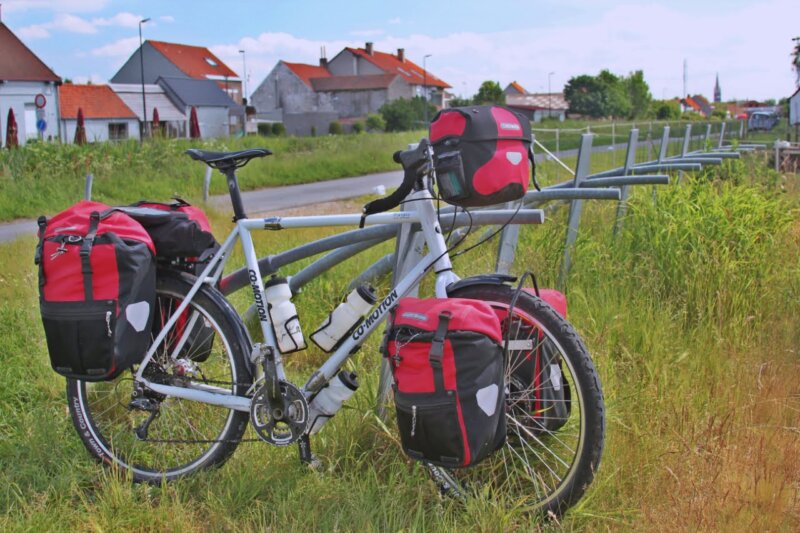
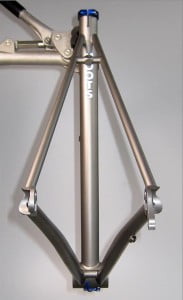
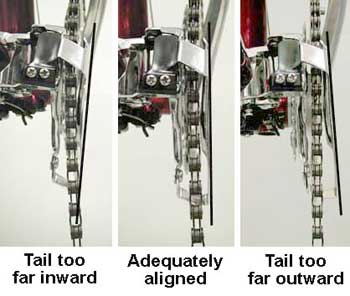
3. Symmetry – alignment and wheel trueness
Are the frame, fork, handlebars and wheels all in line. Can they be put in place with screws, or are frame, or wheels bent? Of course, wheels must be true. Pictures explain a lot better:

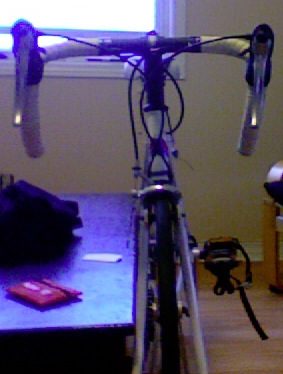
Check whether anything else was damaged (bent frame, shifter lever etc).
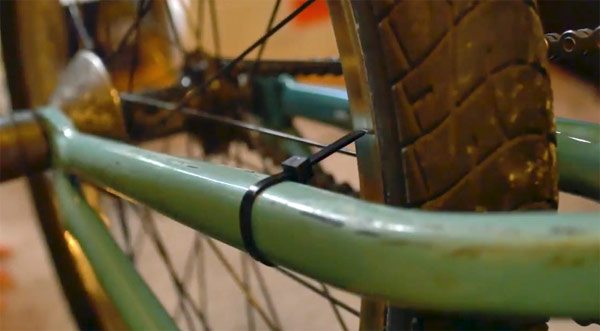
Checking wheel trueness is easily done by lifting a wheel of the ground and spinning it while bike is stationary. Use brake pads, or frame as a reference point – does the wheel go from side to side by more than half a mm? If so, it needs truing. For better precision, if there are no rim brakes, a zip tie can be used:
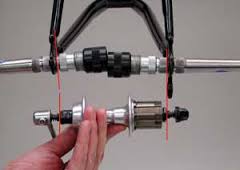
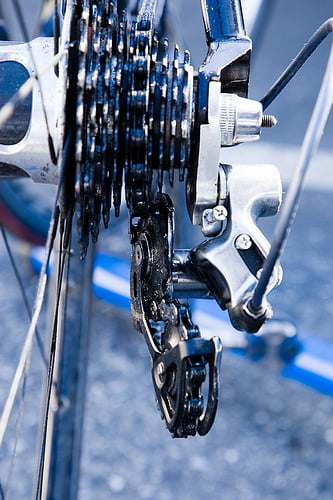
4. Bearings and wheels
If the frame is OK and all is aligned, on to the next step. Checking bearings conditions. Bearings allow circular motion, but shouldn’t have any side-to-side play.
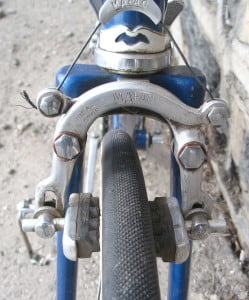
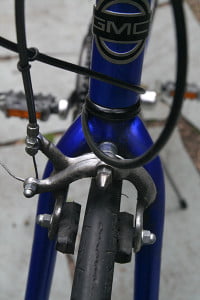
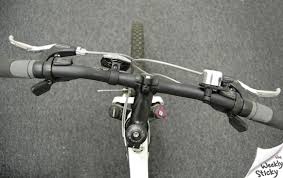
Steerer
Handlebars should move freely and smoothly from side to side, but mustn’t have any up-down, or sideways play. Like marked in the picture below:
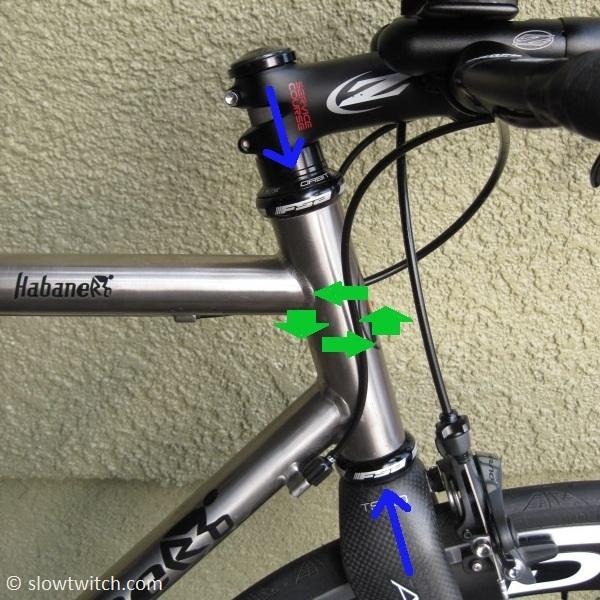
Place a finger at the connection of fork and steerer tube – above the lower blue arrow in the picture above. What a sentence! 🙂
Hold the front brake squeezed and try rocking bicycle front-to-back. If you can feel the fork moving front-back (with the finger from the sentence above), that is not good – bearings are either bad, or badly fastened. New steerer bearings cost around 10 euros.
Wheels
Holding a wheel at the top, try moving it sideways. If bearings are bad, it will feel like a small see-saw. Sometimes it is very slight, but can be felt. Shouldn’t be any play at all. Check are the wheels turning smoothly. Are they true?
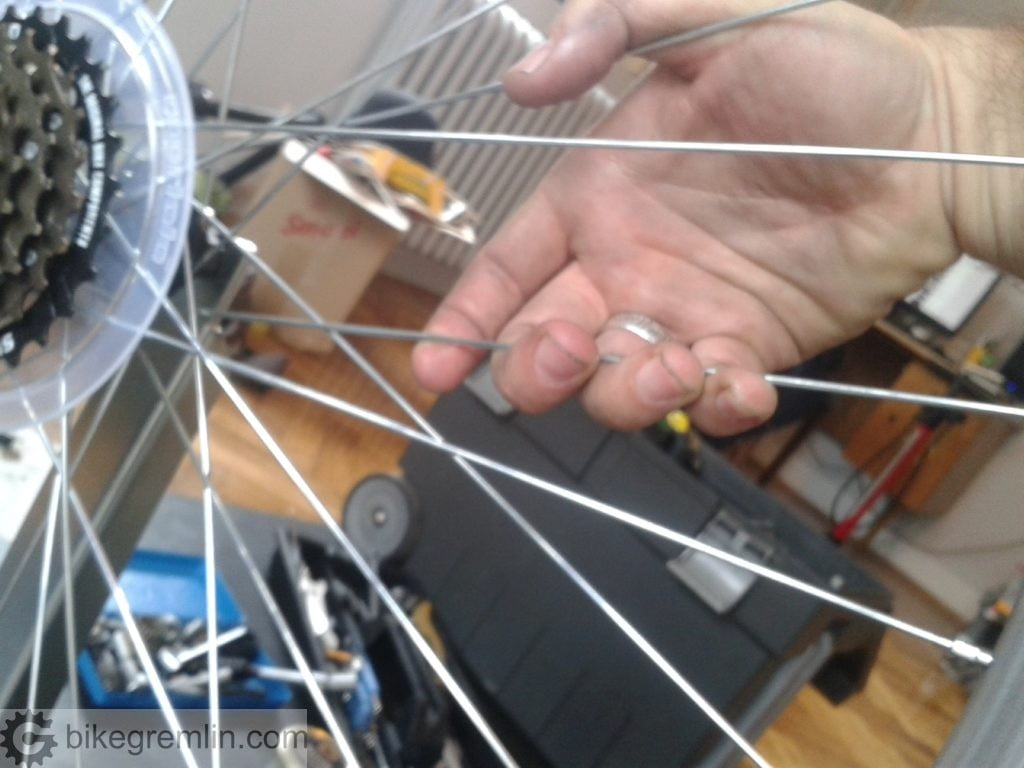
Check the spokes for tension. Twisting two from the opposite sides. All the spokes from one side should have tension similar to the other spokes from that side of the wheel. Obvious variation in tension means damaged spokes, or rim that was repaired from damage. Rear wheels of multi speed bikes have right hand side spokes a lot tighter than the left hand side, but all the right and left spokes should be similarly tensioned.
Check the rims for damage – deep scratches, deformations, or dents. Also, check the place where spoke nipples are attached for damage.
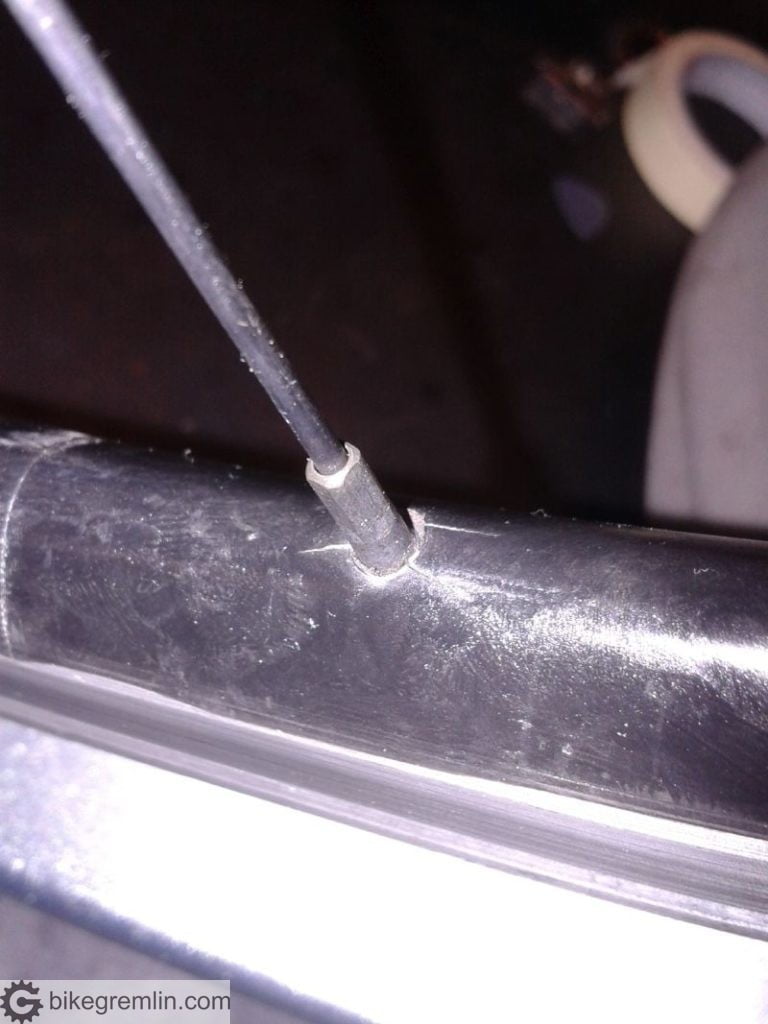
Such rim is finished – when trying to tighten the spokes, nipples will be pulled through the rim.
It is also good to remove wheels and check with hand if the axle spins smoothly. If not, bearings are probably damaged, or at least in poor condition, but tightened enough to eliminate play.
Wheel bearing that has play on a bicycle that was ridden is probably bust. New hubs, plus new spokes cost from 30 euros up.
Crankset
Next check the crankset. Hold a crank arm next to the pedal and try moving it sideways. Towards and away from the bicycle. There mustn’t be any sideways play. Play means busted BB bearings. Also, cranks should turn smoothly.
New bottom bracket costs around 20 euros.
Shock absorbers
If the bike has suspension. Hold the brake and lean on the bike, making suspension “sink”. It should sink and go back smoothly. Without any jarring or play.
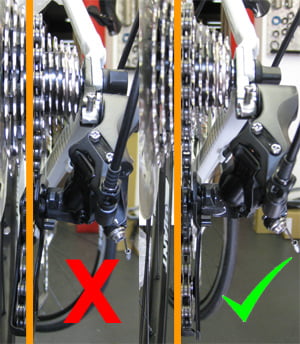
5. Brakes and derailleurs
Cables and housing should be good. Housing shouldn’t have any cracks, while cables shouldn’t be rusty. They should move smoothly when operating brake and derailleur levers. With hydraulic systems there should be no fluid leaking.
Brakes should brake strongly, but evenly – there shouldn’t be sudden changes in braking force. They shouldn’t scratch wheel (or disc) when levers are released. Good brakes, even if they don’t work well can be easily set up, while bad (or damaged) ones can never work well.
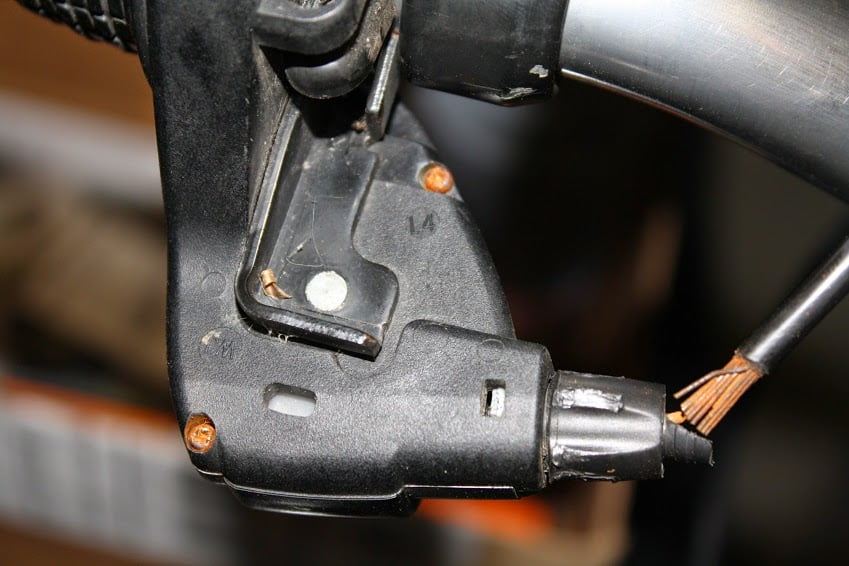
Derailleurs should switch gears, without too much delay, dropping the chain or making noise. If they don’t work, they are either bent (visible bend in cage), or need set up, or new cables and housing.
Finally, checking condition of chain and chainrings is explained in this post: When is it time to replace the chain.
6. Test ride
The last, but not the least important: test ride. Steps before are important because one shouldn’t ride a bicycle that isn’t checked to be safe and functional.
Find a spot without heavy traffic, and take the bike for a test ride. See how the bike steers, how it behaves, does it feel right?
If the bike has gears, check both front and rear shifters separately. Does it shift quickly and accurately, without chain rubbing? Does the chain drop when shifting to biggest and the smallest sprockets front and back?
Check both the front and the rear brake – first separately, then together. Does it brake gradually, predictably and are the brakes strong enough?
Are pedals, cranks and front chainrings parallel, without wobble or play?
Stand up from the saddle, pedal hard, step on the pedals. Does the frame twist too much, or does it make cracking sounds? These are all signs of a damaged, or cracked frame.
Does the bike steer and feel right?
Take the hands off the bars (for experienced and careful) and try riding without holding the steerer.
- Does the bike go straight when the body is straight, or does it take some leaning to compensate? If it takes leaning, wheels, or the frame aren’t straight (or both).
- Can the bike be easily steered with the hands off the bars? If not, steerer bearings are probably bad.
Video where I explain how to check used bicycle adverts, and how to inspect bicycle’s condition:
![How to buy (inspect) a second hand (used) bicycle - Marathon version [1028]](https://bike.bikegremlin.com/wp-content/plugins/wp-youtube-lyte/lyteCache.php?origThumbUrl=https%3A%2F%2Fi.ytimg.com%2Fvi%2Fm3UKLR7XLDI%2F0.jpg)
Related post – Bicyle equipment (“groupset”) classes: