This post explains technique and tools needed to adjust bicycle handlebar height and angle. For explanation on how to optimally adjust bars and cockpit, read these two articles (one for MTB, the other for road bike bars):
MTB bars setup
Setting up road bike bars
There are two standards of bars stem mounting. One is quill stem, the other is “a-head”, also called threadless. This article will explain three things:
- Quill stem height and angle adjustment
- A-head (threadless) stem height and angle adjustment
2.1. Headset bearings preload adjustment - Bars rotation adjustment
1. Quill stem height and angle adjustment
Tools needed: allen wrench 6, wrench 13, flathead screwdriver
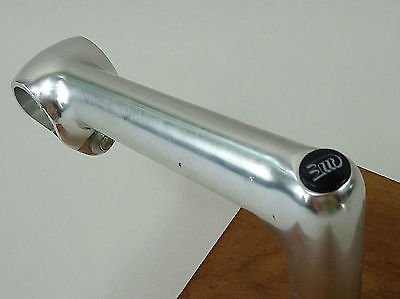
Quill stem is held in place with a wedge that is tightened by a long screw going through the middle of the stem. The pressure keeps the stem from moving. It is put inside the steerer tube, so that keeps it from rocking back and forth.
The principle is the same.
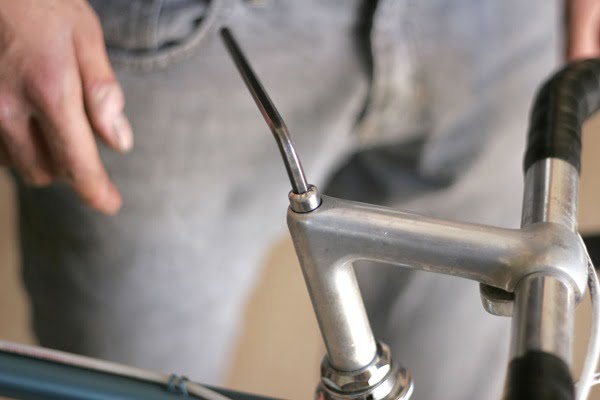
In order to set up height, the bolt tightening wedge needs to be unscrewed for 4-5 turns. These stems often have plastic cap on top, covering allen screw, so the cap needs to be taken off with a flat screwdriver. Those that have 13 mm screw on top, don’t have a plastic cap over it.
If the stem doesn’t loosen up, hit the bolt from the top to push the wedge down and unbind it from the stem and the steerer tube.
After this, the bars can be moved up-down and left-right. Just make sure not to exceed the minimum insertion mark. The minimal insertion mark must not be visible. If there is no such mark, make sure to have at least 5 cm of stem inside the steerer tube.
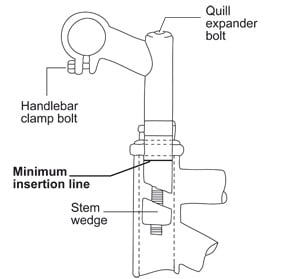
With minimum insertion mark noted.
The main flaw of this patent is that stem is held just by one bolt – the quill expander bolt. So in case it snaps, there’s instant loss of control over bike’s steering – a potentially dangerous thing.
Once the desired height is set, slightly fasten expander bolt, just enough so the stem doesn’t fall down on it’s own. Then it is possible to hold the front wheel between legs and adjust bars angle left-right, so they are aligned with the wheel.
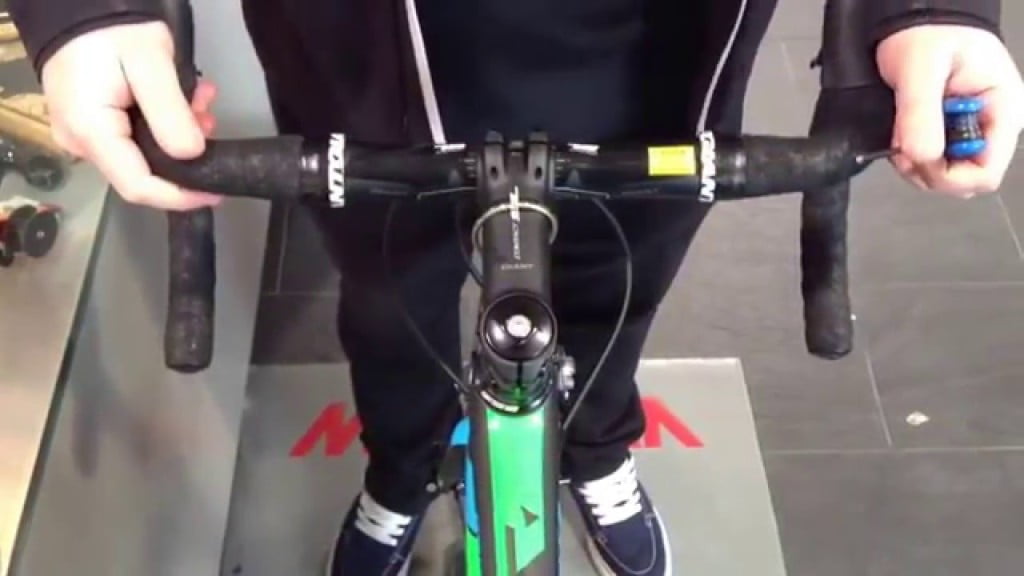
The principle is the same for quill and a-head stems.
2. A-head (threadless) stem height and angle adjustment
Tools needed: allen wrenches 4, 5 and 6 (depending on the bolts)
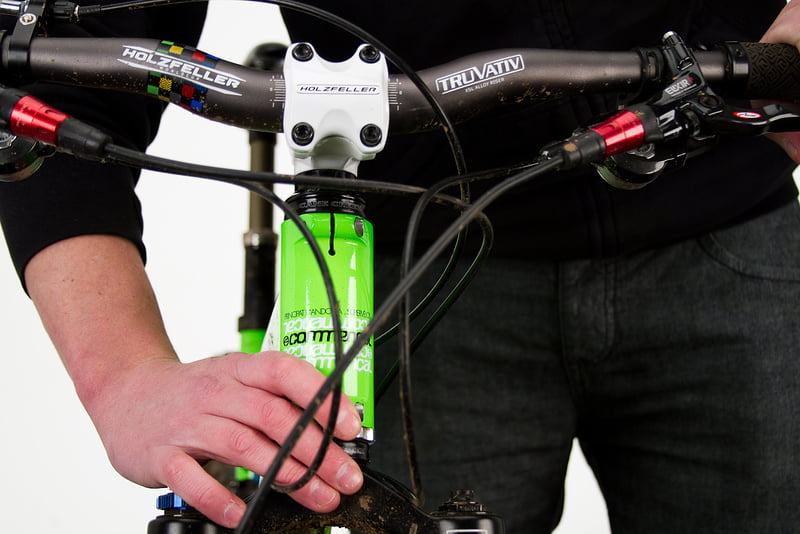
First loosen the bolts holding the stem – stem pinch bolts.
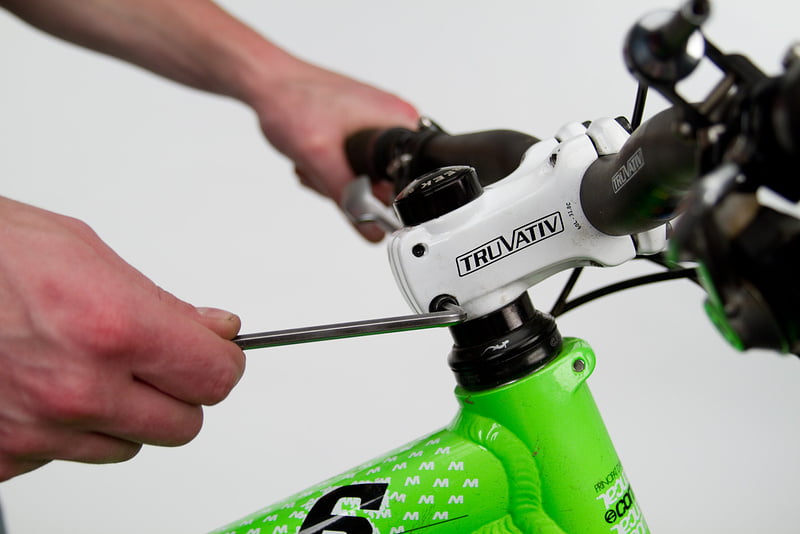
It is enough to loosen them, no need to completely unscrew.
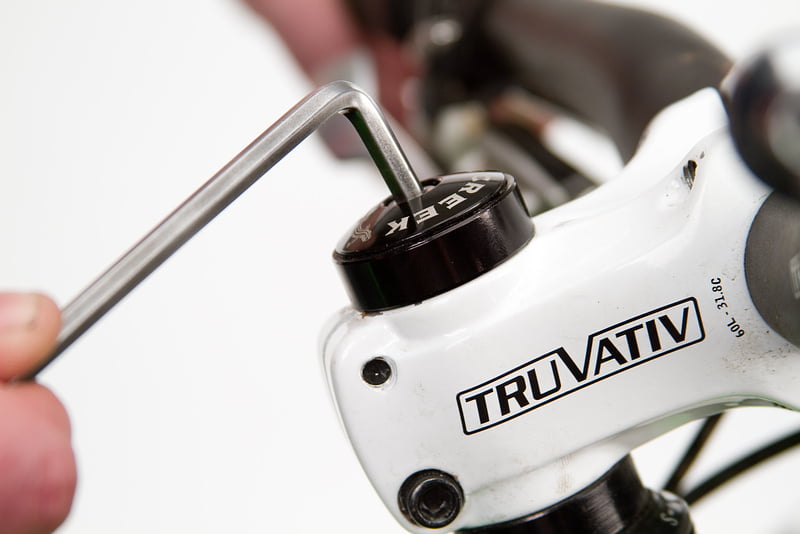
This is enough to set the bars (stem) angle. If changing height is required, then the top cap bolt needs to be unscrewed and removed.
Now spacers and stem can be removed. If bars need to be lowered, spacers below the stem can be put on top. And vice versa for raising the bars. Since stems are at an angle that is not 90 degrees, height can also be adjusted by rotating the stem for 180 degrees, like in the picture below:
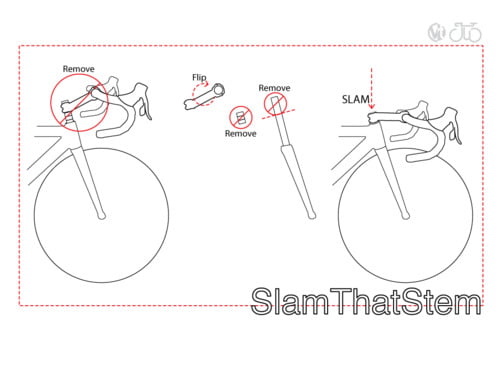
In the picture above, bars were put to the lowest possible position and the steerer tube was cut to size. Before shortening the steerer tube make sure the height isn’t too low. It is better to ride with a few spacers above the stem, than cut the steerer tube too short before being 100% certain it is not too short.
When placing spacers, make sure that the top spacer (or the stem itself, if there are no spacers on top of it) is a few mm higher than the top of the steerer tube. This is necessary in order to enable top bolt to preload the steerer bearings.
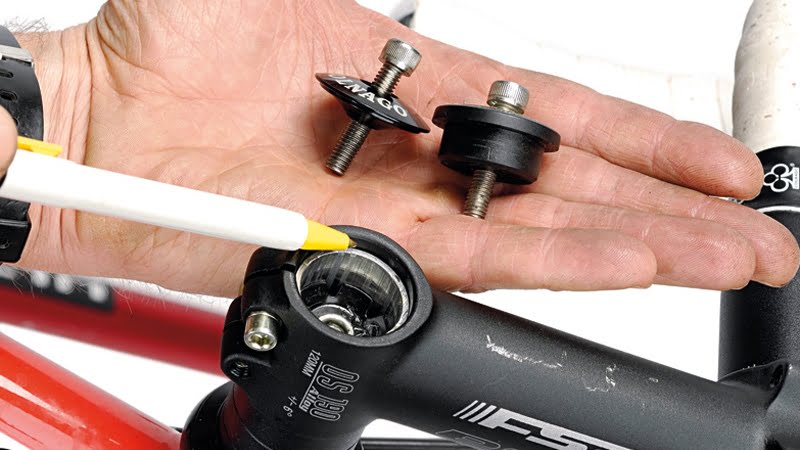
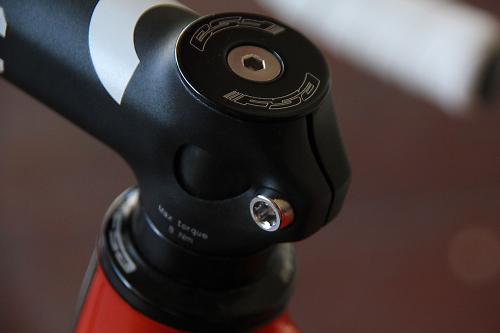
2.1. Headset bearings preload adjustment
When the desired height is set, bearings preload bolt needs to be tightened. Tighten it all the way, but without strong screwing in – just to feel it being screwed in all the way. Then unscrew it for a few full turns. Hold the front brake with one hand and put the other on the lower fork crown. Rock the bike back and forth. If there’s any play (klicking), tighten the compression bolt for half a turn (1/4 of a turn in the “final stages”), then check again.
Once all the play has been eliminated, adjust the stem angle (holding the front wheel between the legs and adjusting the bars), then tighten the stem pinch bolts. Bolts that hold the stem to the steerer tube are what holds it all in place – the top cap bolt is only used to set the optimal preload.
Finally, lift the bike up so that the front wheel points downwards, but not touching the ground. Then turn the bars to one side and let them go. The wheel should rock left-right like a see saw, with diminishing oscilations. If it just goes back down, then it is too tight. You will need to loosen the pinch bolts, then loosen the preload bolt by 1/4 of a turn, bump the front wheel against the floor a few times, re-tighten the pinch bolts and check for freedom of movement and play again. A bit of an iterative process.
I’ve demonstrated what I mean in this video, past 23 minutes – the link should start at the time I’m inspecting the headset bearings:
Inspecting a bicycle – headset bearings checkup
The advantage of a-head system is that stem is held with two bolts, so in case one of them snaps, there is no loss of control over bicycle’s steering. There are a-head stems with just one bolt, but those are best avoided.

3. Bars rotation adjustment
Tools needed: allen wrenches 4, 5, 6, for older stems 12 and 13 wrenches.
Bars are held in the stem by one or more bolts. For adjusting bar rotation, it is enough to loosen the bolts. Not too much, so the bars don’t roll by themselves, just so it is easy to move them by hand. Not too tight, but not too loose either.
Finally, if the stem uses one bolt to hold the bars, then just one bolt needs to be tightened. If it uses two bolts, then screw them both alternately – first top, then lower one, little by little. The safest patent is with four screws, which are fastened in the following order:
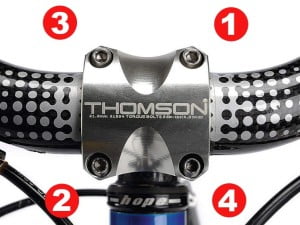
Afterwards repeat in the same order – until they are all tight.
Related post – Bicycle handlebar dimension standards:
This is a great site for cycling information I have found it all very informative.
Many thanks for all the effort from your team in maintaining this excellent website.
Best regards
John
Thanks, glad to hear it. 🙂
Excuse my ignorance But should be any bearings at the bottom or top of the quill stem system , My old BSA mens bike has none , and clicks a lot .
In another article I explained all about bearings and forks/stems. Chapter 3.1.1 shows bearings for a standard threaded fork using quill stem. The article:
Headsets [01] Names of fork and headset parts
You said “hold it so that front wheel points downwards, then rock the wheel to one side. It should rock like a see saw, with diminishing oscillations.”
Not sure what you want us to do here.
Thanks, Great Information.
mchnhed (Scott)
NoHo
Hi Scott,
I’ve demonstrated what I mean in this video, past 23 minutes – the link should start at the time I’m inspecting the headset bearings:
Inspecting a bicycle – headset bearings checkup
The see saw is demonstrated when I lift the bike up – some 20-30 seconds into the video.
Relja