This post explains how to mount bicycle tubes and tyres onto the rim. If needed, see posts on how to how to remove wheels, how to remove tyres and tubes, and how to patch punctured tubes.
Table Of Contents (T.O.C.):
- Inspect the rim
- Make sure that rim tape is good and well placed
- Place one side of the outer tyre on the rim
- Mount the tube onto the rim, inside the tyre
- Mount the other side of the tyre onto the rim
- Inflate and check
1. Inspect the rim
It needs to be without sharp edges. Straight, without bends.
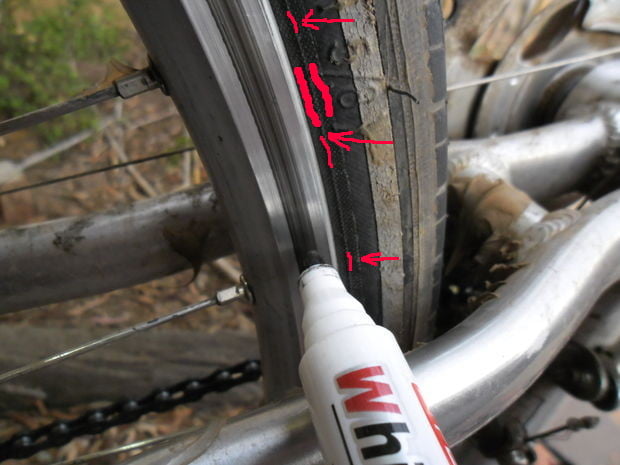
2. Make sure that rim tape is good and well placed
If rim tape is bad or not placed well, now is the time to fix that. Post on rim tapes: Rim tape types.
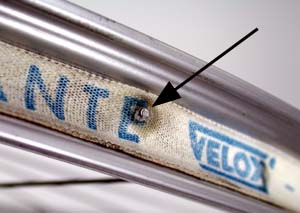
This rim tape is well placed, but damaged. Needs replacing.
Rim tape mustn’t be too wide, to reach walls of the rim, where the outer tyre clinches to the rim. It also mustn’t be too narrow. Or misaligned, to any side. It should cover the inner part of the rim where the tube goes. Just like in the picture above, except that it needs to be without damage, holes or cuts.
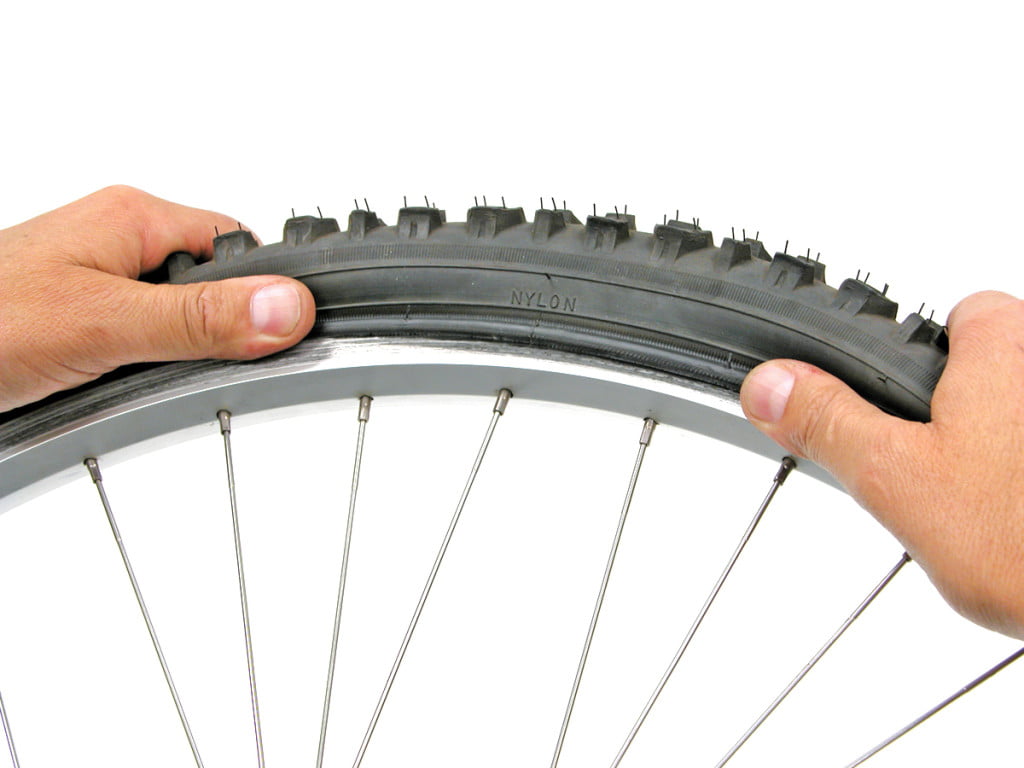
3. Place one side of the outer tyre on the rim
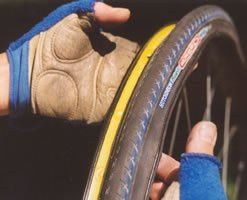
This should go easily, tyre might even fall off the rim when just one side is mounted.
The part of the tyre where manufactuer’s logo (and tyre model, if noted) is printed should be aligned with the valve hole on the rim, facing the right hand side of the wheel. That gives an impression of a well done job with attention to detail. It also comes in handy in case of a puncture: once a hole in a tube is located, it is easy to know at which part of the tyre the sharp object had entered (and, perhaps, stayed) – since the position of the tyre on the rim is known.
4. Mount the tube onto the rim, inside the tyre
Lightly inflate the tube, just so it gets less than completely flat. Then put the valve through the valve hole in the rim (secure the valve with a nut, if it has a holding nut – don’t screw it tight, just so it doesn’t fall out).

Now tube needs to be put all the way onto the rim, beneath the tyre. Going round from the valve, towards the opposite end – at both sides of the valve.
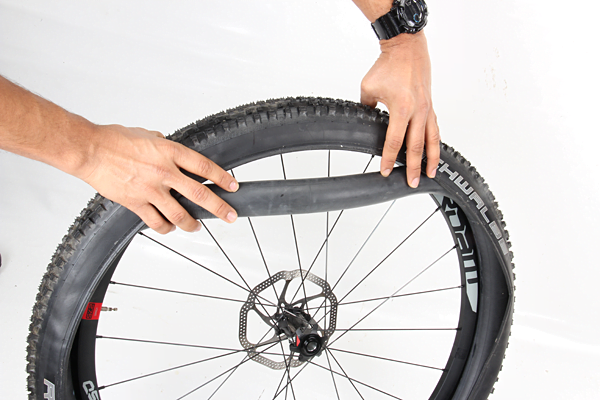
5. Mount the other side of the tyre onto the rim
Paying attention not to pinch the tube in the process, start from the side opposite from the valve and go along both sides, finishing at the valve. Using thumbs, start mounting the tyre onto the rim.
The critical moment is when the final third of the circle is reached. It becomes harder and harder. When it is no longer possible to mount the tyre with hands, hold one side with one hand, so that the tyre doesn’t go off, then with the other hand go all the way around the tyre, pulling it towards the opposite end.
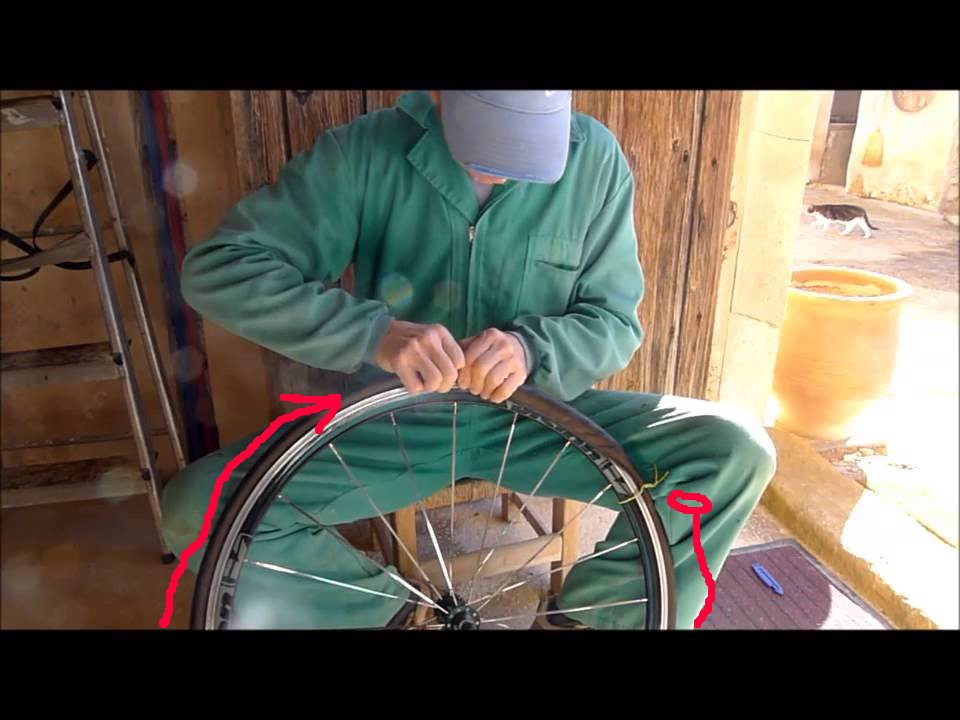
Here the man uses zip tie at one end, so that he could use both hands to “drag” the tyre all the way round, to move it further onto the rim.
This sounds a lot more complicated than it is. Simply start at one and, then pull the tyre along the rim to the other end. The wire holding the tyre is unloaded and “moved” towards the other side, to put it that way.
Make sure not to pinch the tube. Use finger or mounting lever to put it out of the way before mounting the tyre.
If it goes too difficult, make sure the tube is not too inflated, and that it is all seated well – on the other side of the rim. On the other hand, if the tube gets stuck beneath the outer part of the rim and the tyre, then it might need a bit more air.
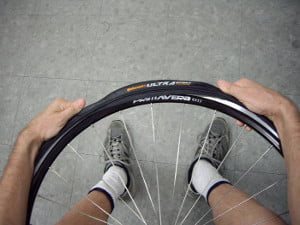
6. Inflate and check
Double check all is well seated. Inflate tube slightly, just so that tyre gets round shape. It should still be soft. Move hands around the wheel, pushing tyre inwards, to sit well onto the rim.
Add a bit more pressure. Check again if it is moving off the rim in any place. If it is, deflate a bit, and put it back in place with hands.
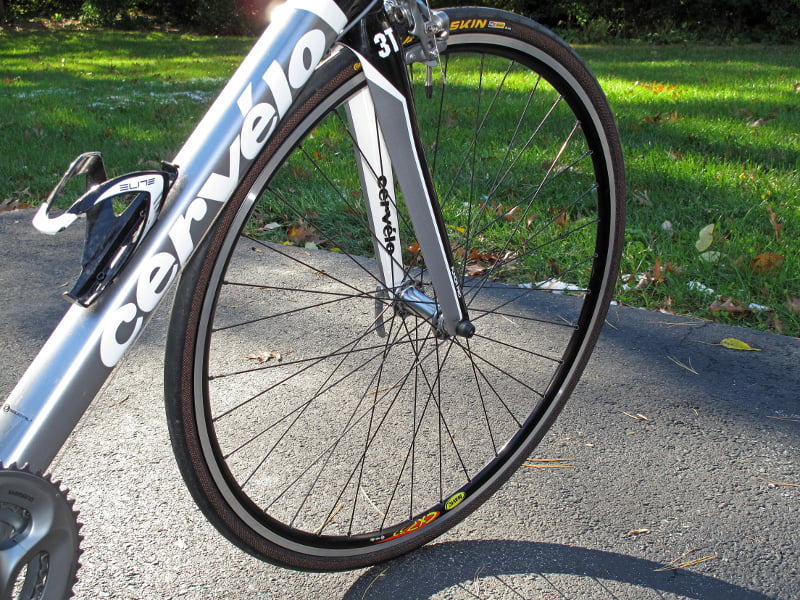
Then add a bit more pressure, so that the tyre feels firm. Tyre has an aligning marker near the rim.
It should be at the same distance from the rim around the whole wheel.
If the marker is not aligned all the way round, the tyre is not seated well. If it is deeper in one place, then adding a bit extra pressure to the tyre might make it pop into place.
If this doesn’t help, tyre needs to be deflated a bit and put back into place with hands. Also, if at home, one could use an alcohol based window cleaner spray, to spray a bit between the tyre walls and the rim. It should get back in place on itself when inflated.

Any make should work.
My video demonstration of wheel removal, tyre removal, tube replacement, and mounting it all back:
![How to fix a flat tyre on a bicycle [1020]](https://bike.bikegremlin.com/wp-content/plugins/wp-youtube-lyte/lyteCache.php?origThumbUrl=https%3A%2F%2Fi.ytimg.com%2Fvi%2FaX11CmCOdsU%2F0.jpg)
if you are having trouble fitting some of these new very very tight fitting tires here is a few tips,when seating the last bead make sure that first bead is in the rim centre,start the second bead at the valve stem first or you can damage that valve or tube if you try to do it last,for the last part of the tire when its almost impossible to fit on put some lube under the tire bead first,i use ky jelly its the best,dont use tire levers to put on the last bit of the tire bead,use a tool called a tire bead jack,these tools will do even the toughest of tires,the makers are koolstop tire bead jack and ezclincher tire bead jack but there are many others on amazon or ebay,dont use tire levers on tough tires you will most likely ruin the tire and tube,sometimes even laying the tire in the sun helps but these tire jack tools will do very tough fitting tires,alot of tire makers are now making very very tight fitting tires,many brands.
just a follow up for bead seating tools for those impossible to fit tyres here are those tools,tyrekey,koolstop,challenge,bikehand,ezclincher,there are plenty of youtube clips so you can see what the different models do.some local bike shops have them online but alot are on amazon or ebay.this is the first time in history that i have not been able to fit a tyre by hand.
just found a perfect tool for removing those stuck 36mm bottom bracket cups on older bicycles,forget bicycle tools for this one,try an open end flat spanner 36mm slogging spanner,this tool fits well on the cup and it is made to be hit with a big hammer,use wd40 and give this very tough tool a big hit,another tool that works is a smooth flat jaw big pipe type wrench,bicycle tools wont take off these rusted in cups
seeing as though most bottom bracket fixed cups vary so much in sizes from 35.5mm wrench flats to 36mm wrench flats a big smooth jaw monkey wrench is probably a better tool,for the other side adjustable cup lockring that has 3,4,or 6 notches,this super B tool will do all lockrings,TB-BB20,one end of this tool has 3 notches and does all 3 notch and 6 notch lockrings,the single notch on the other end will do 4 notch lockrings or any other unusual ones,i have an older 4 notch lockring tool but that one fits only 4 notch lockrings,the super B tool is a nice one.